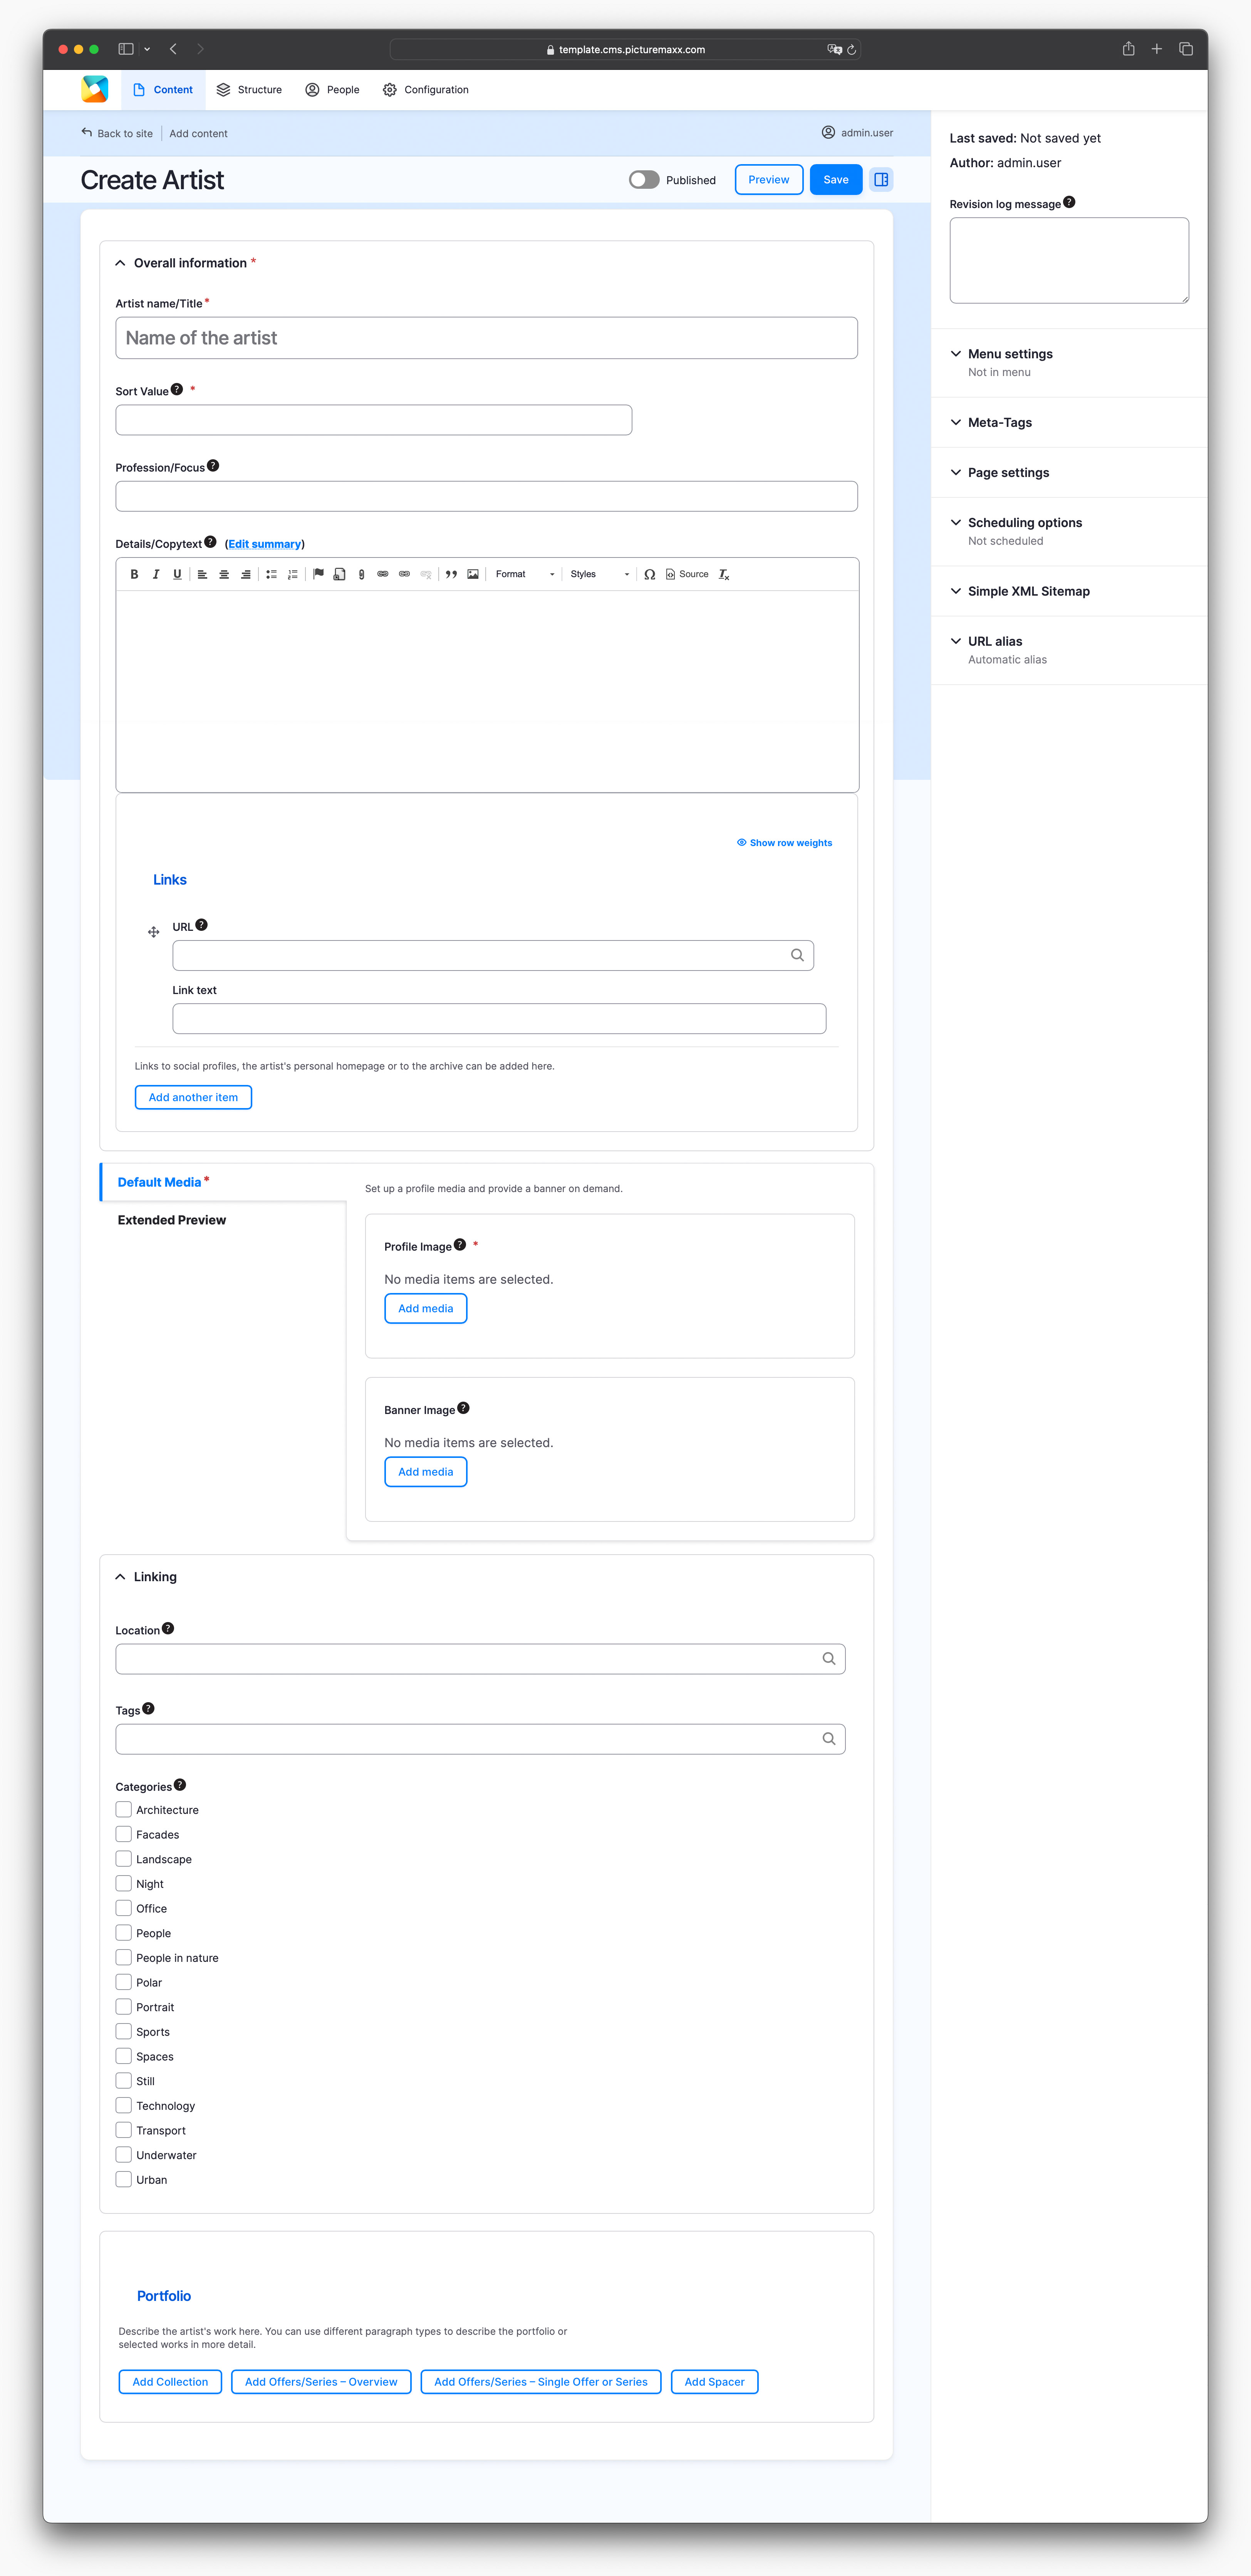
Home → Create Website → Content Types → Artist
Artist
Promote and present your artists in an appealing overview. Combine the Artist content type with View Section and filtering by tags, and get a powerful tool to showcase artist portfolios. See Taxonomy to learn more about tags.
1. Create Artist
Here we explain in detail how to create an Artist page. To get a quicker overview, watch the video down below.
-
- Before you start creating an Artist page, learn how to add Collection and Offers/Series to display an artist's portfolio.
- In Structure → Taxonomy → Categories, define Taxonomy categories to efficiently present artists on related pages.
- Navigate to Content → Add Content → Artist to set up the page.
-
-
Overall information
Title
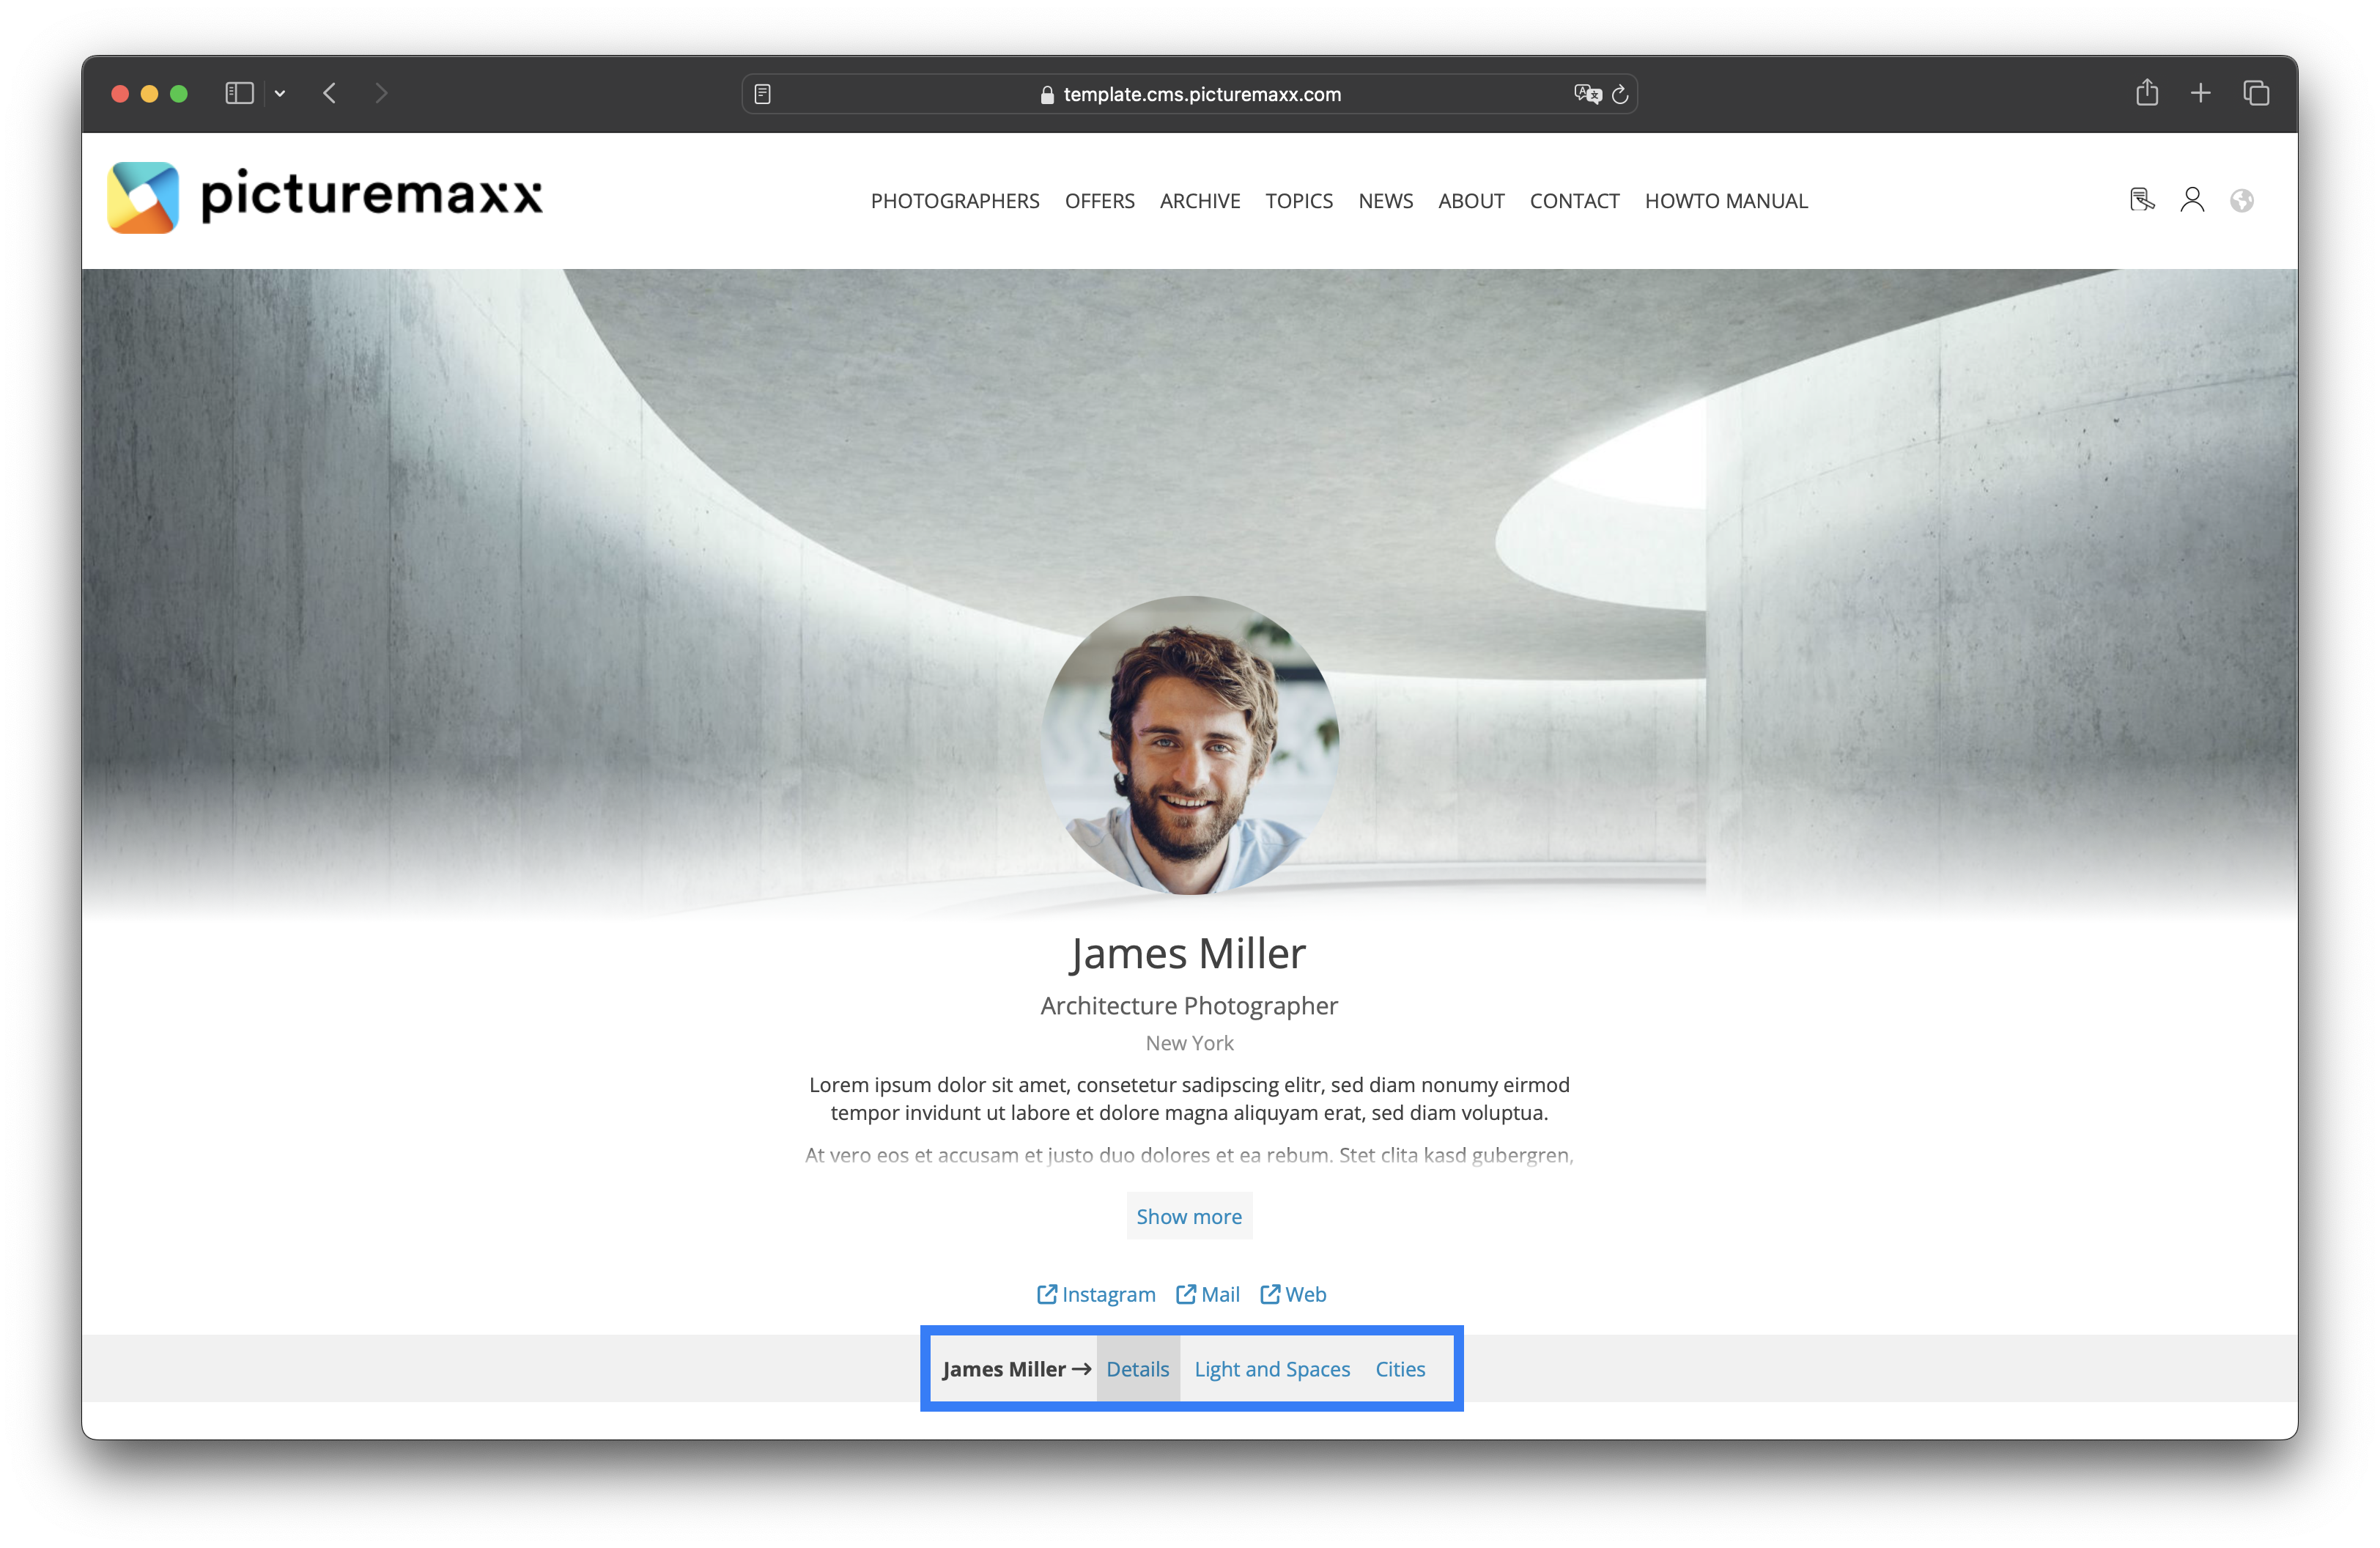
Enter the artist's name.Sort Value
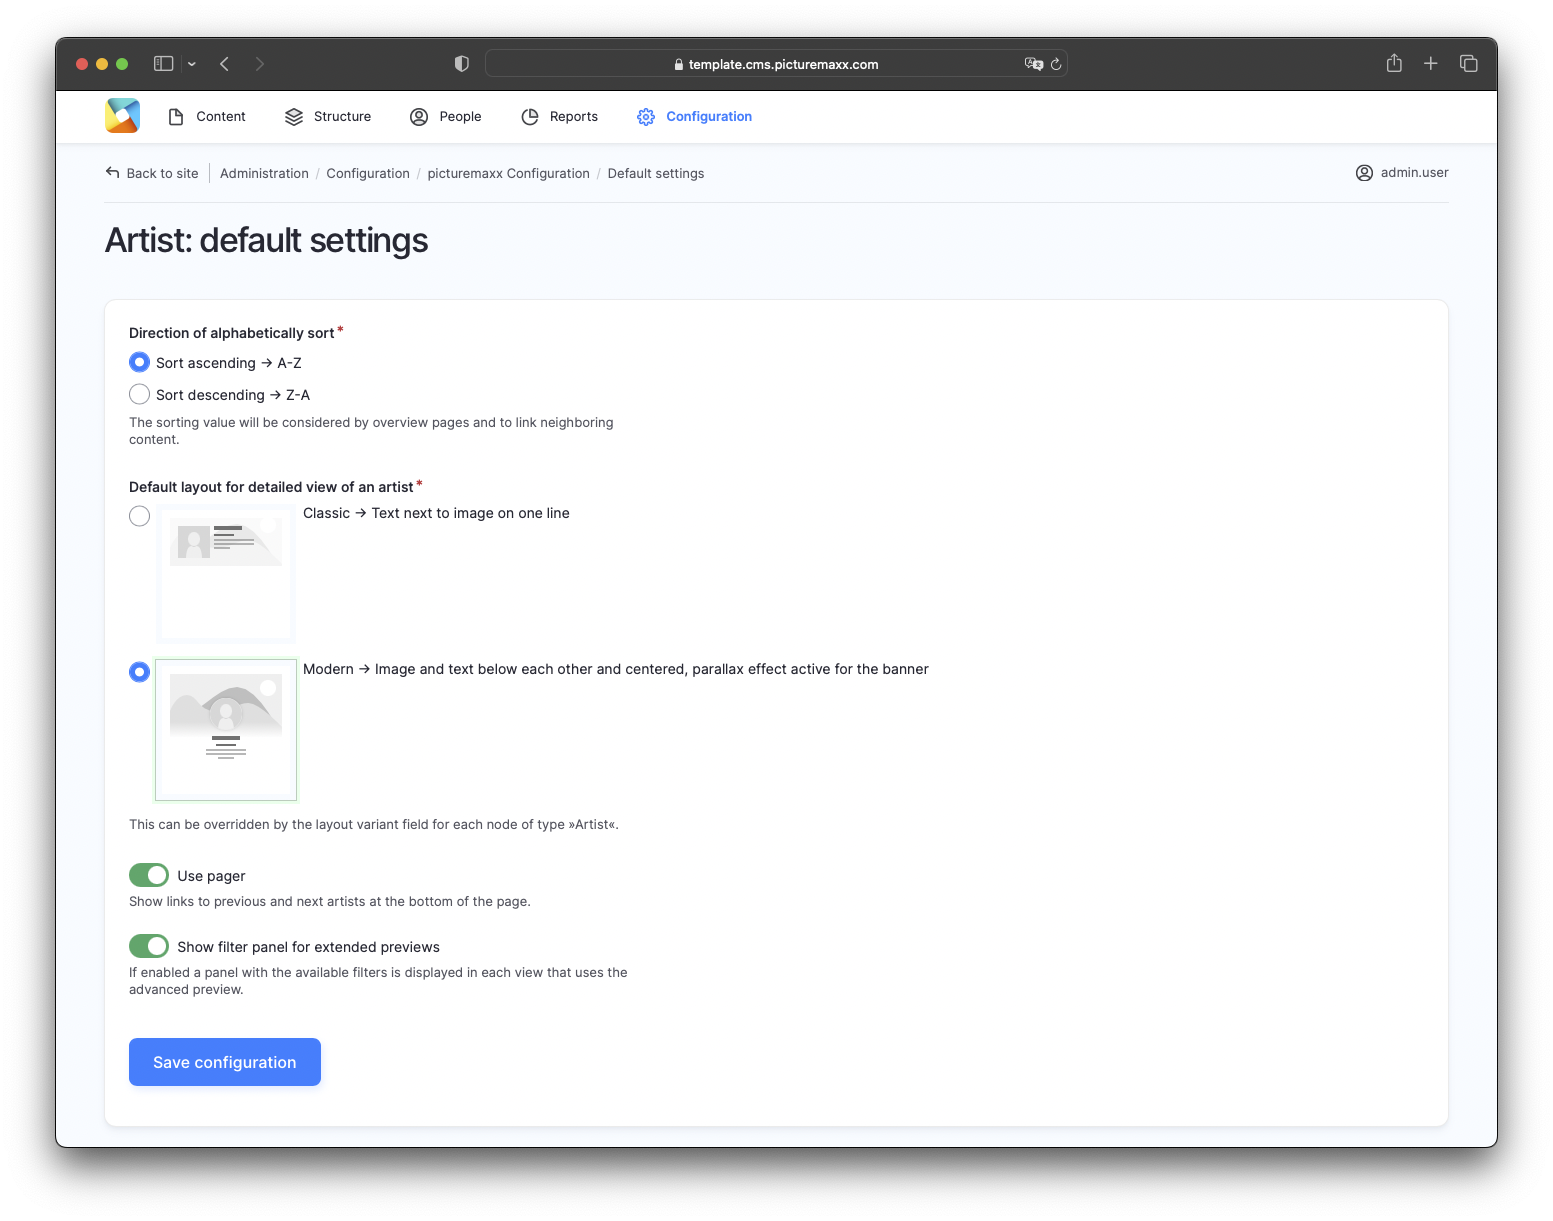
Enter an artist's first name/last name to sort photographers so that they appear in alphabetical order. You can change the default ascending order (see Artist: default settings below). You can also use numbers to set a higher sorting priority. The value is used not only to sort the overview page, but also to link neighboring content.Profession/Focus
Enter the artist's job title or the focus of their work.Summary (hidden by default)
The field is only required for the page metadata and is not displayed by default.Details/Copytext
Describe the artist in more detail, if needed.URL
Start typing the title of a piece of content to select it. You can also enter an internal path (/node/add) or an external URL (http://example.com). Enter <front> to link to the front page. Enter <nolink> to display link text only. Enter <button> to display a link for keyboard-only navigation.Link text
Add a descriptive link text to label the URL/path. Note: You can post as many links as you need with Add another item.
Default Media & Extended PreviewProfile Image
The output has an aspect ratio of 1:1. If you are not adding a banner image, the profile image is also used on the overview pages. In this case, remember to set also the clipping for the list display that has an aspect ratio of 3:2.Banner Image
You can use a banner for preview on the overview pages or as a background image in the intro. Therefore, add an image with an optimal resolution of 1920x1080 pixels. Also remember to set the crop of the overview page accordingly (list: 3:2, grid: 1:1).Extended Preview
You can display up to five photos in Extended Preview. The layout varies according to the number and order of images.Linking
Location
Specify location or area of operation of the artist. Multiple locations can also be specified.
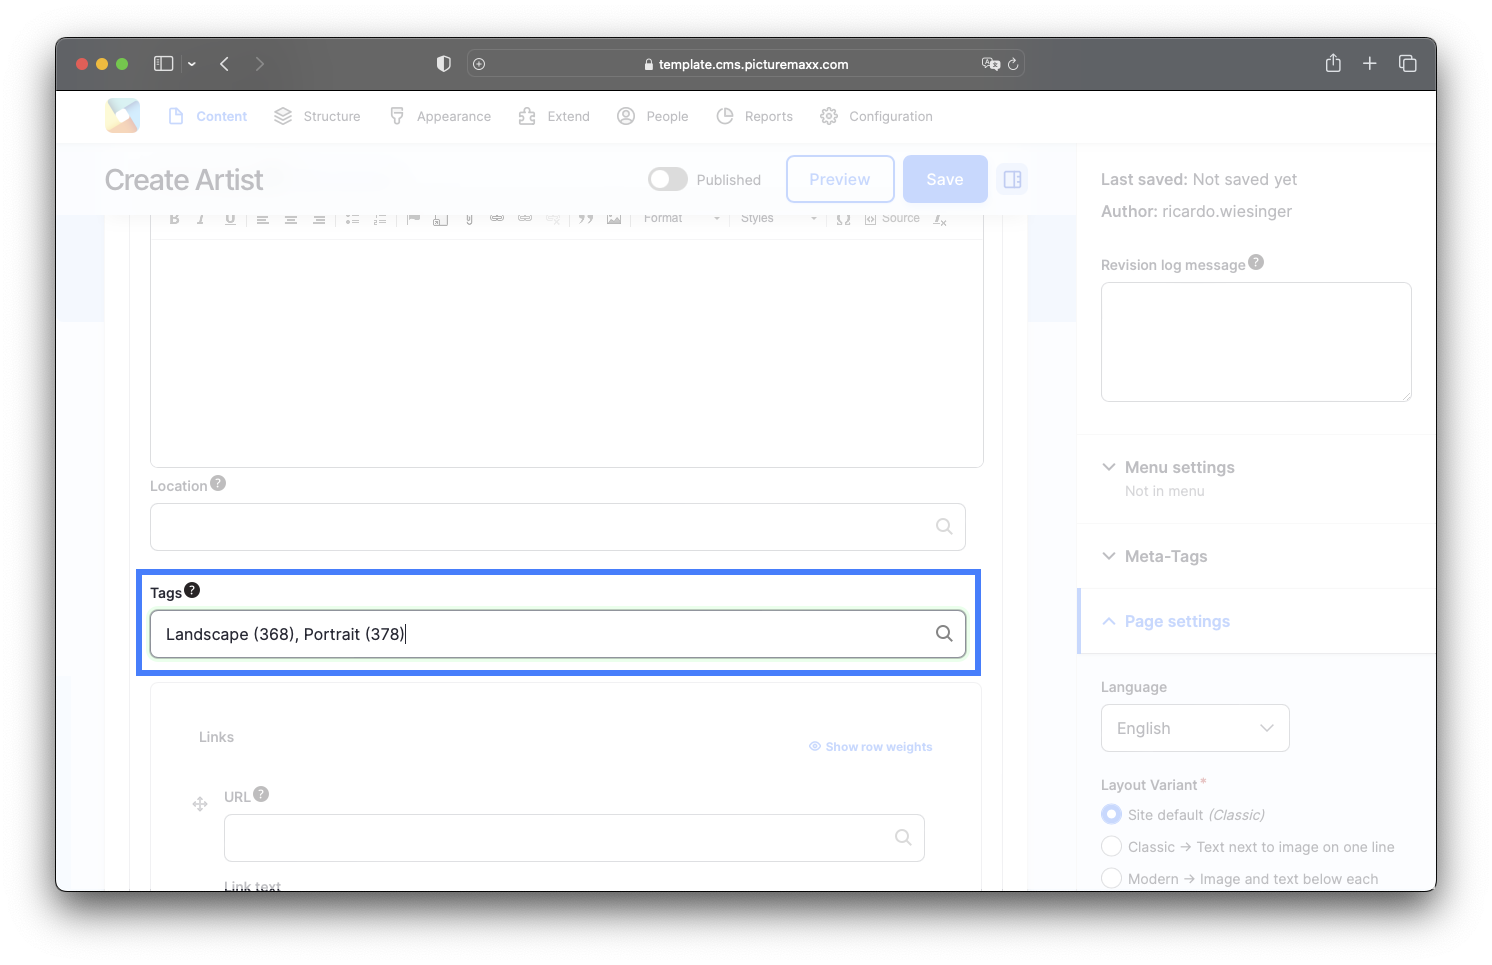
Tags
You can optionally enter content-specific tags here. Use tags as filters to have areas on your site that only display the content that is associated with specific tags. Note: these are not SEO tags.Categories
Select taxonomy categories predefined in Structure → Taxonomy → Categories.
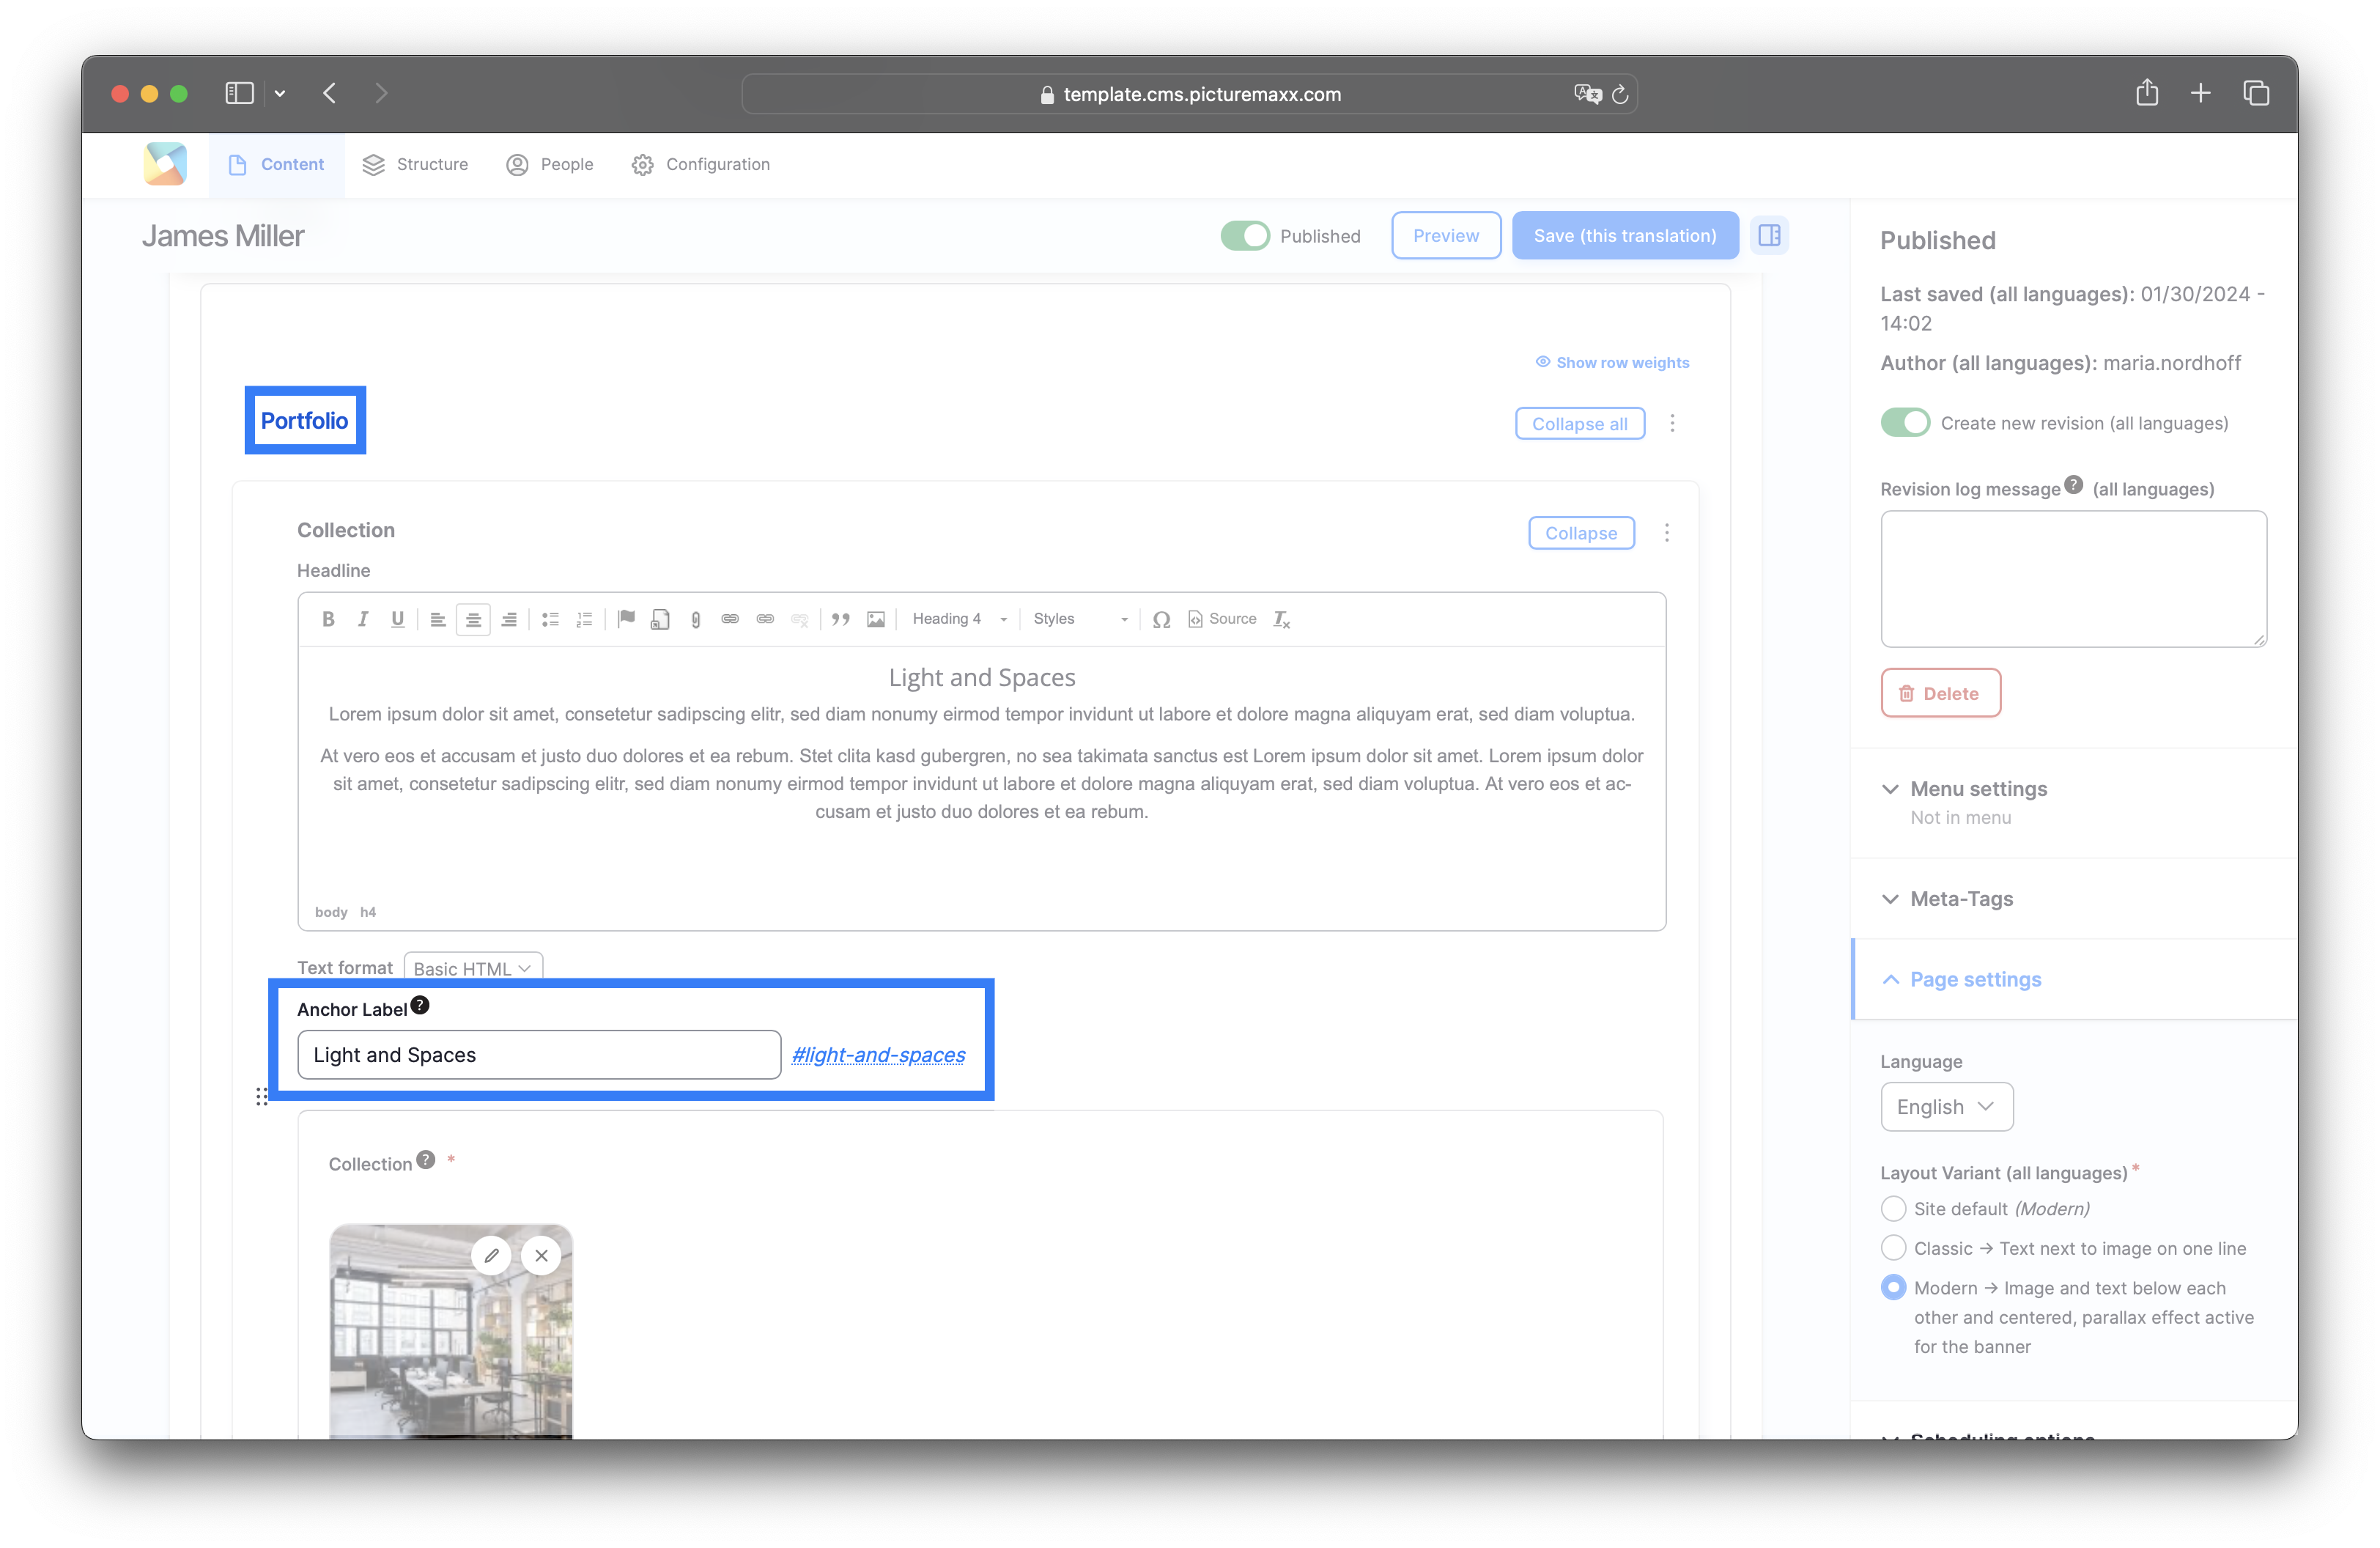
Portfolio
Portfolio is the heart of the Artist content type. You can easily integrate Collections and Offers/Series into your Artist page to showcase the artwork. To display different sections, just create several Collections or Offers/Series.
When you add collections or offers to your Artist page, they are now presented as Portfolio.
Related content: learn how to create Collections and Offers/Series.
2. Default Settings
-
Here you can define some of the default settings for your artist pages. For example, the sorting method and layout.
Configuration → picturemaxx → Default content type settings → Artist: Default settings
-
3. Menu / Anchor Labels
If you need to upload multiple galleries for one artist, divide them into themed topics with Anchor Labels. Assigned anchor labels then appear as menu items above the galleries (see the screenshot below).
-
Enter your Anchor Label in the Portfolio section of the setup page:
The labels will appear directly under the artist's profile.
4. Using tags with Artist
A fancy representation of all the artists becomes practical when you can also arrange your photographers by their style and display them accordingly. Use tags in the Artist and View Section content types to make this possible.
-
- Define tags in Structure → Taxonomy → Tags.
It makes the most sense to create tags for different topics. For example, various photography styles, e.g. architecture, landscape, portrait. - Assign tags in the Tags field of the Create Artist setup page (see below).
- After you have assigned tags to your artists, you can use View Section to display them on any page of your website:
- When you select the Extended Preview layout on the Create Artist setup page and leave the Tags field empty, all tags will appear as filters for the users to choose which artists to display.
- When you fill in the Tags field of View Section, only the artists with the specified tag will display.
Our Demo Page shows all tags as filters to display photographers by their style.
Related content: The same works for the News content type. Explore Taxonomy to see how to classify and relate your website content. Learn how to apply View Section to display Artists and News.
- Define tags in Structure → Taxonomy → Tags.
-
Before publishing the page:
- Click Preview to make sure everything looks the way you want. You can preview any change before publishing it.
- To return to the Edit page, click Back to content editing.
- To make new content visible on your website, turn on the Content is live (published) option.
- Click Save to store your changes. The website content items are listed on the Content page.