Home → First Steps → Change Look & Feel
Change Look & Feel
This is where you set the global design that applies to all pages. With the picturemaxx configuration you can define basic design elements and give your website an individual look.
- General color scheme
- Background colors for Paragraph Types
- Add your logo
- Main navigation
- Favicon
- Back-to-top button
- Fonts
7.1. Custom Fonts
7.2. Import fonts / Google API Key
7.3. Add font display
1. General color scheme
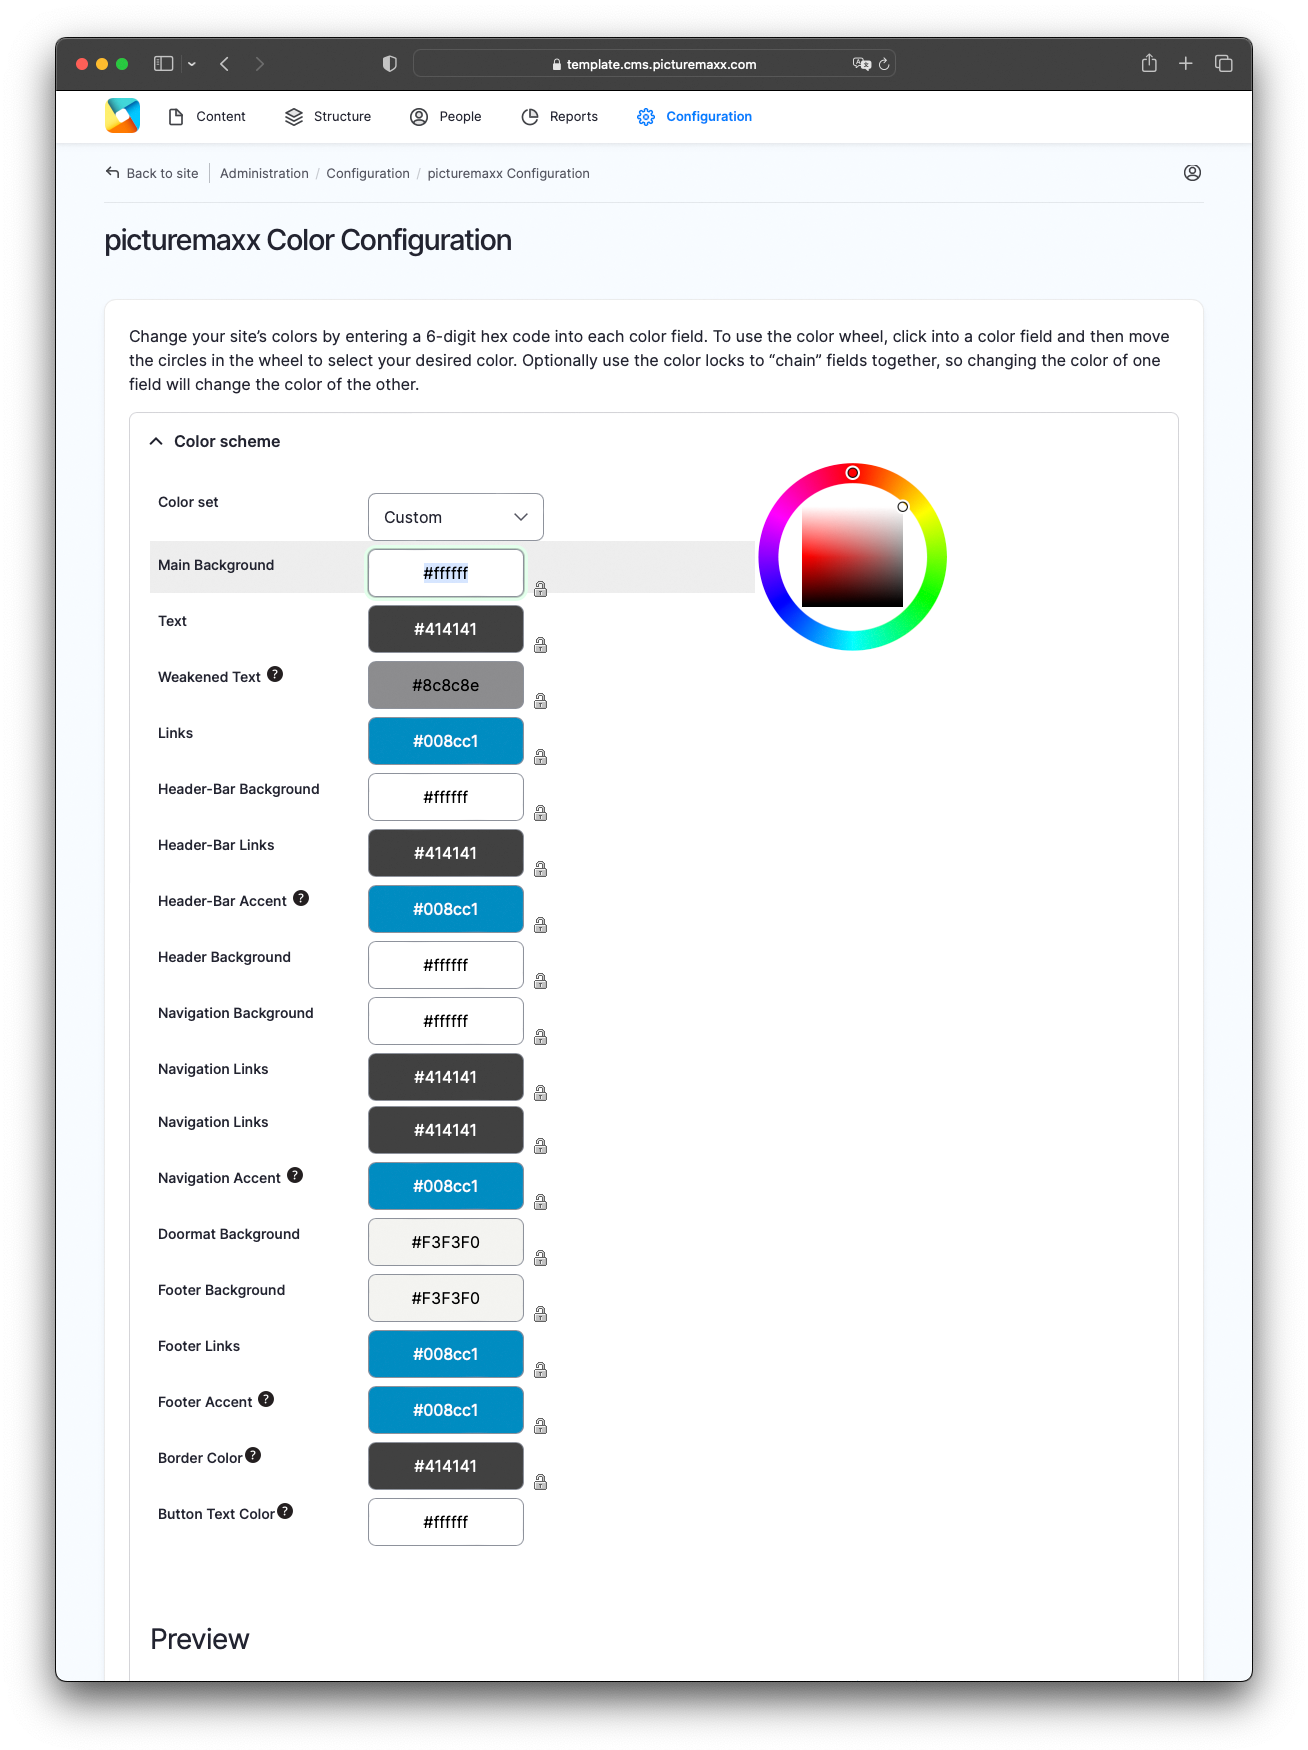
In the Color scheme panel, specify custom colors for general settings by:
- manually entering a HTML color code, or
- selecting a color from the palette
2. Background colors for paragraph types
You will design sections of your pages with elements called Paragraph Types. To define a range of background colors consistent across the paragraphs, scroll the Color configuration page to Color settings:
- Add new colors into the Override palette of background colors box:
- Enter web colors using the Hex triplet format that consists of a hashtag (#) followed by six symbols.
- Color codes shall be separated by a comma and quotation marks and enclosed in square brackets. For example, ["#BBE6FA","#E3FFEC","#FFDEC2"]
- In the Dark background colors box, define the font colors you want to invert against the background color for better visibility. With the dark background color, the font will automatically turn white. Use the colors defined in Override palette of background colors.
- Here, color codes shall be separated by a comma. Do not use quotation marks or square brackets. For example, #8c8c8c, #414141.
-
In Main Administrative Menu, navigate to Configuration → picturemaxx Configuration → Theme settings → Colors, logos & styles. Scroll down to Color settings, as shown below.

-
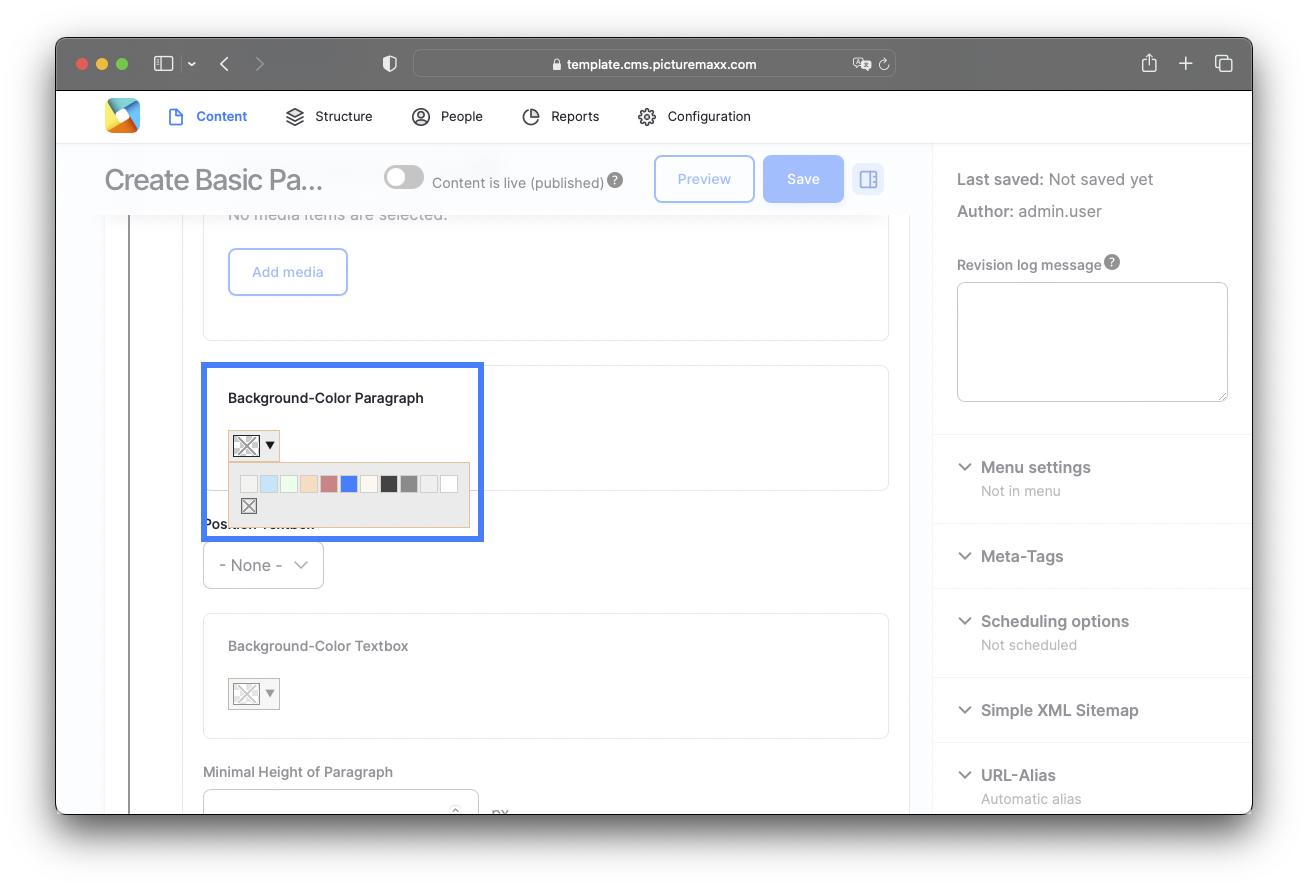
New color codes are available on the Settings page of every paragraph type in Display Options → Background-Color Paragraph. This helps ensure that background colors are consistent across your website pages.
3. Add your logo
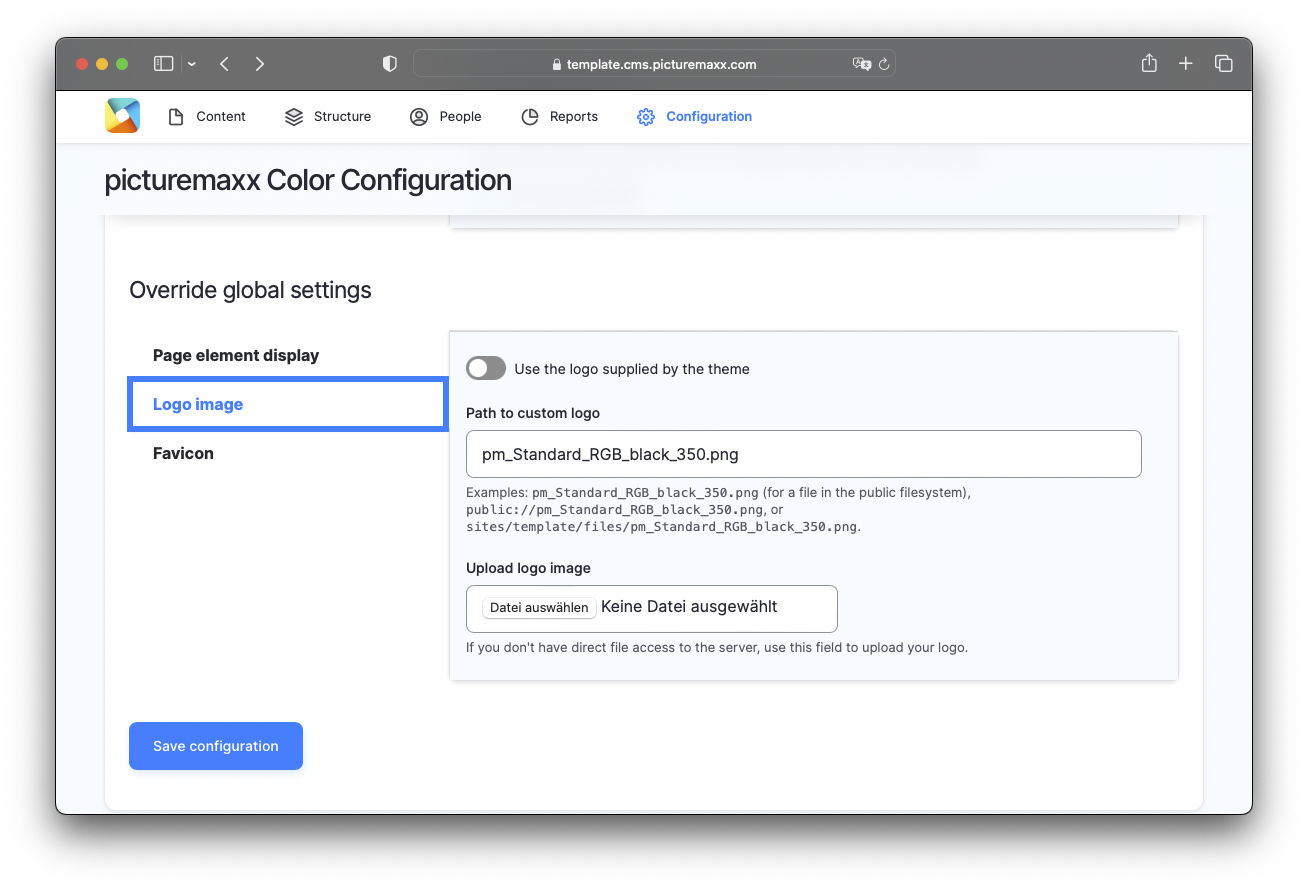
Scroll the Configuration page down to Override global settings and select the Logo image option.
- Before uploading, delete the path information in the Path to custom logo box, to remove the existing file from your template.
- Recommended: Upload a png file cropped to the exact size you want it to appear on your pages.
Note: For best results on high-resolution (e.g. 4K) displays, make sure to upload your logo with a height of 300px. This prevents it from appearing blurry or pixelated. This recommendation does not apply to the Headers 1 & 2, which display the logo always in the original size.
-
In Main Administrative Menu, navigate to Configuration → picturemaxx Configuration → Theme settings → Colors, logos & styles and scroll down to Logo image, as shown below.
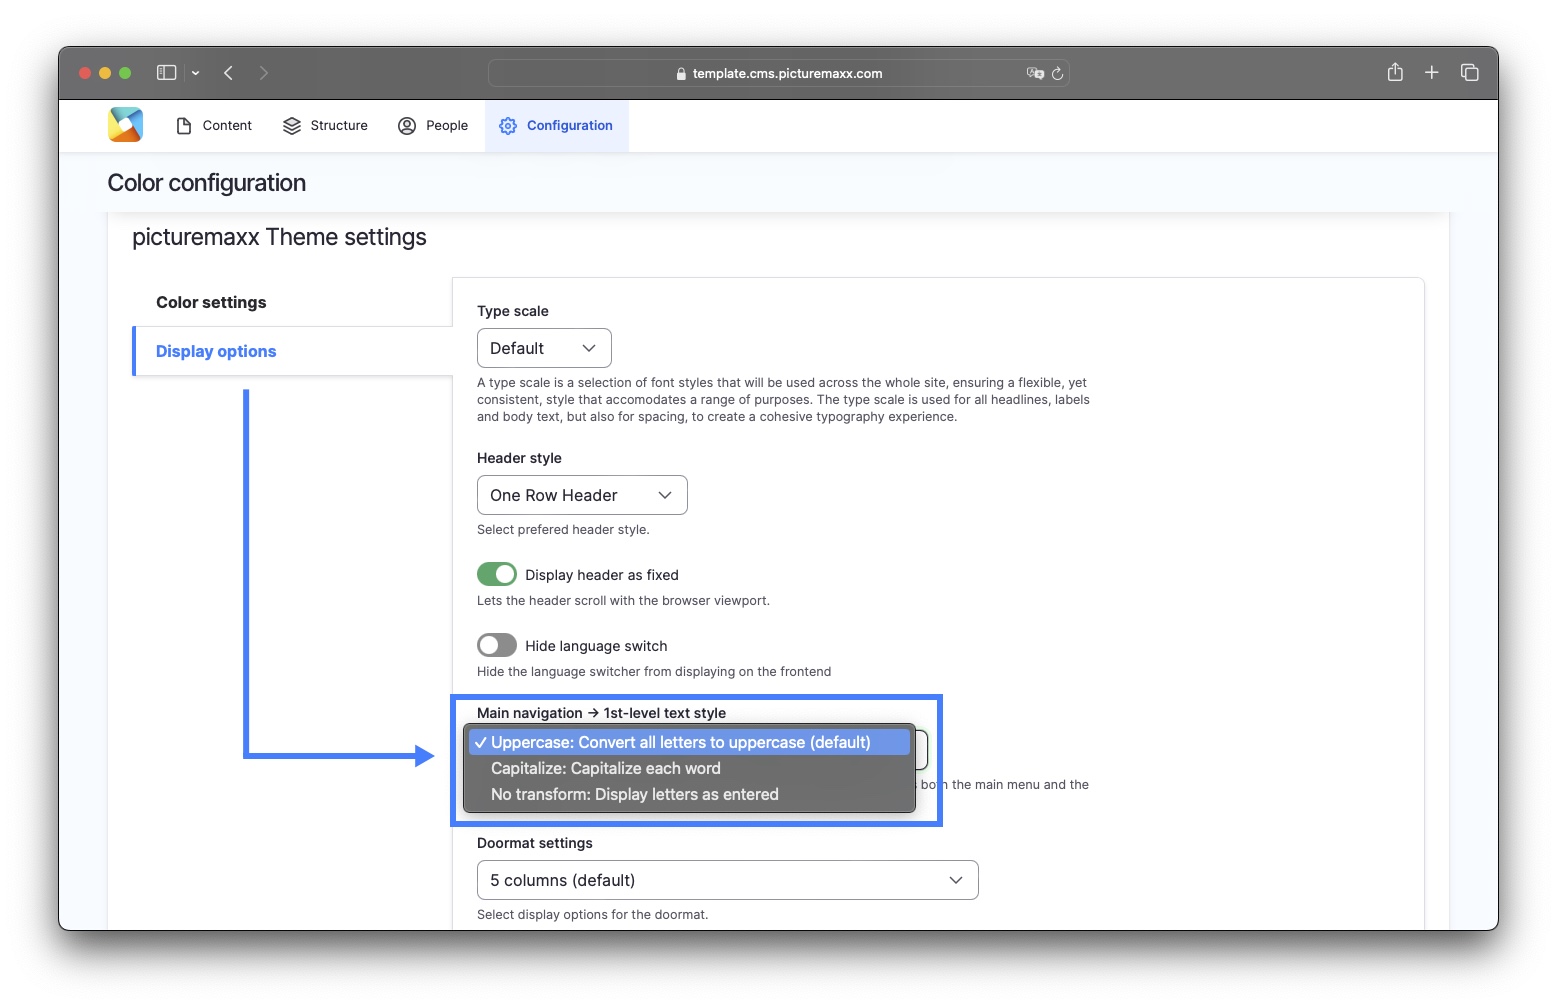
4. Main navigation
Choose between three display options for your main menu. Scroll the Configuration page down to picturemaxx Theme settings and click Display options, as shown below.
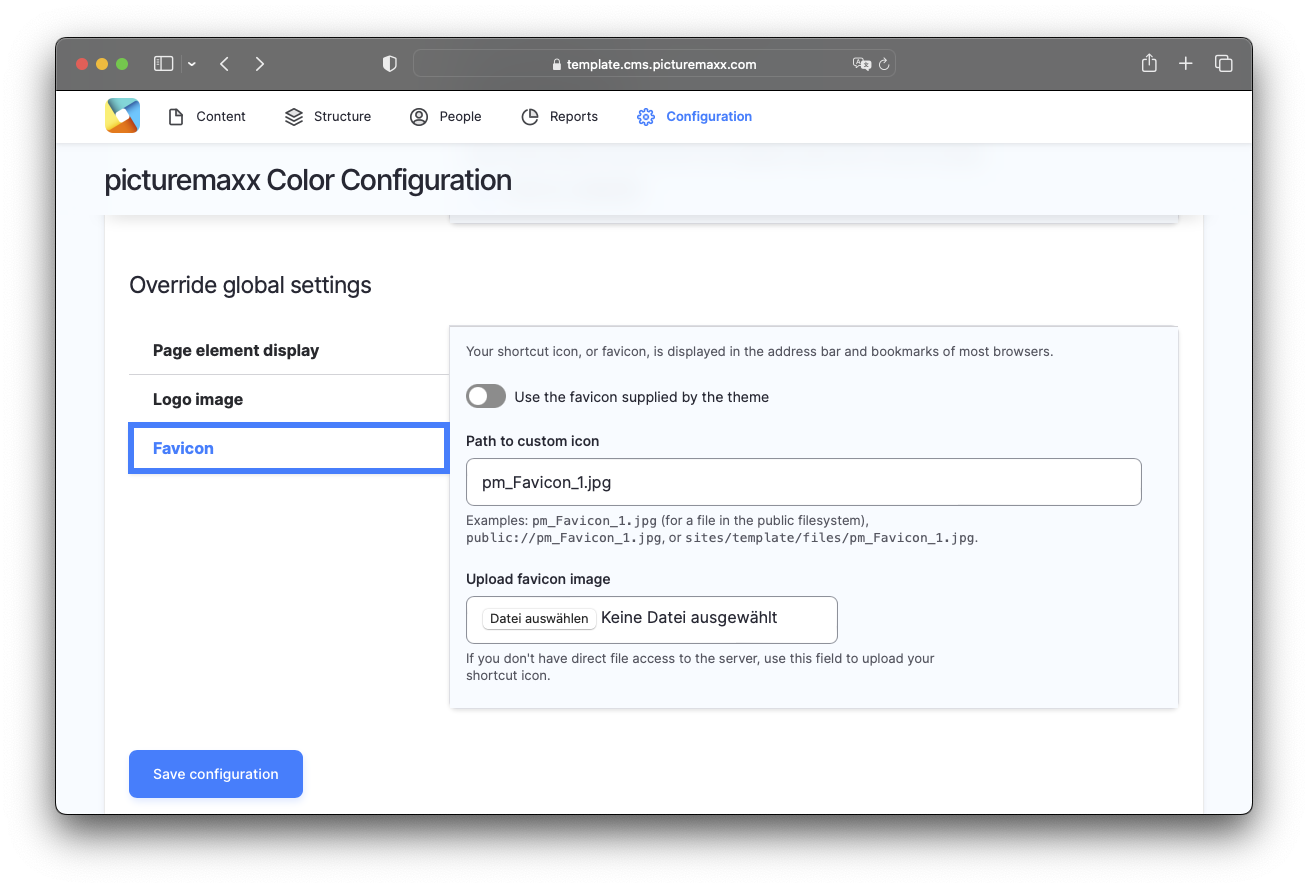
5. Add your favicon
Scroll the Configuration page down to Override global settings and select the Favicon option.
- Before uploading, delete the path information in the Path to custom icon box, to remove the existing file from your template.
- Recommended: Upload a png file, square, max. size 48x48 px.
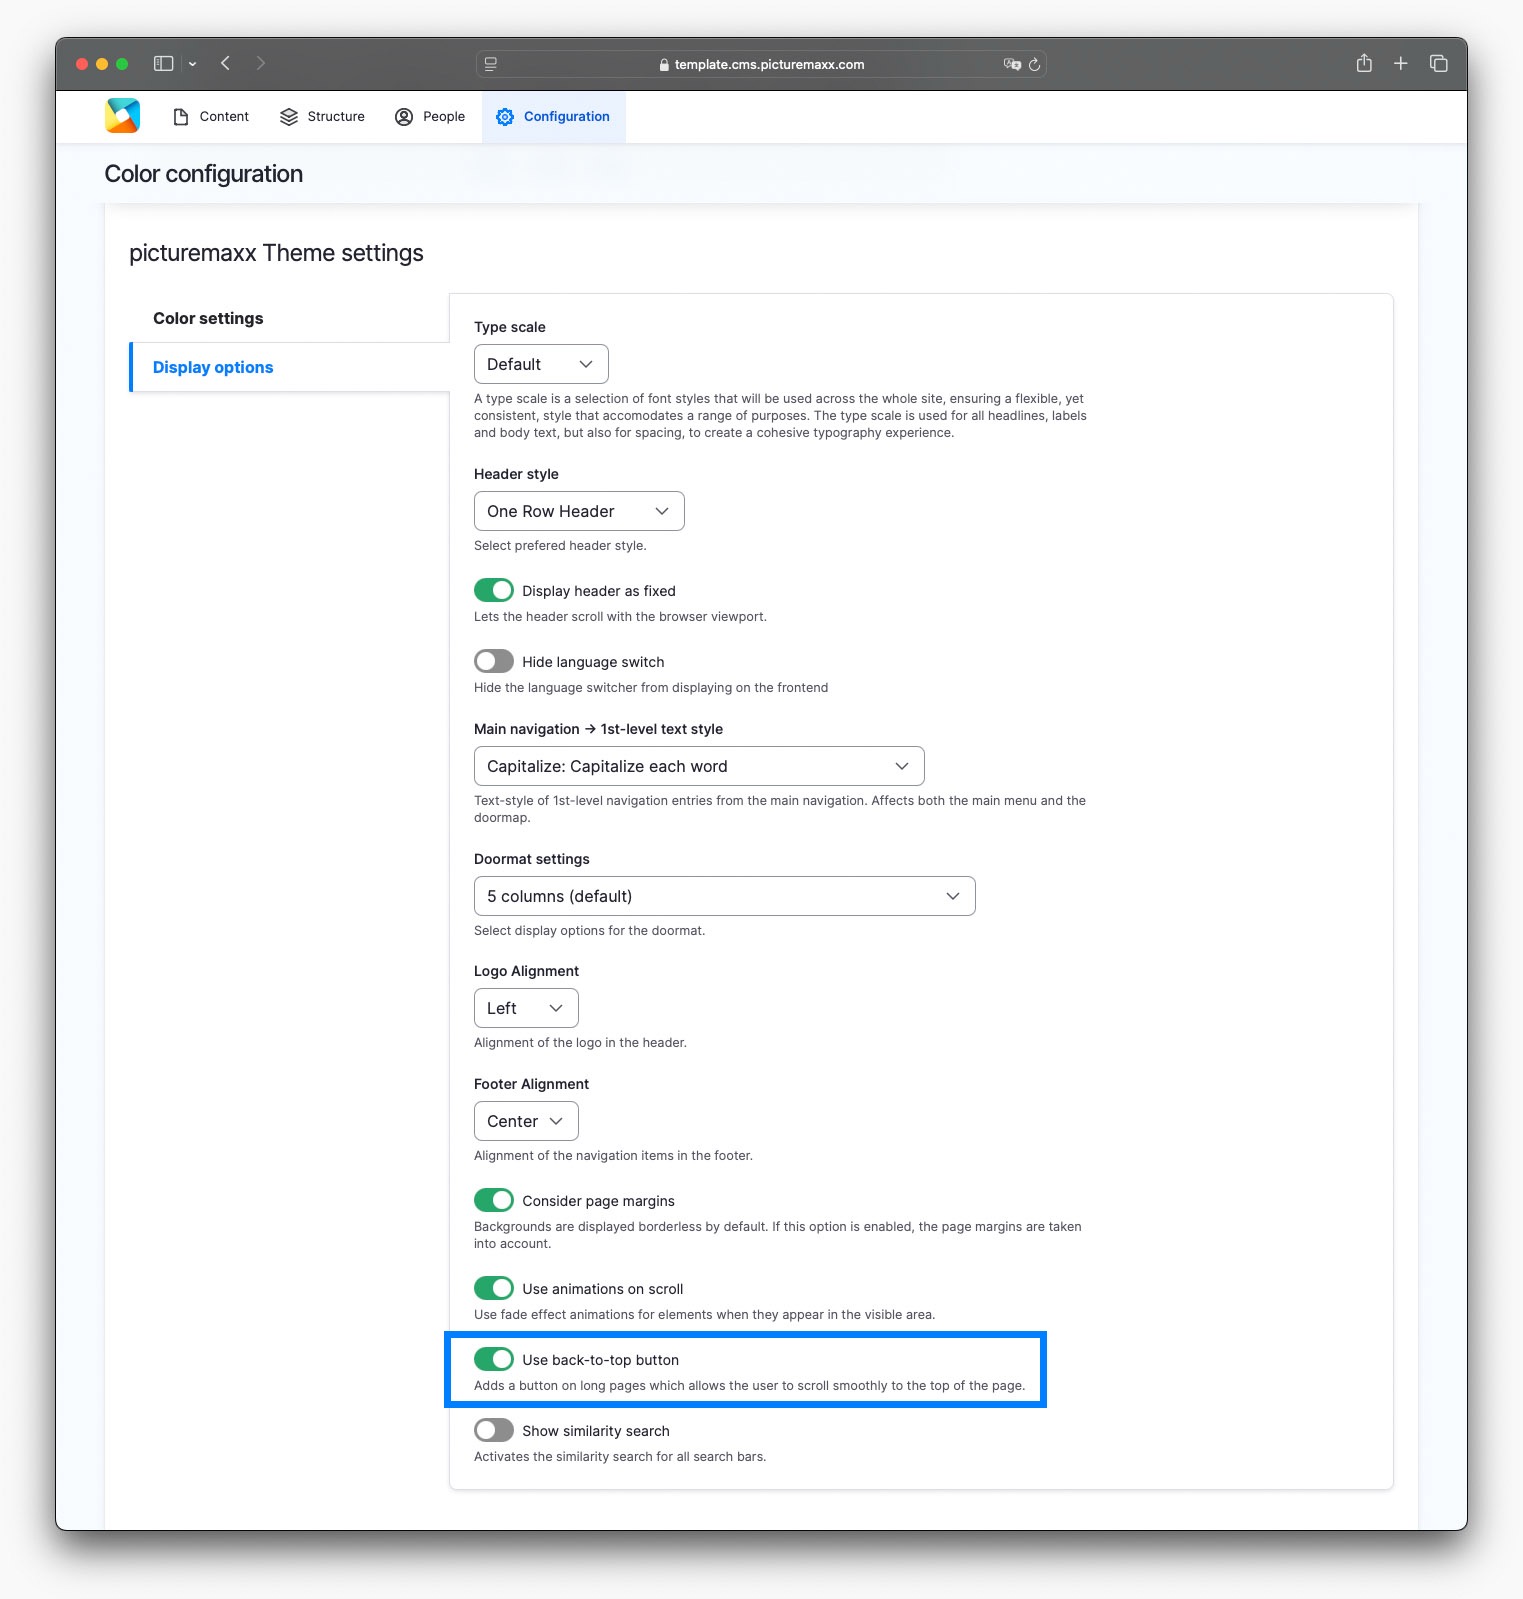
6. Add 'back-to-top' button
Help your users get back to the top of a long page without scrolling:
On the Configuration page, locate Display Options and enable the Use back-to-top option (see Settings Page below).
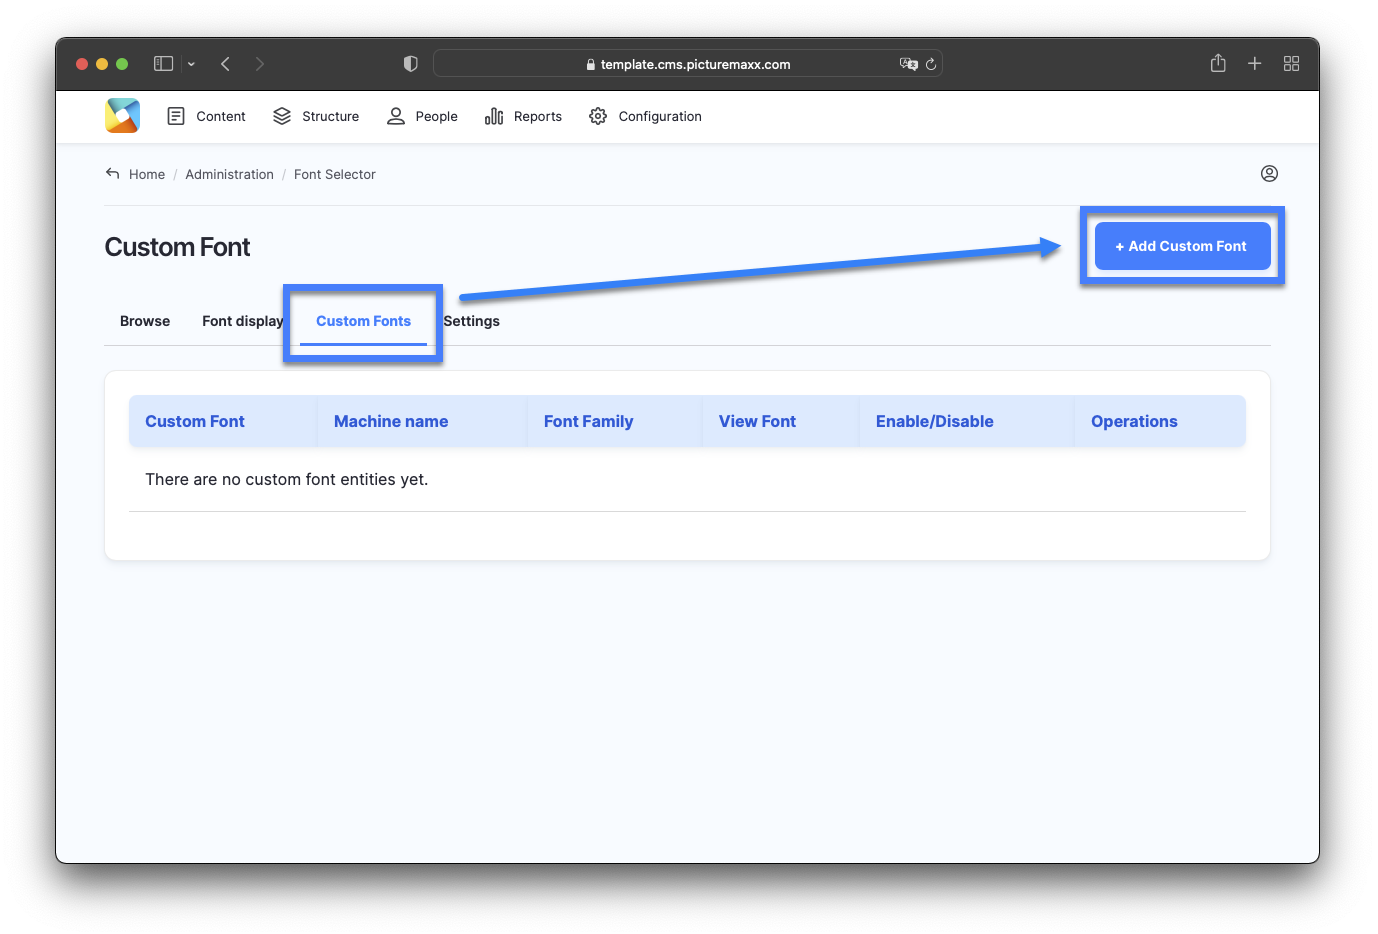
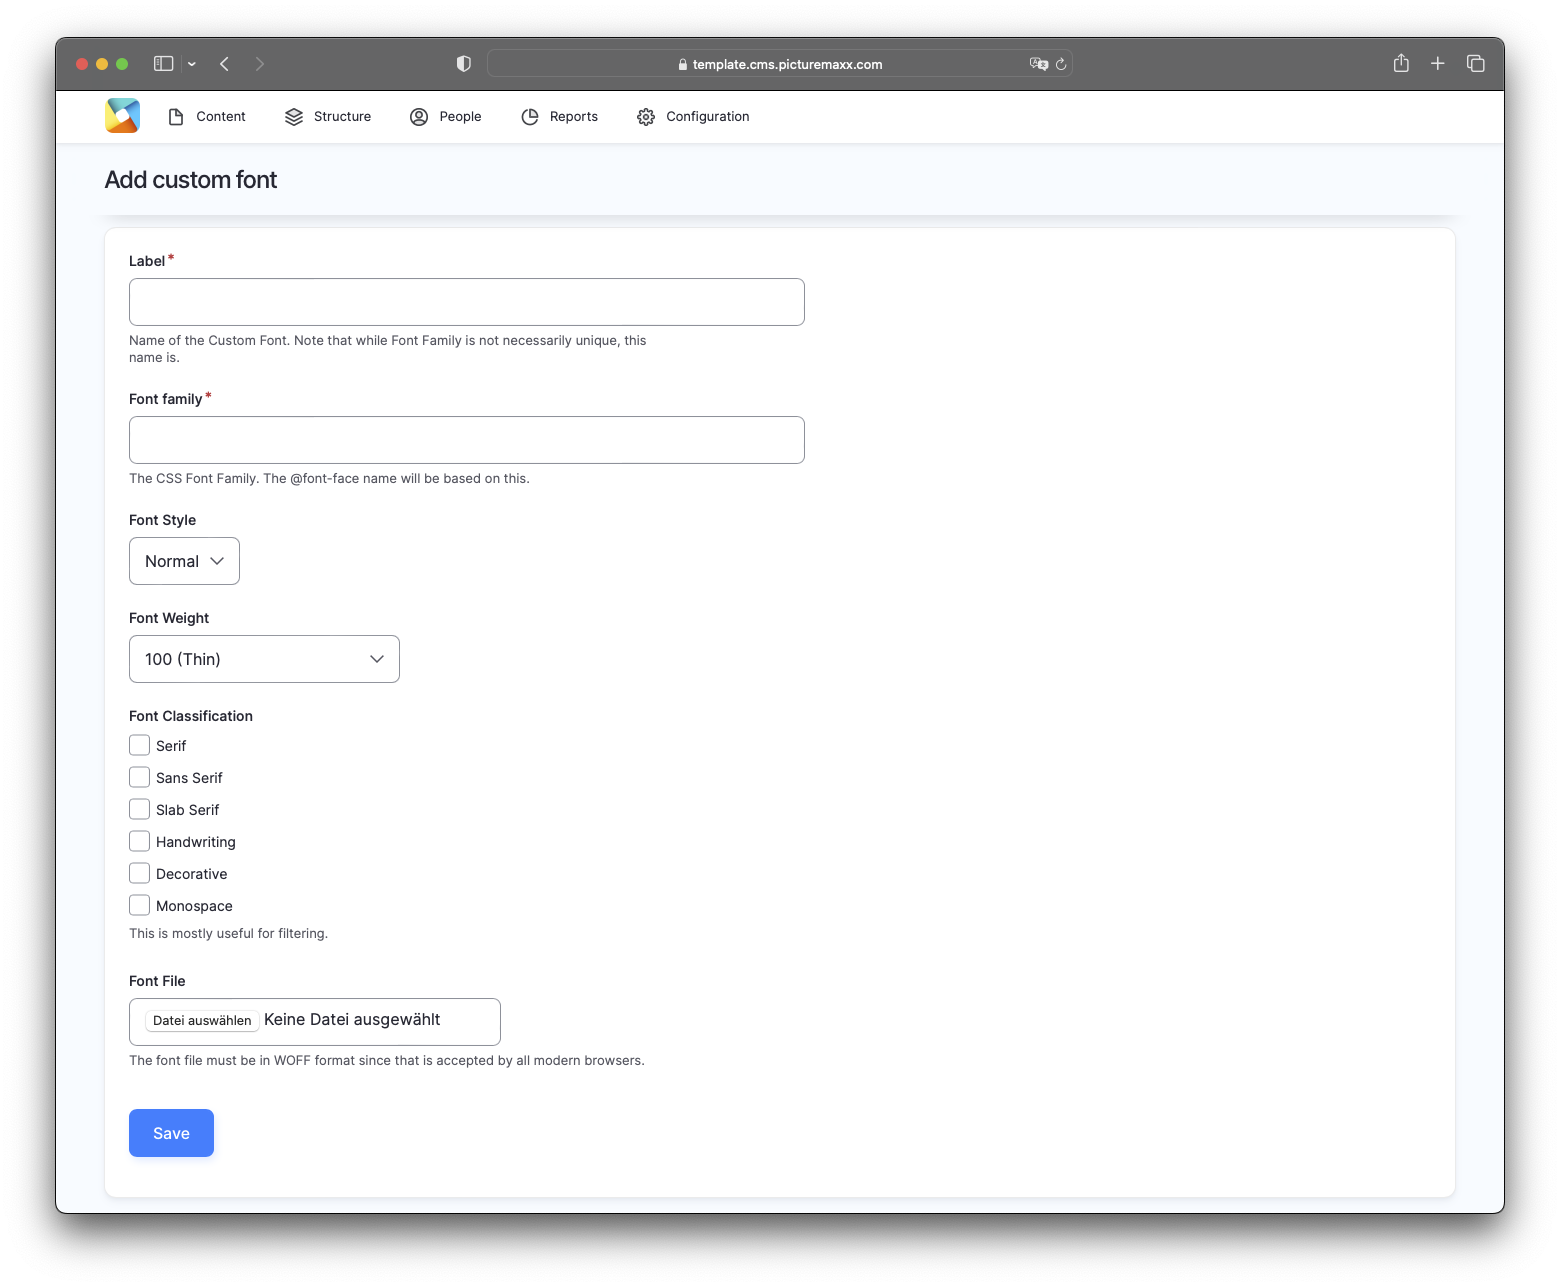
7.1. Custom fonts
Select desired font attributes and upload fonts to apply your own font style (WOFF format only).
To upload custom fonts:
- In Configuration → picturemaxx Configuration → Theme settings → Font selection and configuration, select Custom Fonts and click Add Custom Font:
7.2. Import fonts / Google API Key
To import fonts from the Google Fonts service, navigate to Configuration → picturemaxx Configuration → Theme settings → Font selection and configuration.
-
1. First, follow this link https://developers.google.com/fonts/docs/developer_api#APIKey to aquire a Google API Key for fonts. In Font Selector, click the Settings tab to add the aquired API key.
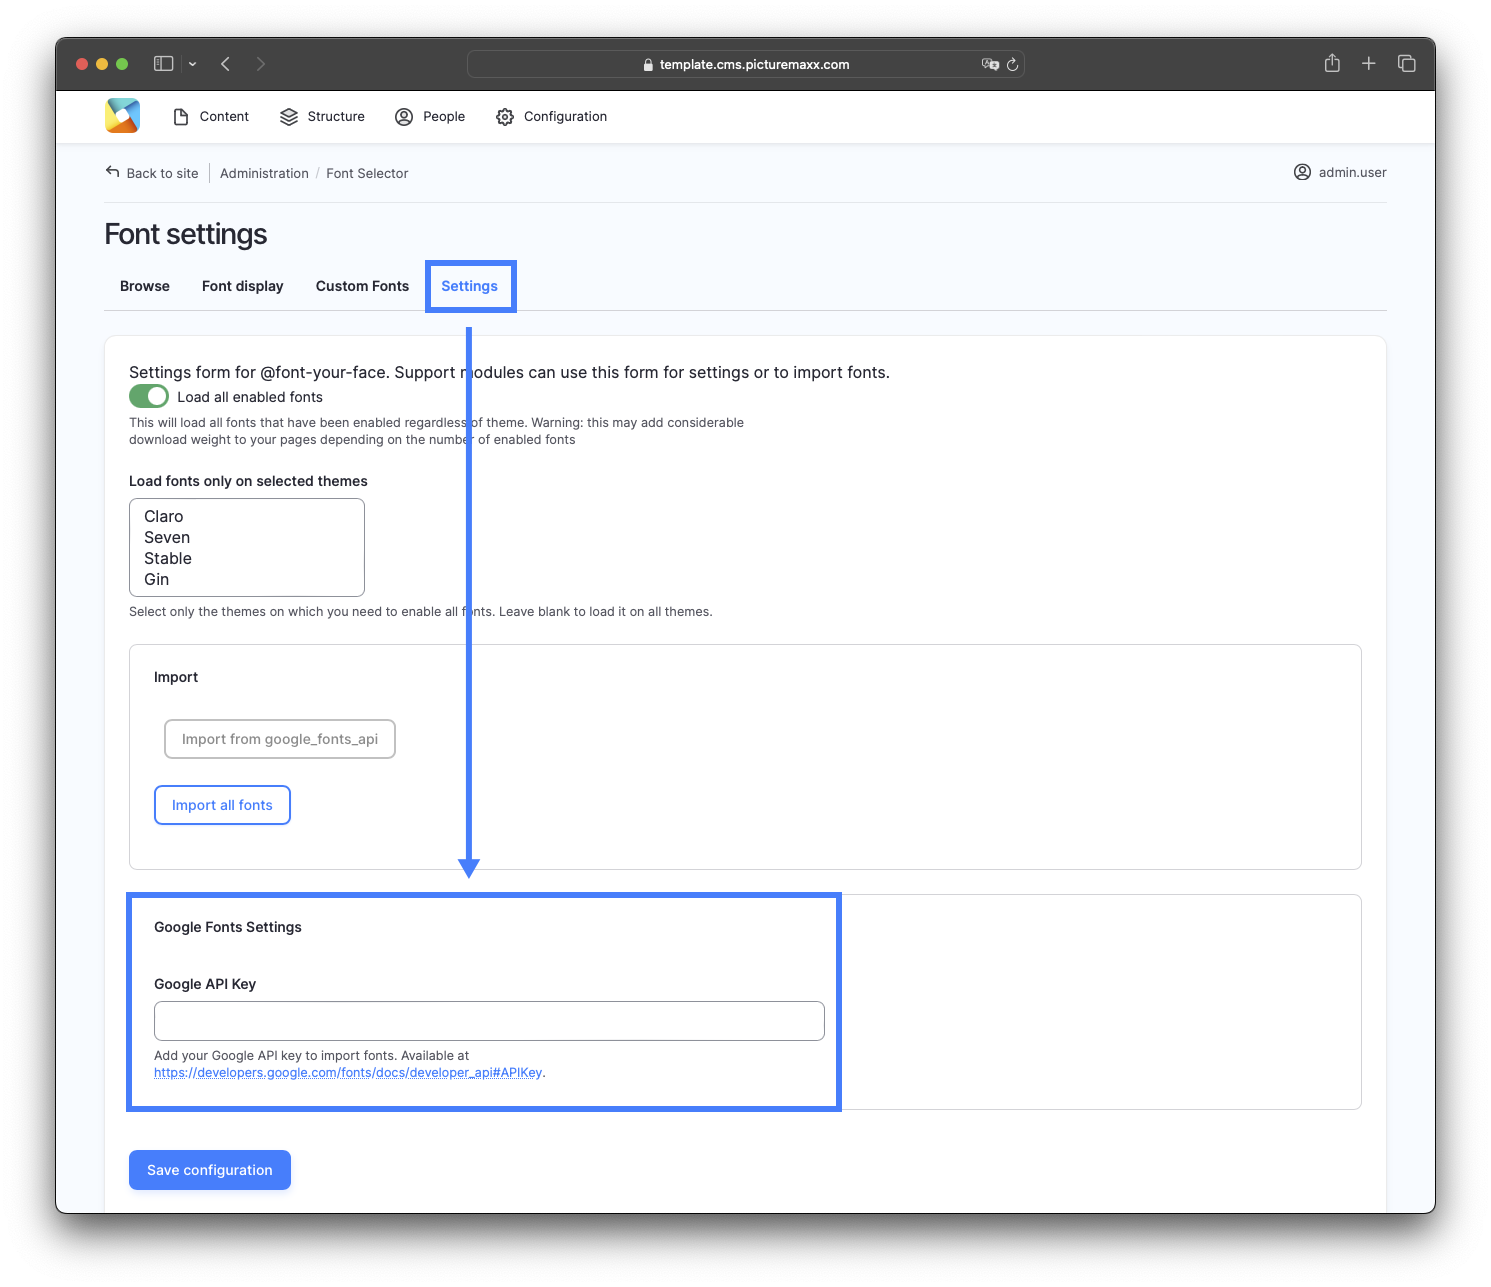
2. Enter the Google API Key into the Google Fonts Settings box and click Save configuration:

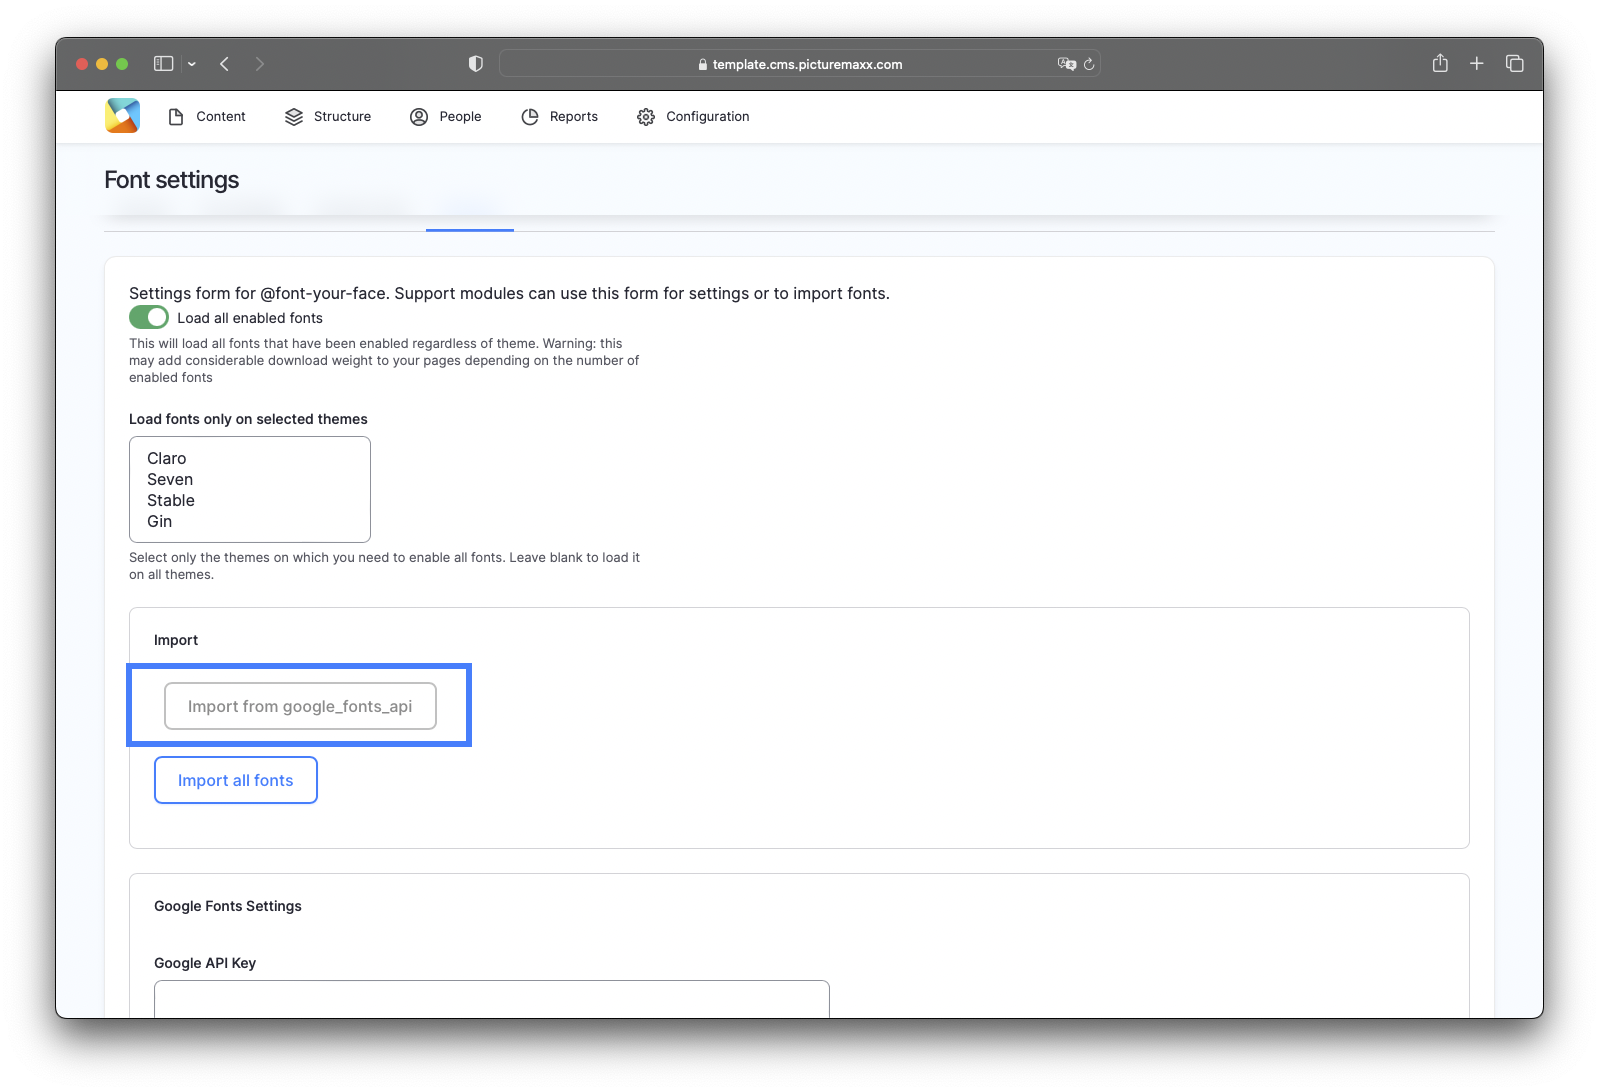
3. Scroll up and click Import from google_fonts_api to import the fonts you want to display on your website:
-
To enable specific font sizes and styles, in Font Selector select the Browse tab. Explore available fonts and select the fonts you'd like to use. Just click on each font applicable.

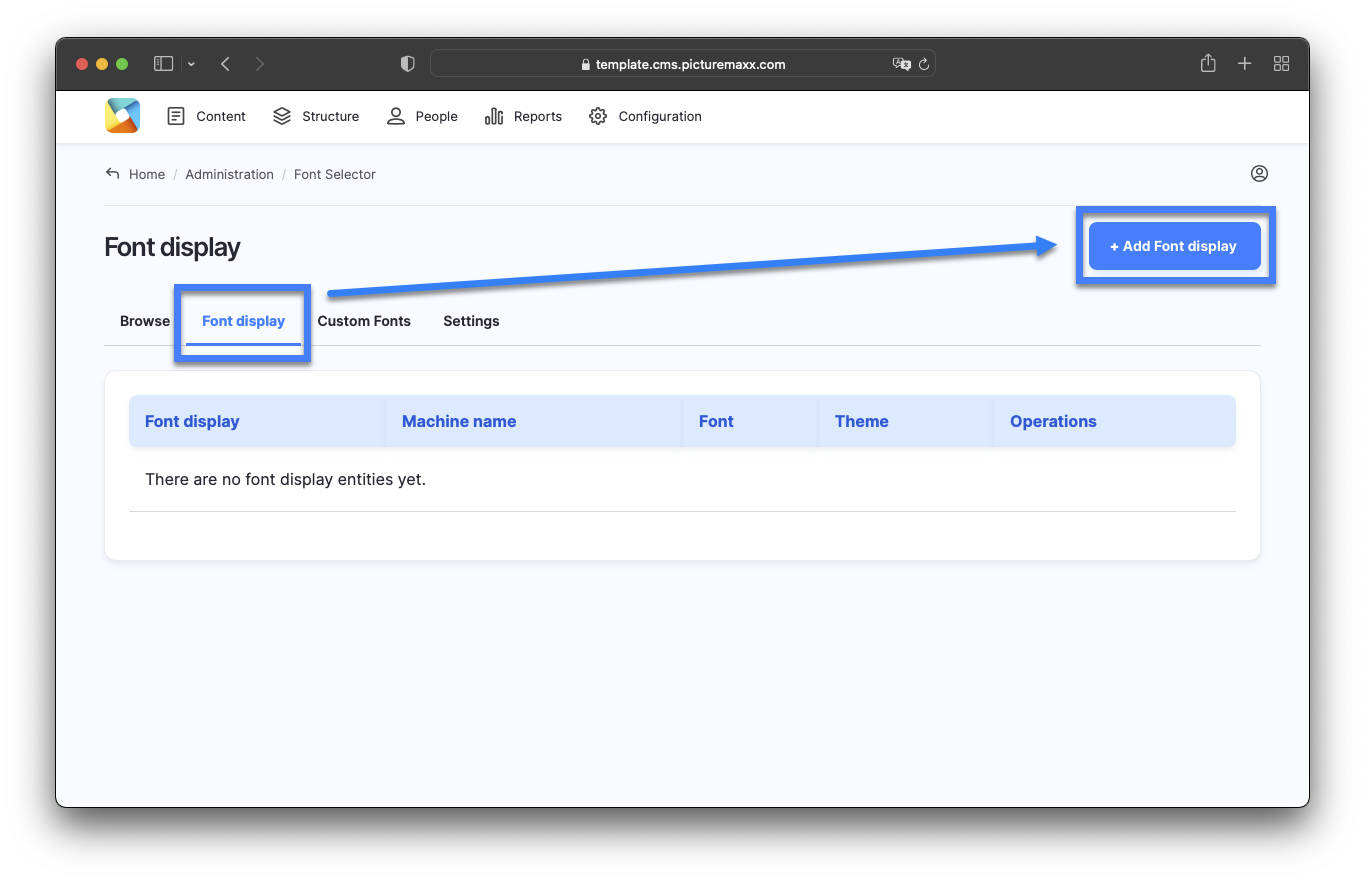
7.3. Add font display
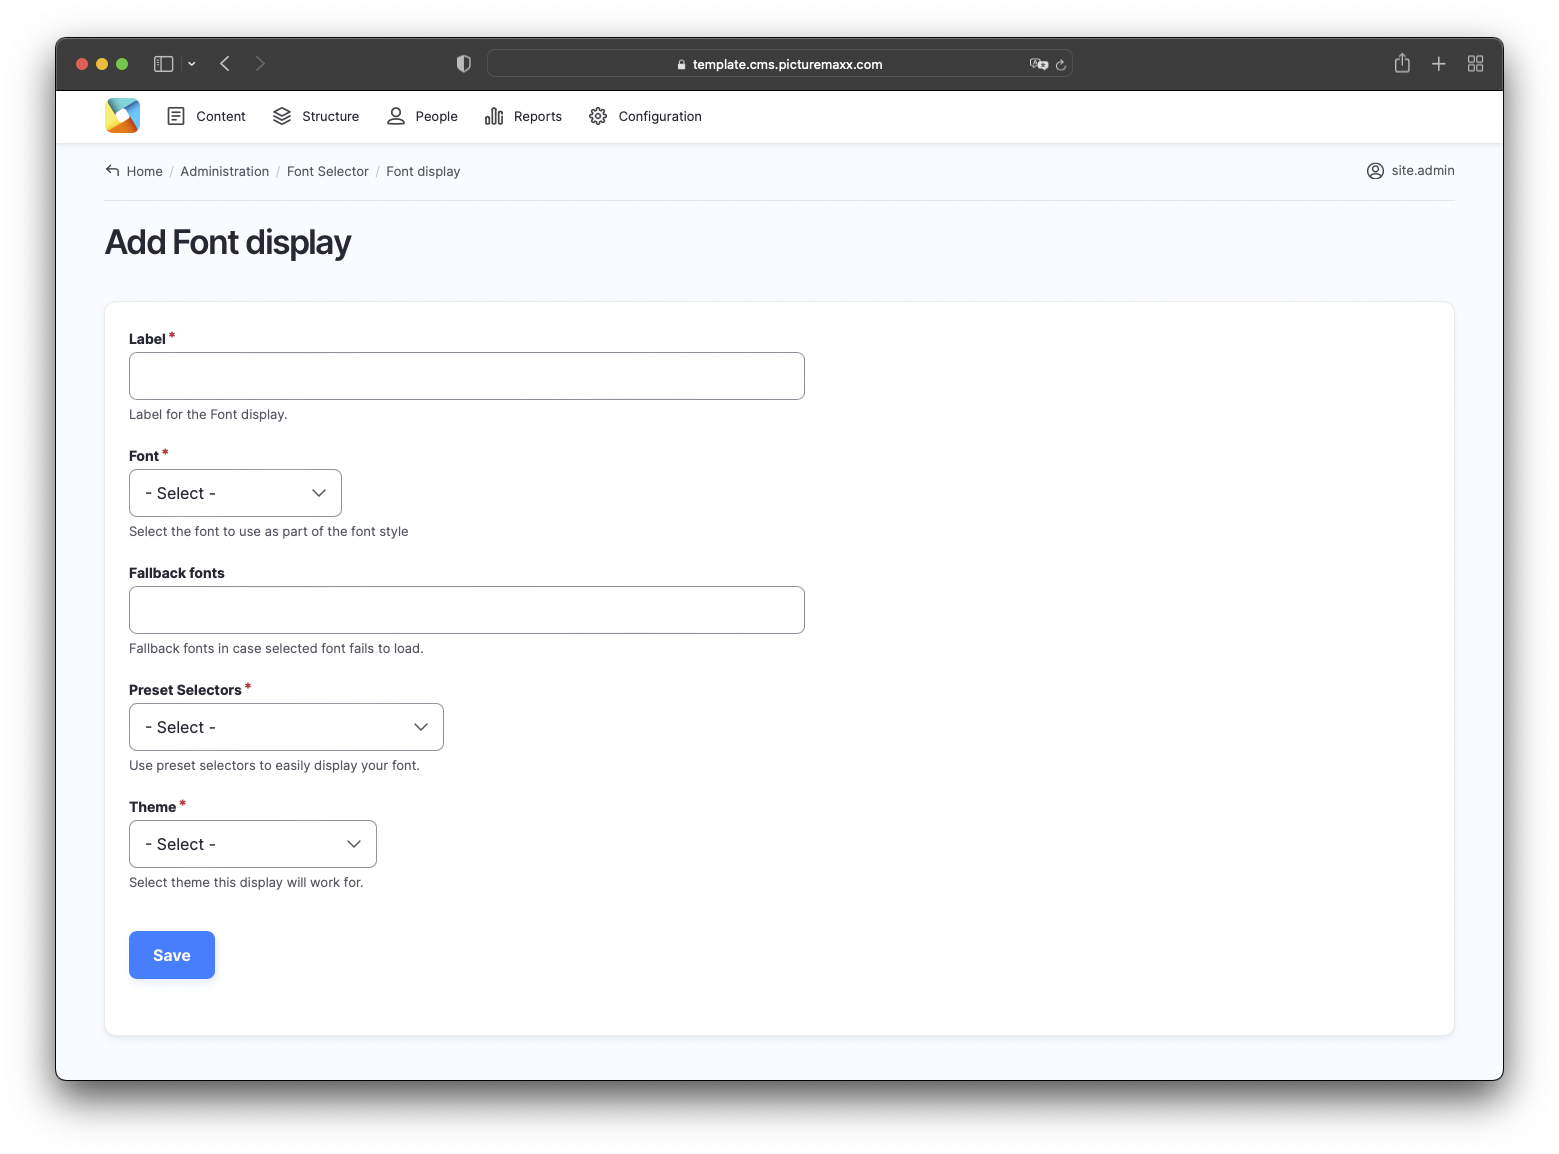
After you have imported a Custom font or a Google font, take the last step to implement a Font display for the imported font. Navigate to Configuration → picturemaxx Configuration → Theme settings → Font selection and configuration. On the Font Selector page, select the Font display tab and assign a font style to specific selectors (e.g., headers, standard text) and the front-end theme.
-
1.On the Font display page, click Add Font display:
2. Now you can assign a font to specific selectors and the front-end theme.