
Section

Home → Paragraph Types → Section

Section

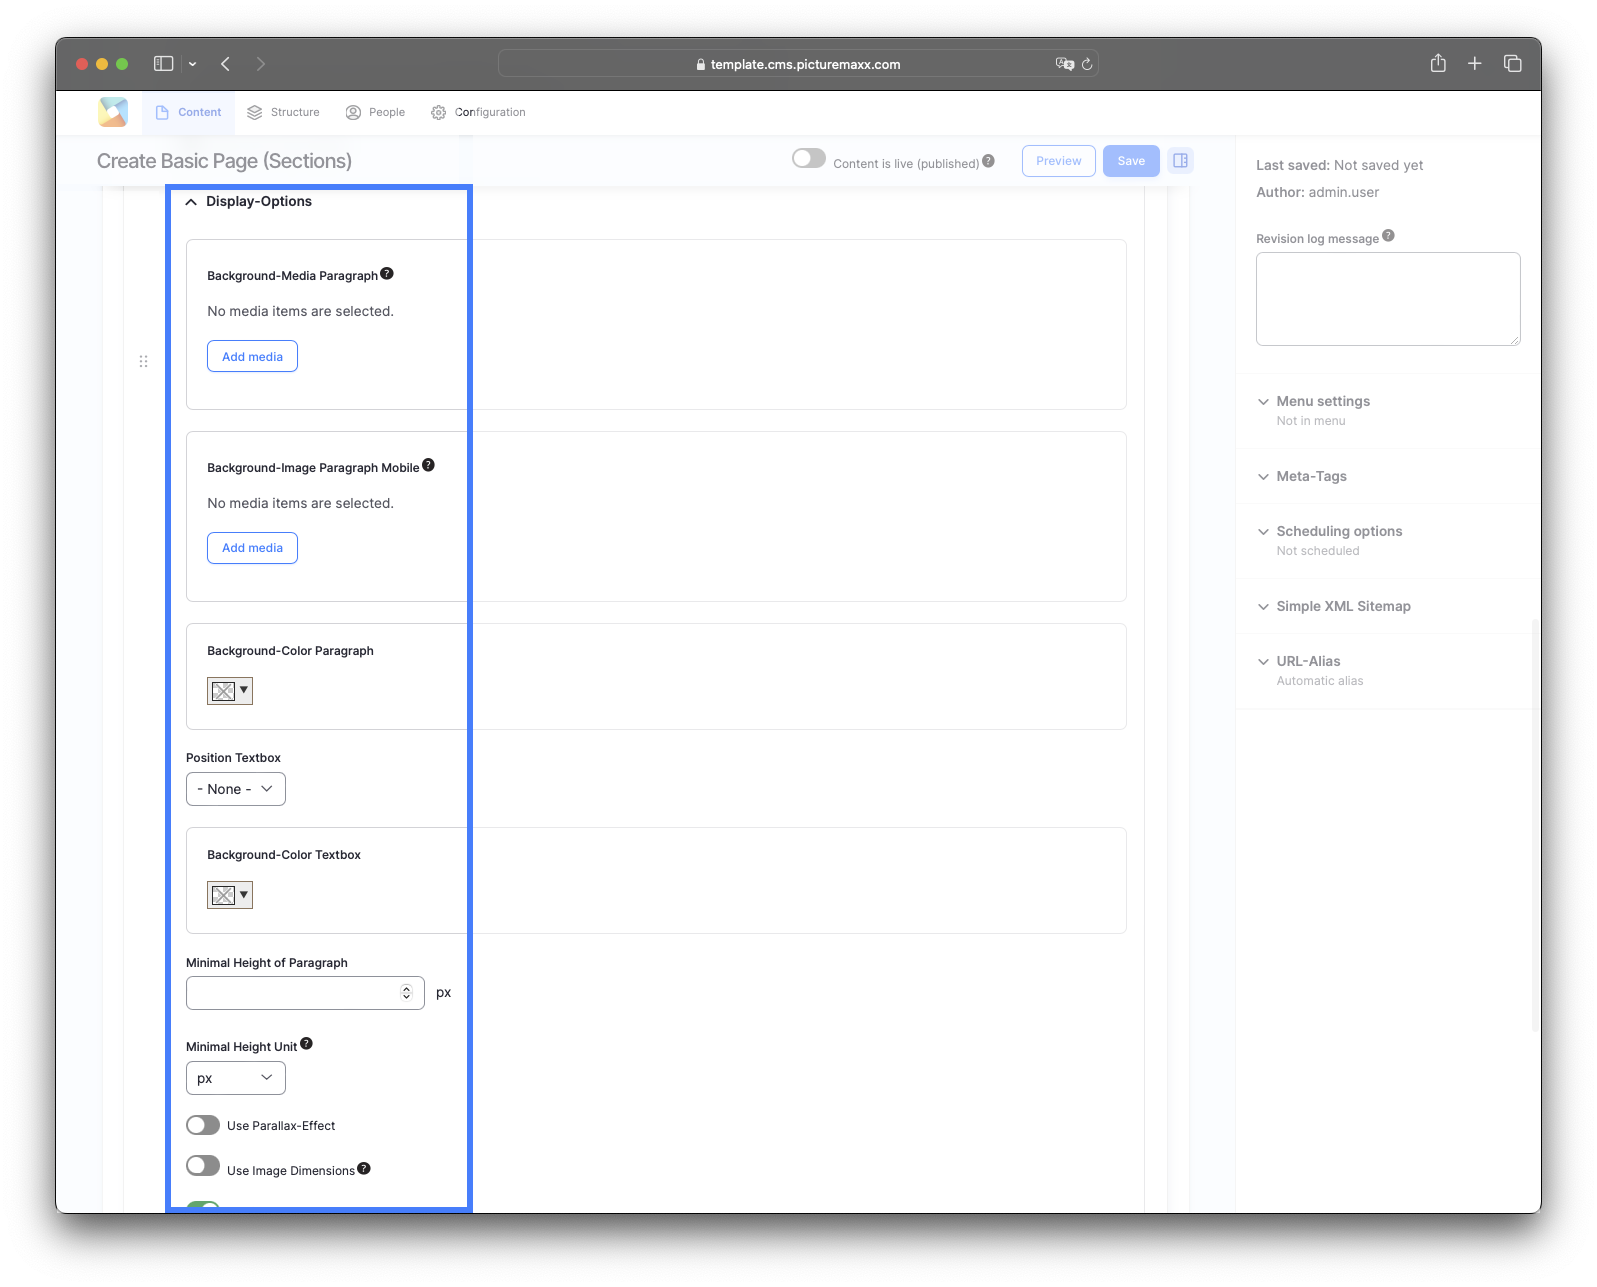
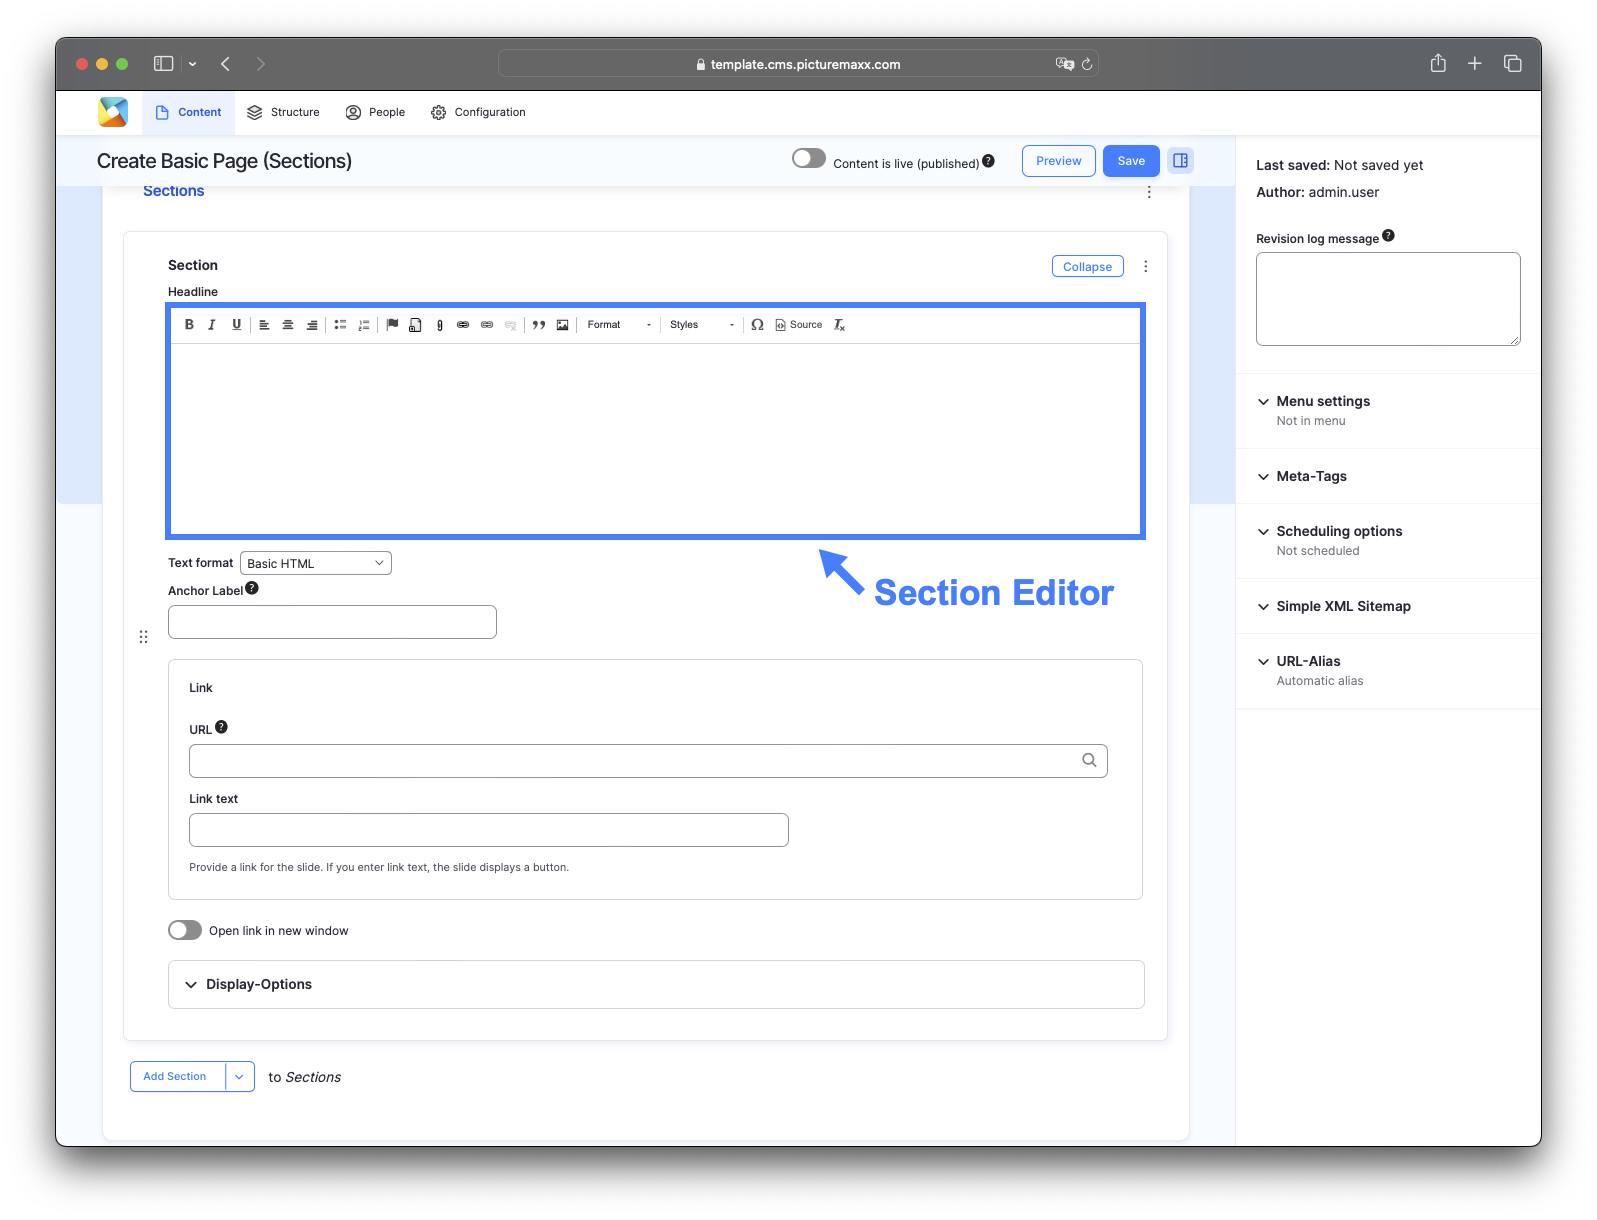
Section is the most used paragraph type due to the versatile functions it offers. Choose between various text formatting options and styles in the editor. You can also add photos and videos as background. 


Add a section to a page

    1. In Main Administrative Menu, navigate to Content.
    2. In the Content Overview table, select a page to add the section to, and click Edit. The Edit template form is displayed.
    3. Go to the bottom of the Edit template form and select Add Section from the Add Section dropdown.
    4. In the Headline area, enter a name or description text. The Editor menu allows applying a format or style to the text.
    5. Select a background image or video (see Display Options below)
  • Section Setup


  • Screenshot of the text formatting options in the text editor

    Text format options to customize and structure the text (bold, italic, underline, text align, bulleted list, numbered list)


    Screenshot of the link icon in the text editor  

    Add a link to internal or external pages.

    • To add an external link icon (link), click Advanced and type is-external in the CSS classes box.
    • To open a link in a new window, click Advanced and enable the Open in new window option. 


    Screenshot of the 'Insert Media' icon in the Text Editor.

    Insert Media     
    You can insert gif, png, jpg, jpeg files and videos (.mp4).


    Screenshot of the 'quote' icon in the text editor.

    Block quote     
    Use this function to visually separate a block of text. 


    Screenshot of the 'insert table' icon in the text editor

    Insert table     
    Create simple grids with the table tool. You can use it to organize information into rows and columns, which is helpful for any data that needs clear structure.


    Screenshot ot the 'horizontal line' icon in picturemaxx Drupal.

    Horinzontal line     
    The horizontal line tool adds a visible line across the page. You can use it to separate sections of content to make the page easier to read.


    Screenshot of the 'styles' icon in the picturemaxx Drupal text editor.

    Styles     
    The styles function lets you quickly apply pre-designed formatting to your content – like headings or special text highlights. This helps make your website look clean, consistent and professional. 


    Screenshot of the 'paragraph' icon in the text editor of picturemaxx Drupal

    Paragraph     
    The paragraph function helps you organize your writing by breaking it into separate blocks of text. This makes your content easier to read and keeps different sections or topics clearly separated. 


    Screenshot of the 'special characters' icon in the text editor of picturemaxx Drupal.

    Special characters     
    Lists the insertable symbols that aren't found on a regular keyboard – like copyright signs (©), math symbols (≈) or currencies (¥). 


    Screenshot of the 'source' icon in the text editor of picturemaxx Drupal.

    Source     
    The source function lets you see and edit the behind-the-scenes code of your content – specifically HTML.

Display Options

  • Display Options Setup


  • Background-Media Paragraph
    Choose an image or a video for the Section's background.

    Background-Media Paragraph Mobile
    Select a different media file for mobile devices, if needed.

    Background-Color Paragraph
    The background color for the Section affects the text color within the textbox. The font will automatically appear white, if you select a dark background for the paragraph. It won't interfere with the image display. To learn where to define new background colors for your Paragraph Types, go to Change Look & Feel (2. Background colors).

    Position Textbox
    Choose where to place the textbox. Default None positions the textbox to the top left corner.

    Background-Color Textbox
    Choose a background color for the textbox.

    Minimal Height of Paragraph

    Define the Sections height in your browser. With a fixed height value, the width of the media file will adapt to the browser window. You can either set the slide height here or upload images that already have proper dimensions for your slide. In this case, enable Use Image Dimensions

    Use Parallax Effect
    Learn more about this feature on the Parallax page.

    Use Image Dimensions
    Enable the option to specify the image size for the slide before uploading it and to make sure it appears the same way in different display sizes. The display is responsive.

Video: Add a section with a big headline and a background image with the parallax effect applied. 

Before publishing a page:

  • Click Preview to make sure everything looks the way you want. You can preview any change before publishing it. 
  • To return to the Edit page, click Back to content editing.
  • To make new content visible on your website, turn on the Content is live (published) option.
  • Click Save to store your changes. The website content items are listed on the Content page.