Home → Website Administration → SEO
Search Engine Optimization (SEO)
Standard plugins offer extensive possibilities to help improve your site's ranking in search engines, this is referred to as search engine optimization (SEO). Your website needs to contain important keywords in order to be found - similar to images and other media. picturemaxx Drupal offers a variety of SEO Tools to improve your site's presence in search results.
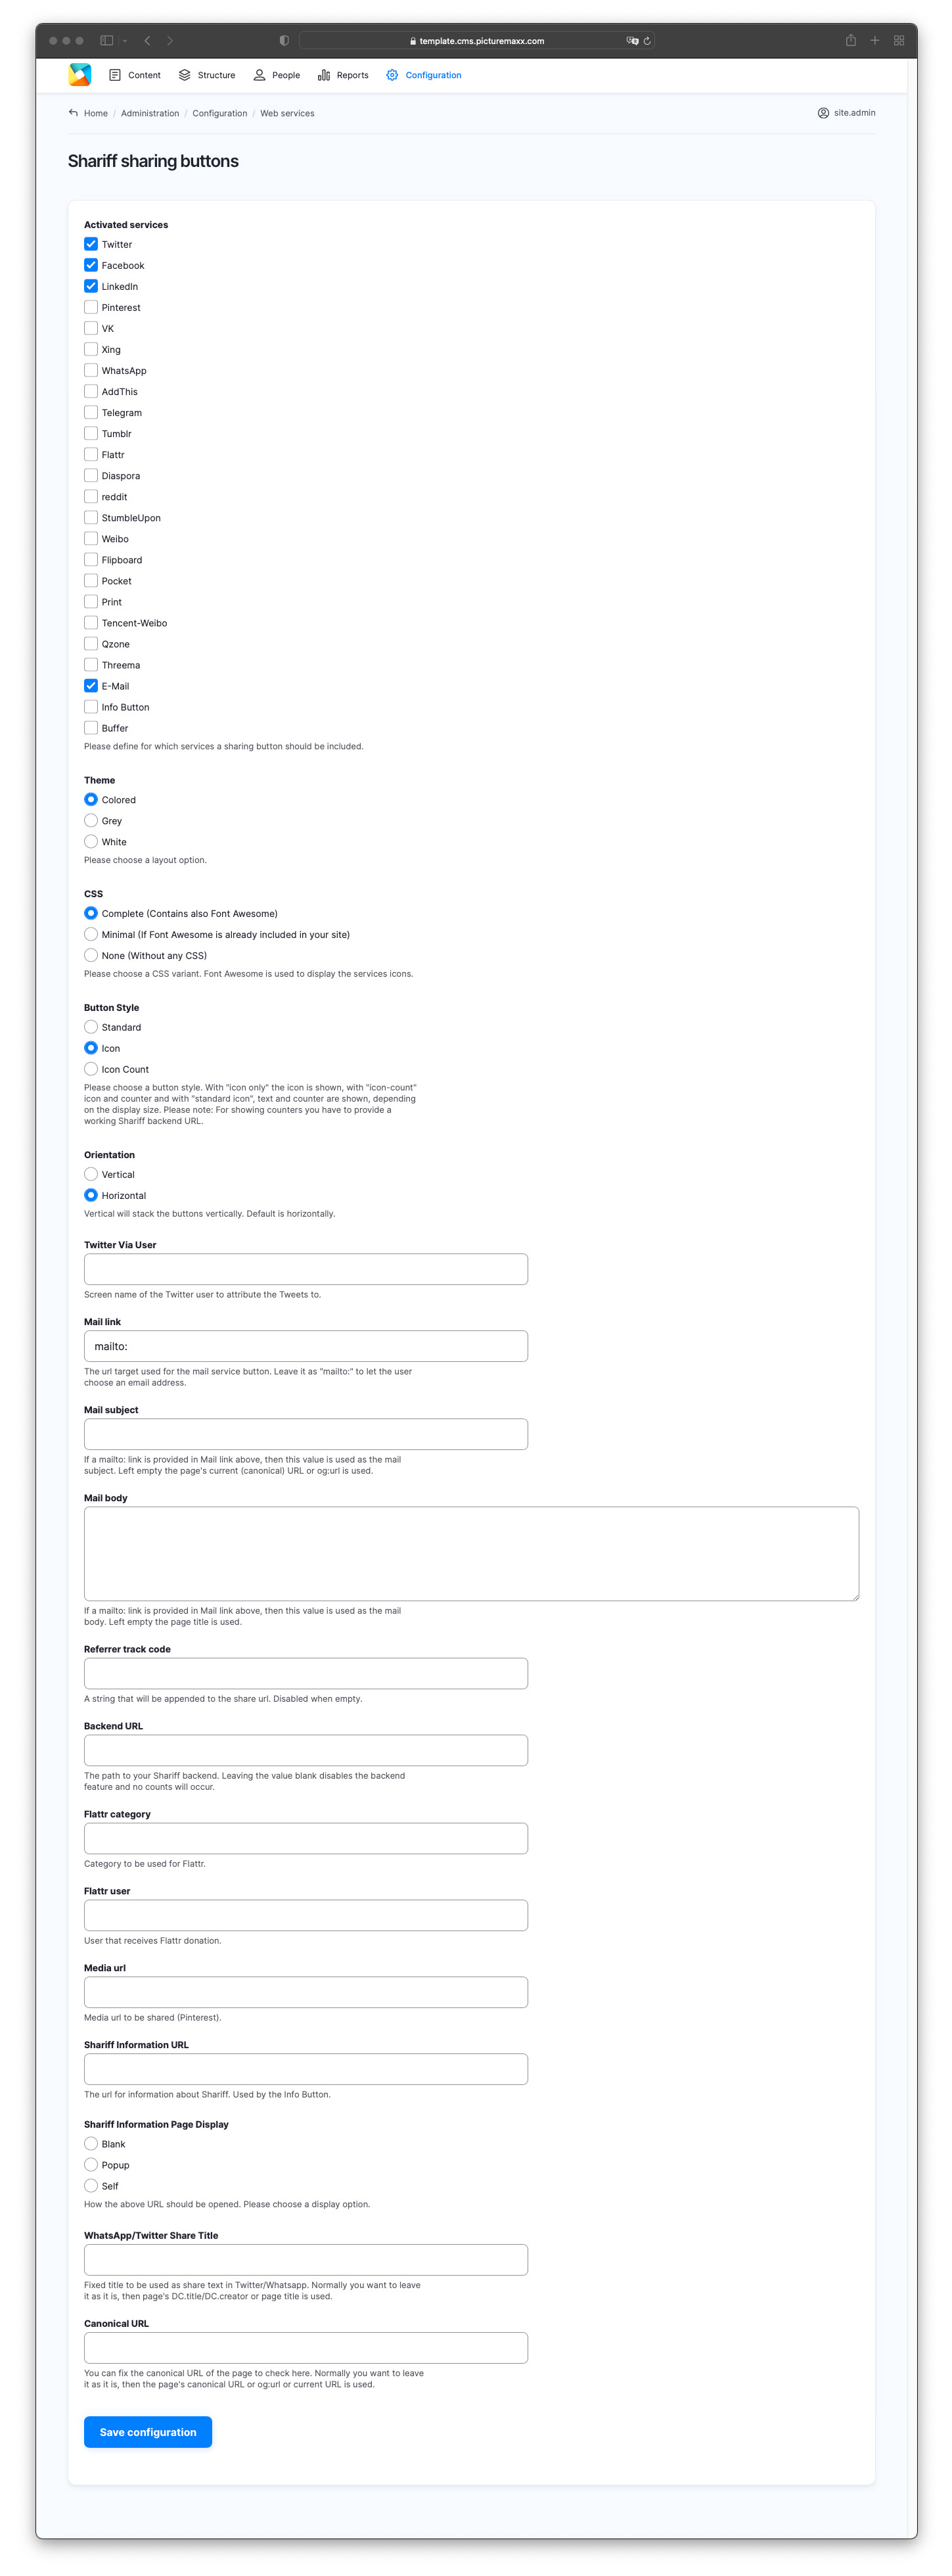
1. Shariff Sharing Buttons
Shariff is a privacy-compliant open-source program. Unlike usual share buttons, it does not track visitors directly if they share your website's content. The Shariff button establishes direct contact between social networks only if the page visitor clicks actively on the share button.
To edit the Shariff settings, go to Configuration → Web services → Shariff sharing buttons.
NOTE: Shariff sharing buttons work for News-Article only. To share general content on social media, add Shariff sharing buttons within Block Layout of your website to display them on every page created.
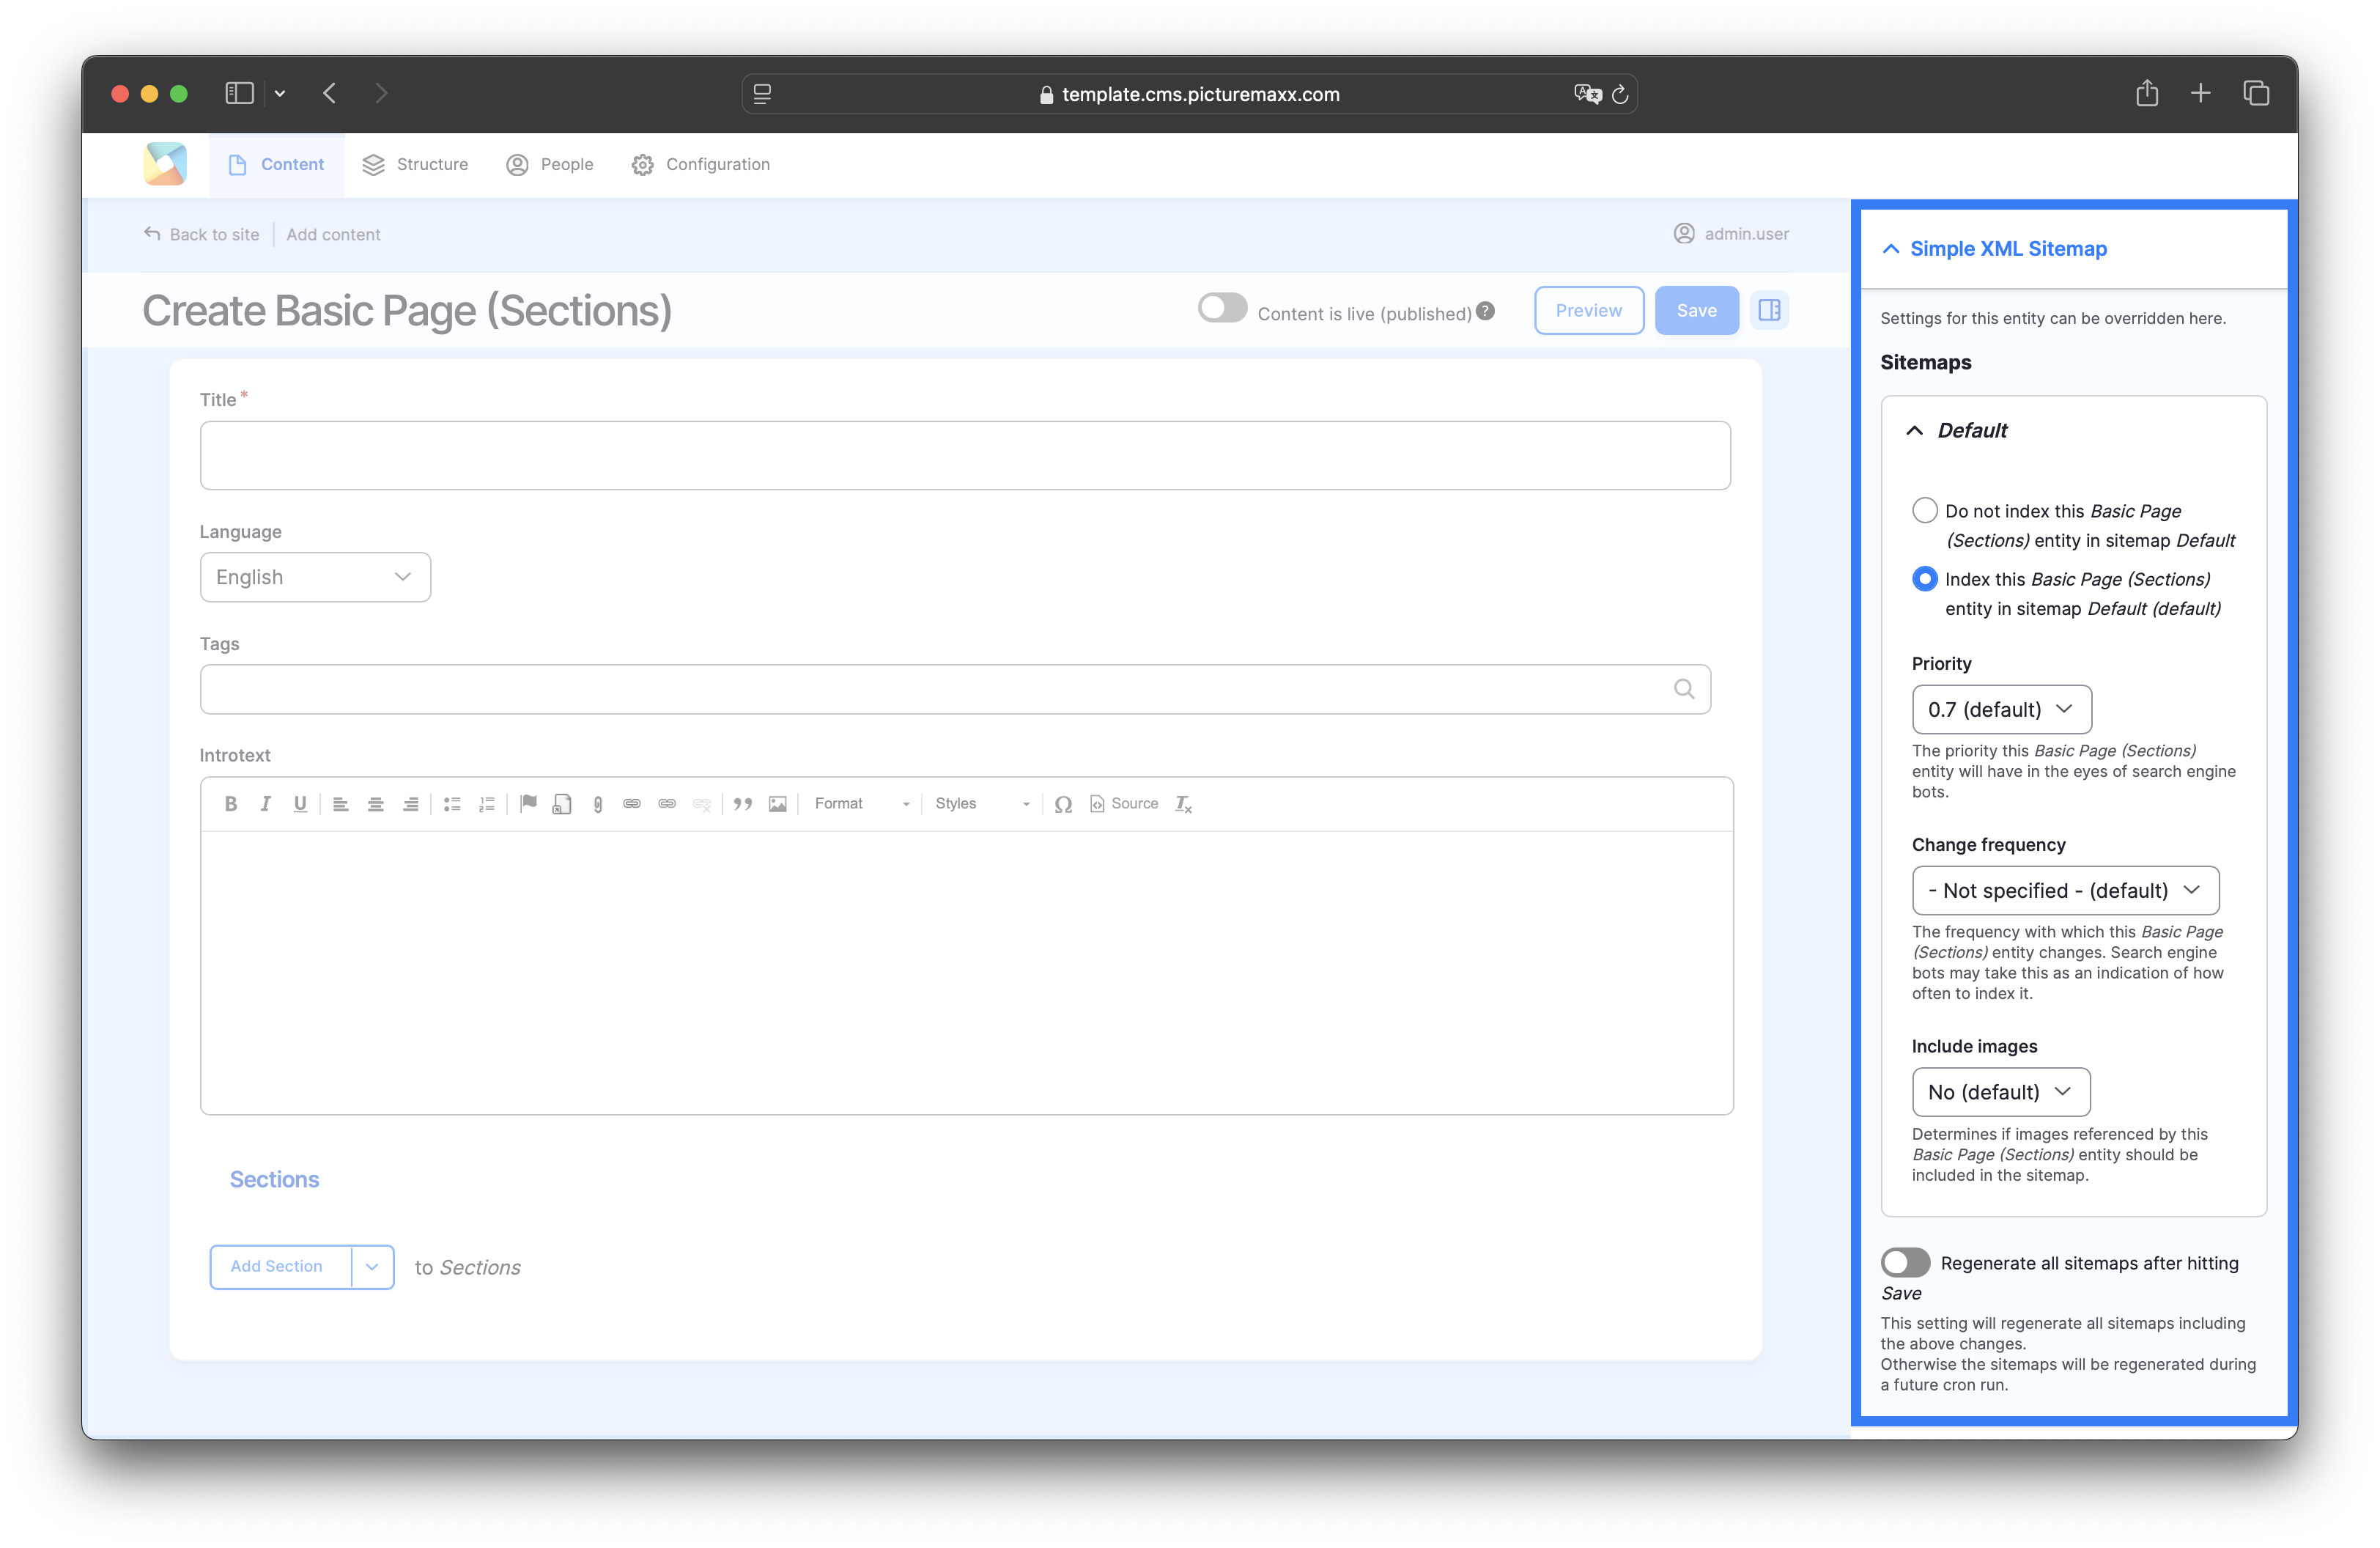
2. Simple XML Sitemap
A sitemap is an index of all your publicly visible pages. It helps search engines crawl and index your website. The sitemap is created automatically.
By default, a page is included in the sitemap but you can override the setting in Menu settings > Simple XML Sitemap in the sidebar that appears on the right of each setup page. (See Setup page below). Here you can also set page priority.
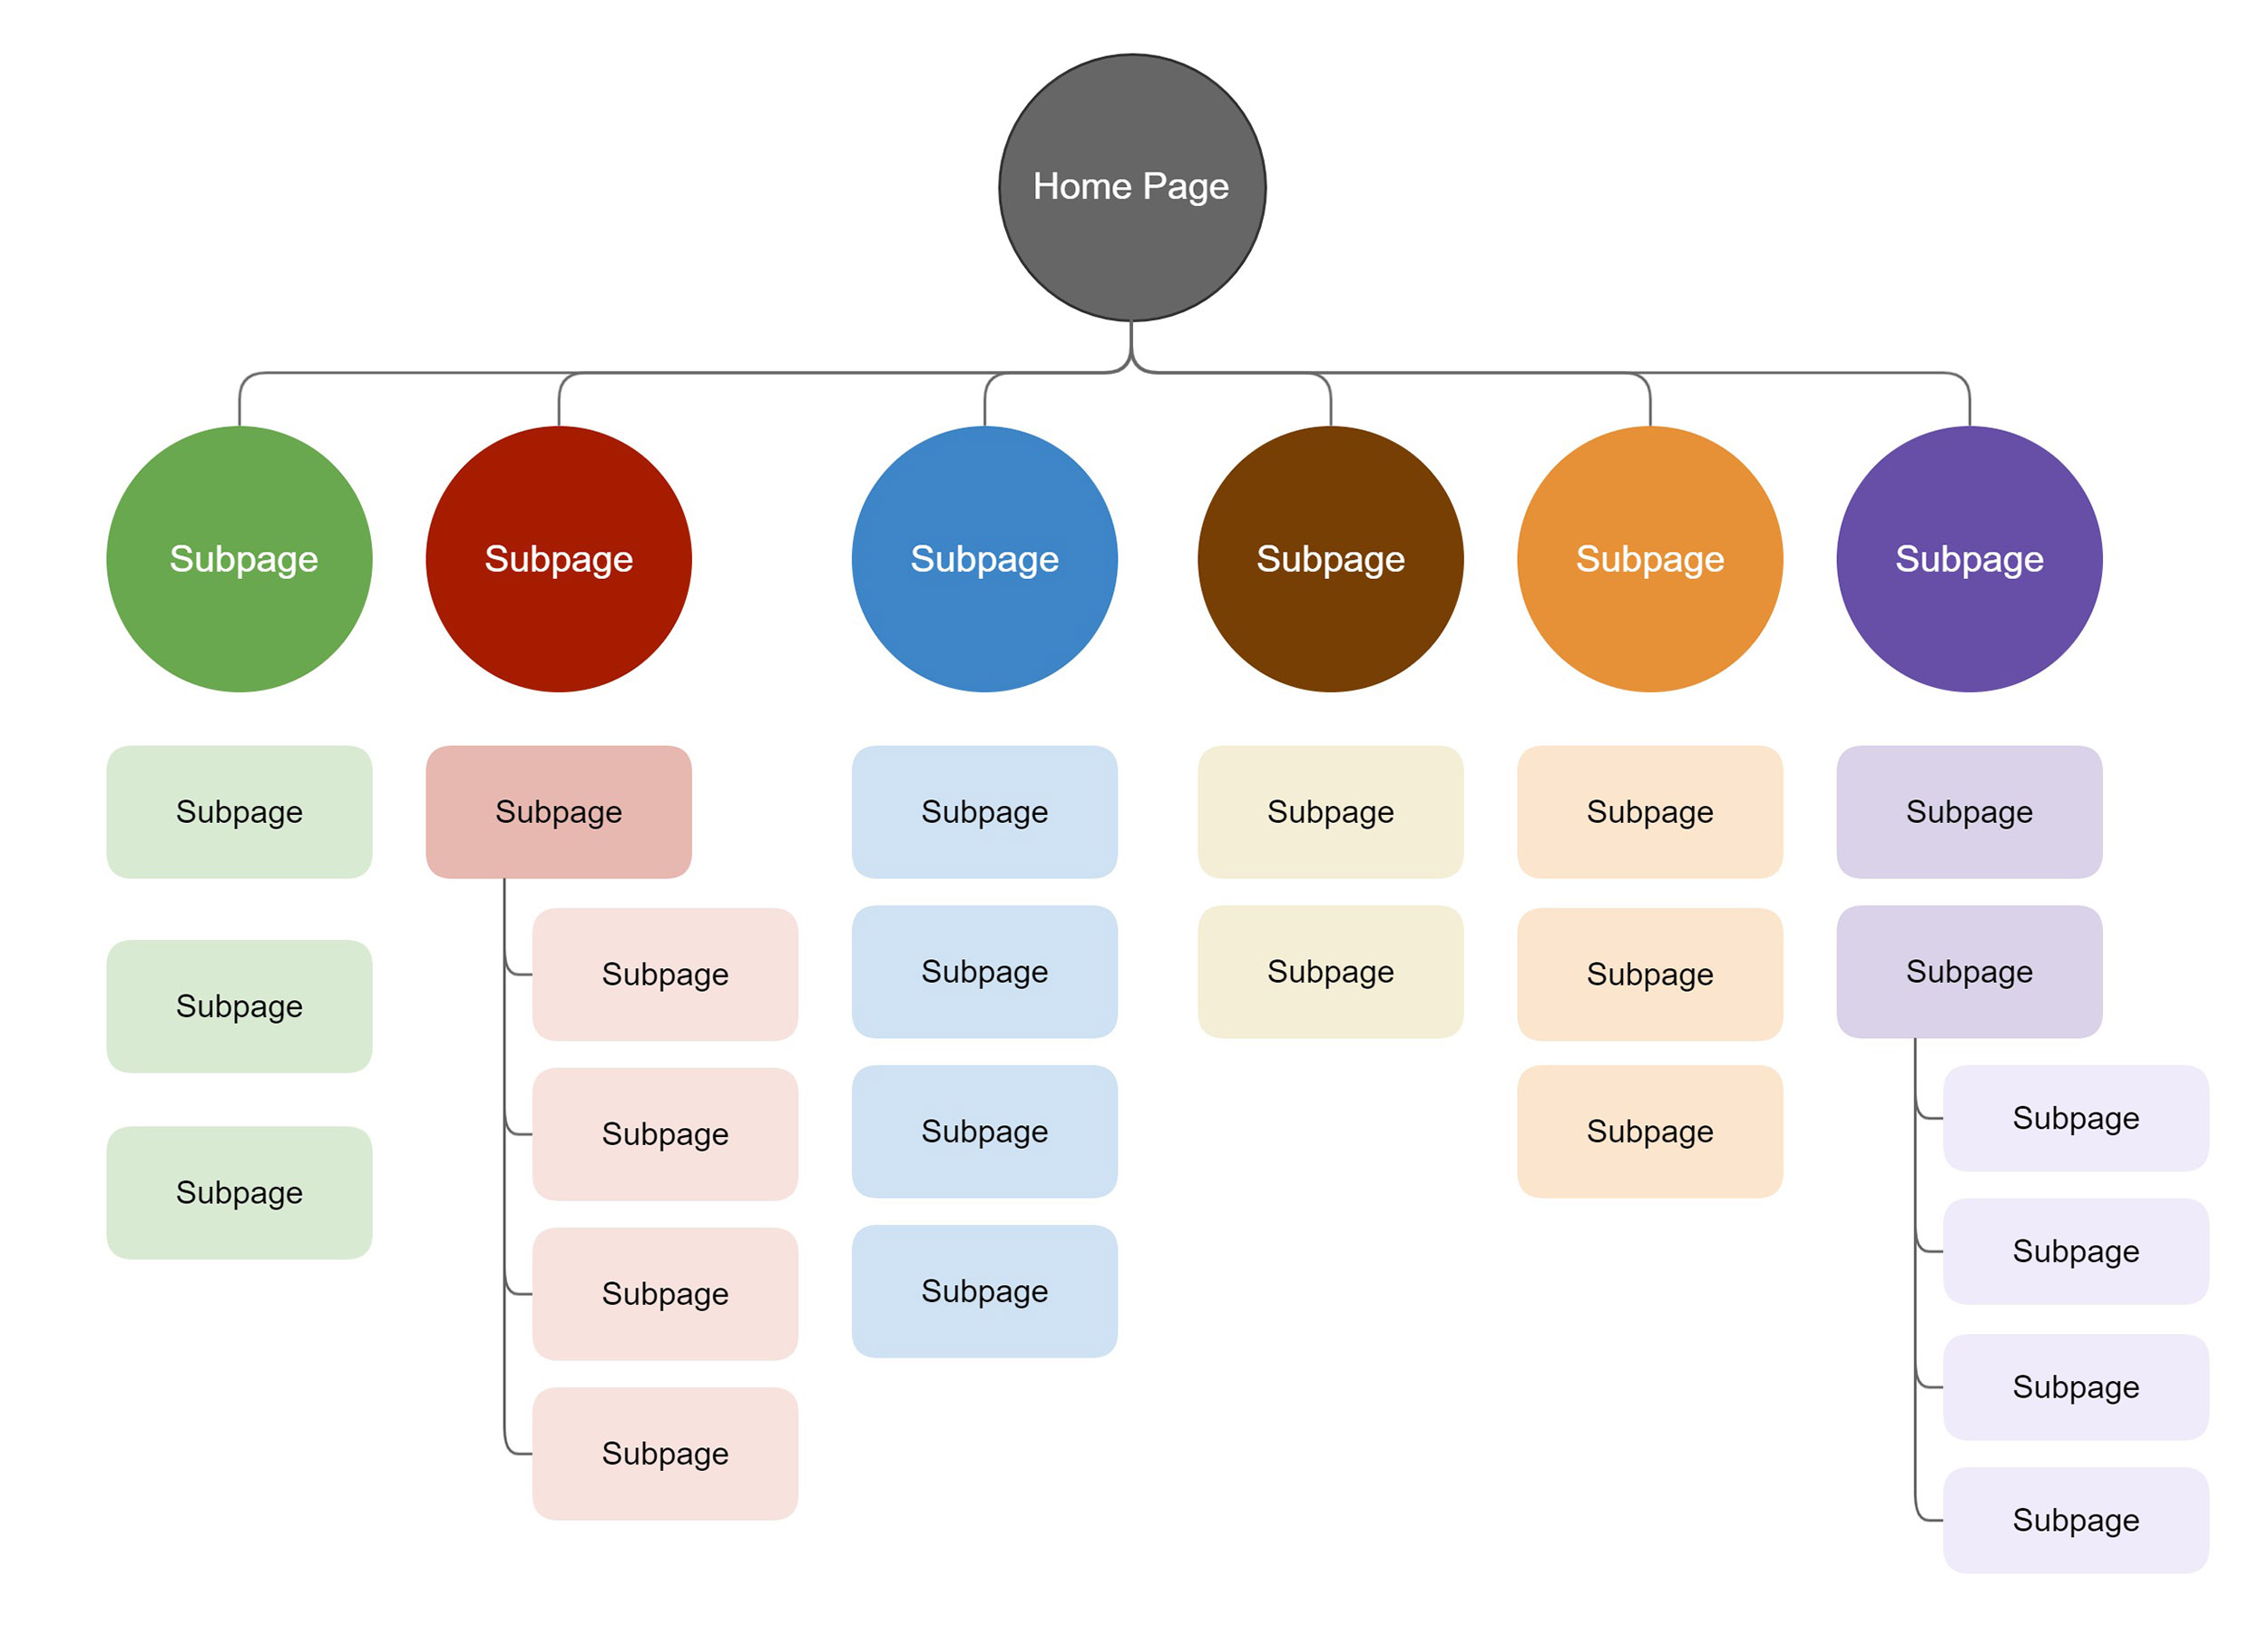
3. Deep Linking
Deep links take users directly to a specific subpage of a website, rather than just to the home page. Deep links facilitate internal website navigation and help direct external traffic to the content relevant to users, which makes them valuable for SEO. A deep link usually gets a higher value, because it represents a stronger recommendation.
-
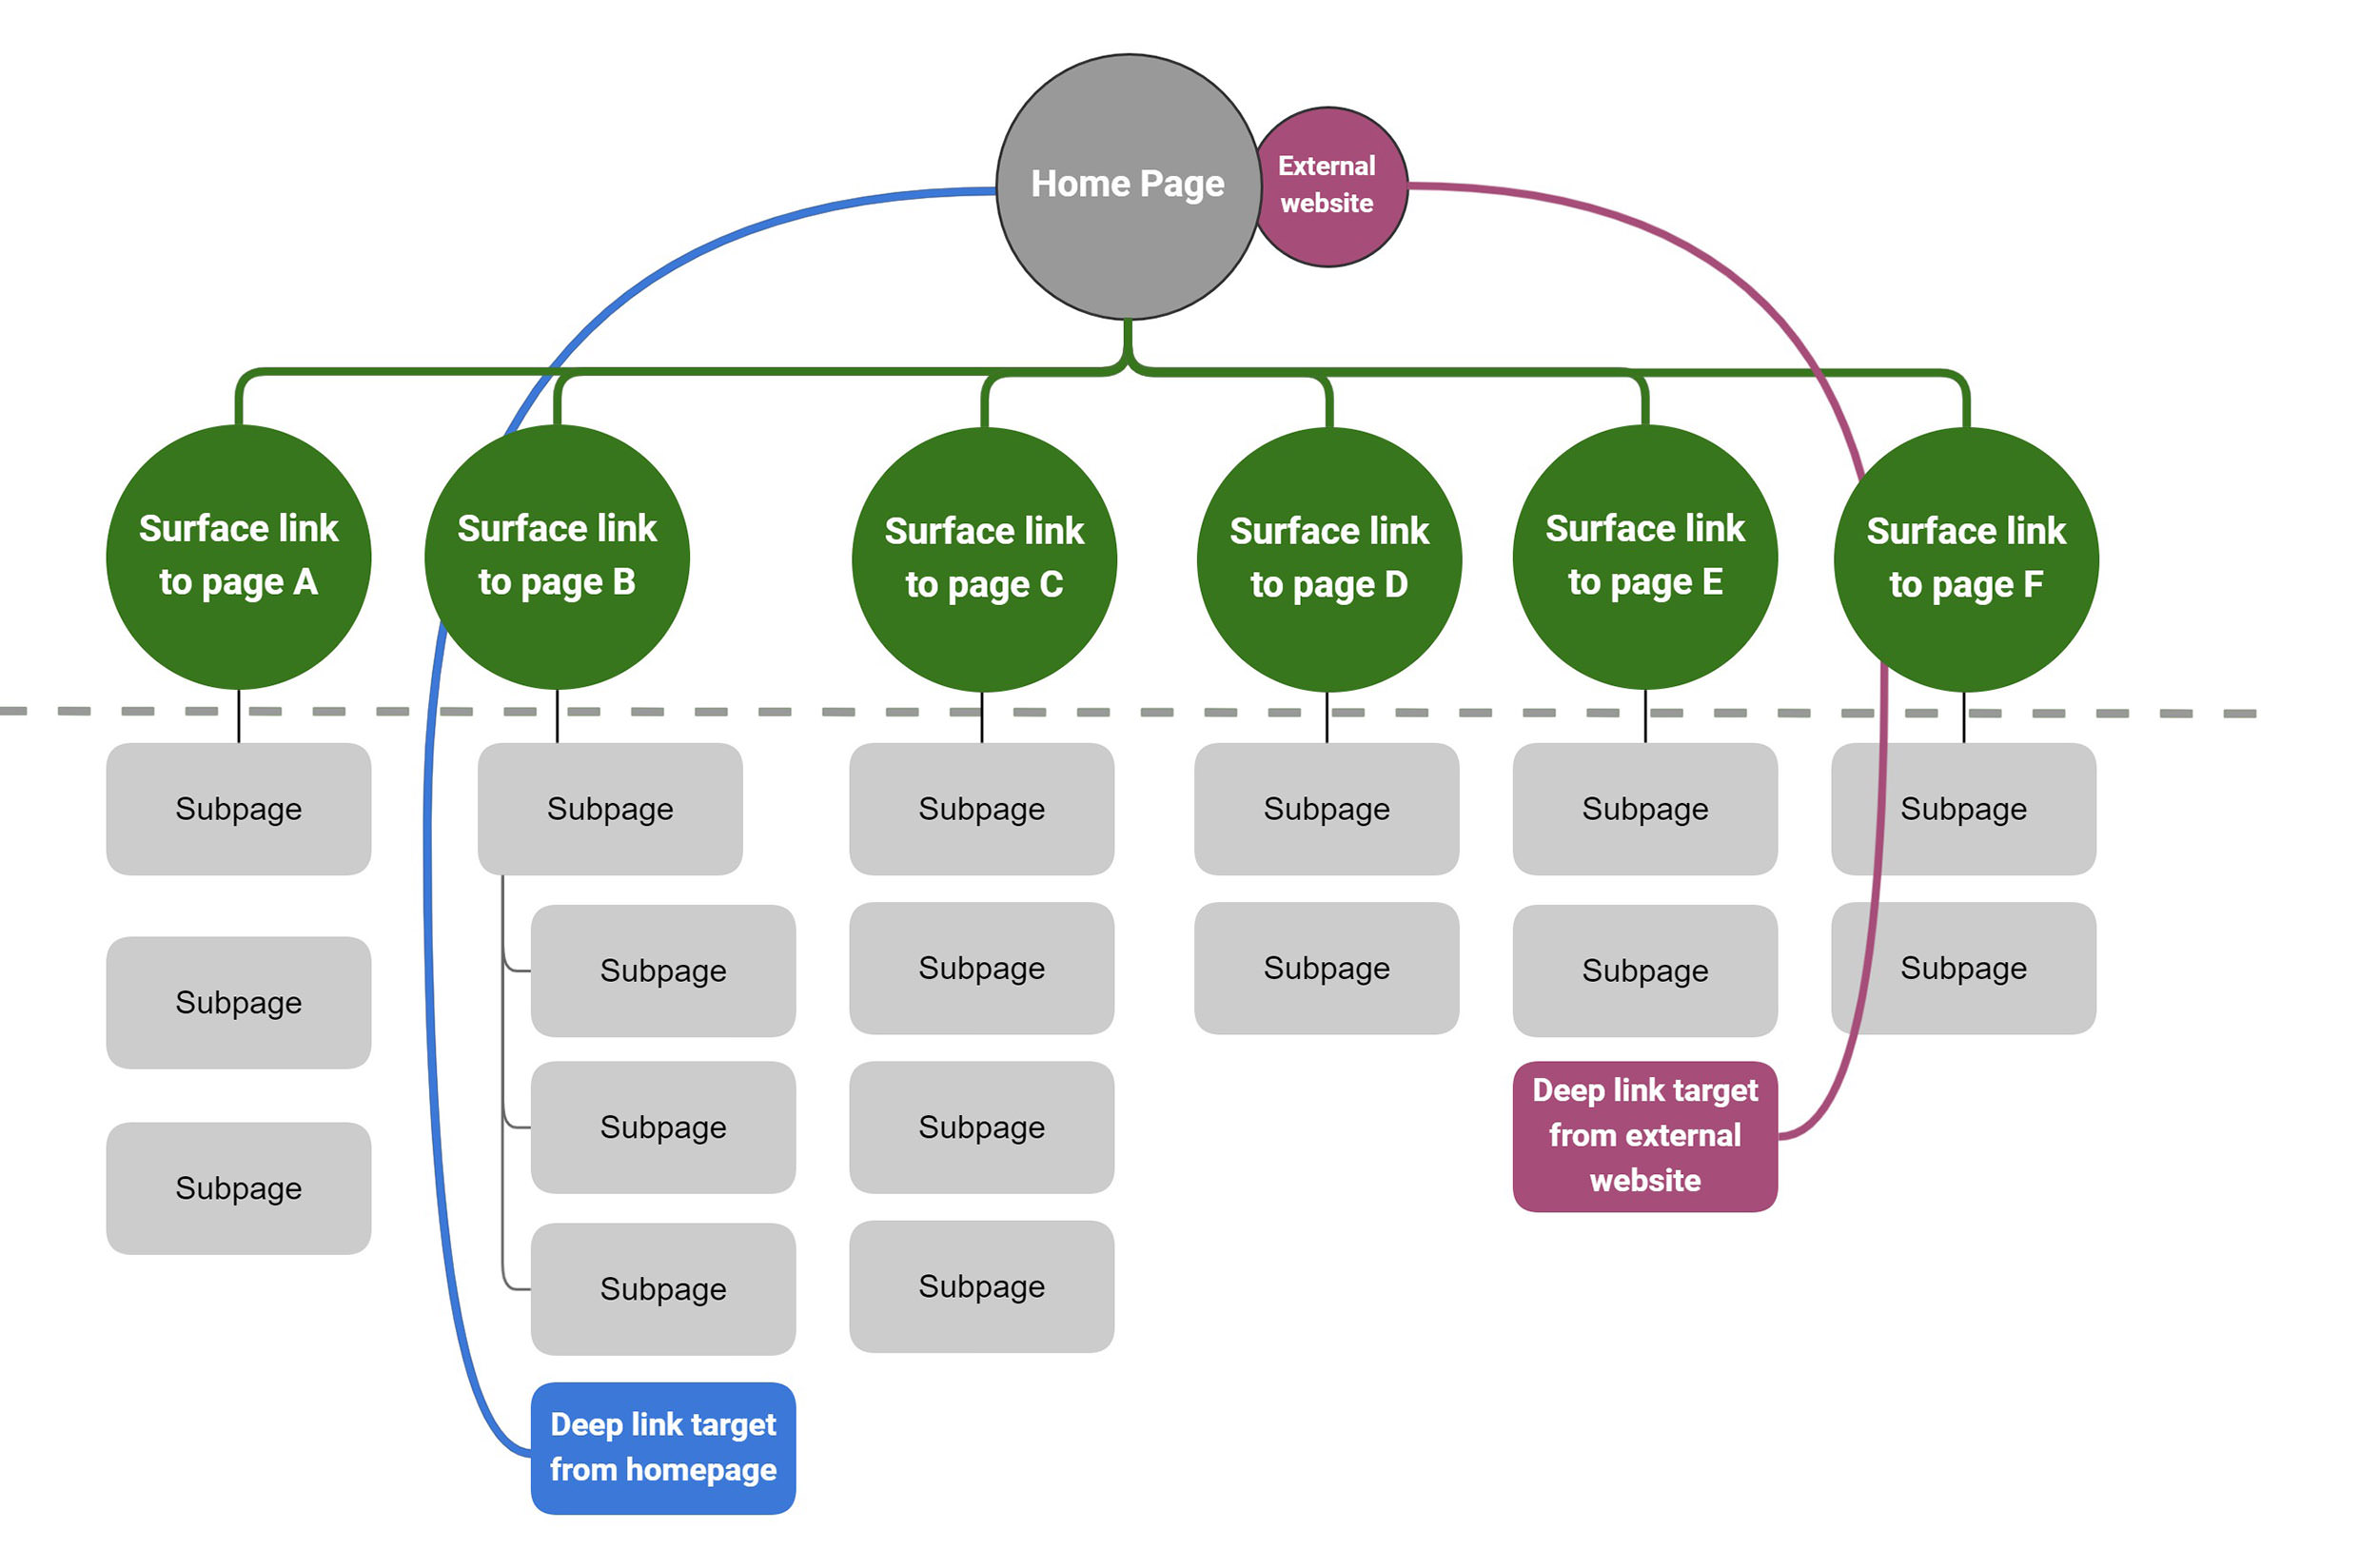
-
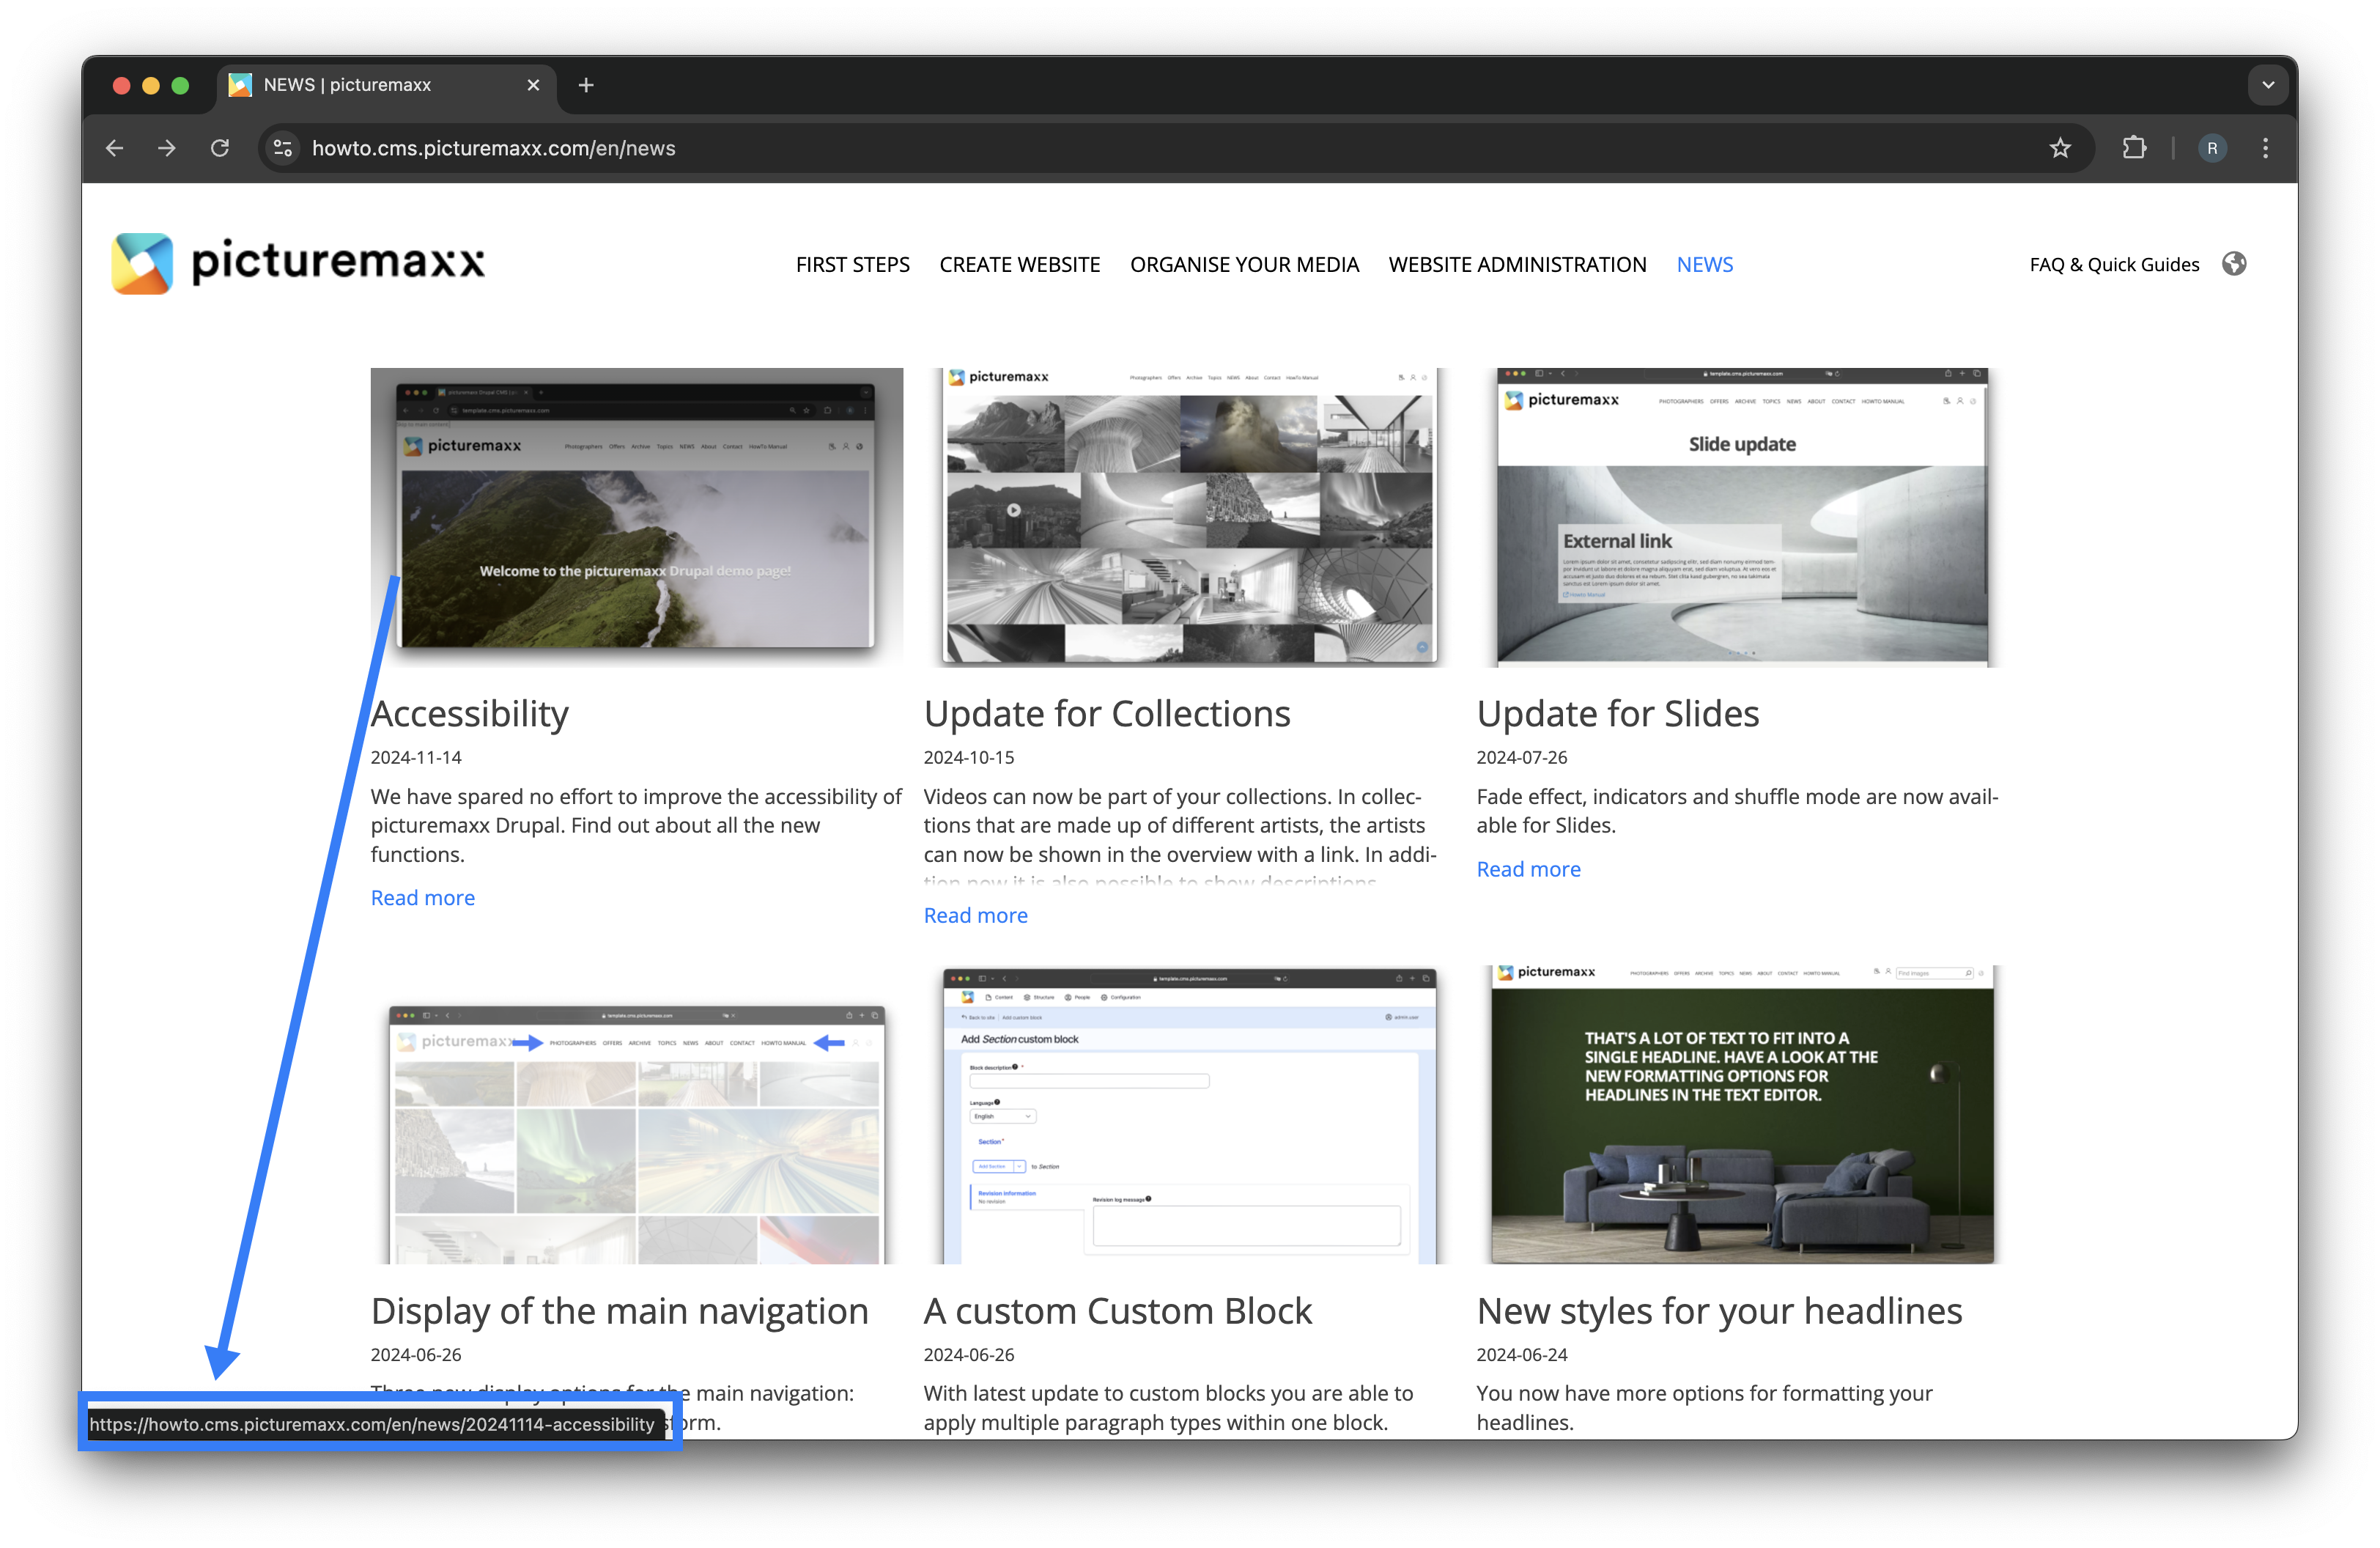
When you hover your mouse over the news article image, the link to the news subpage is displayed in the lower left corner of the browser. This is a deep link within your website.
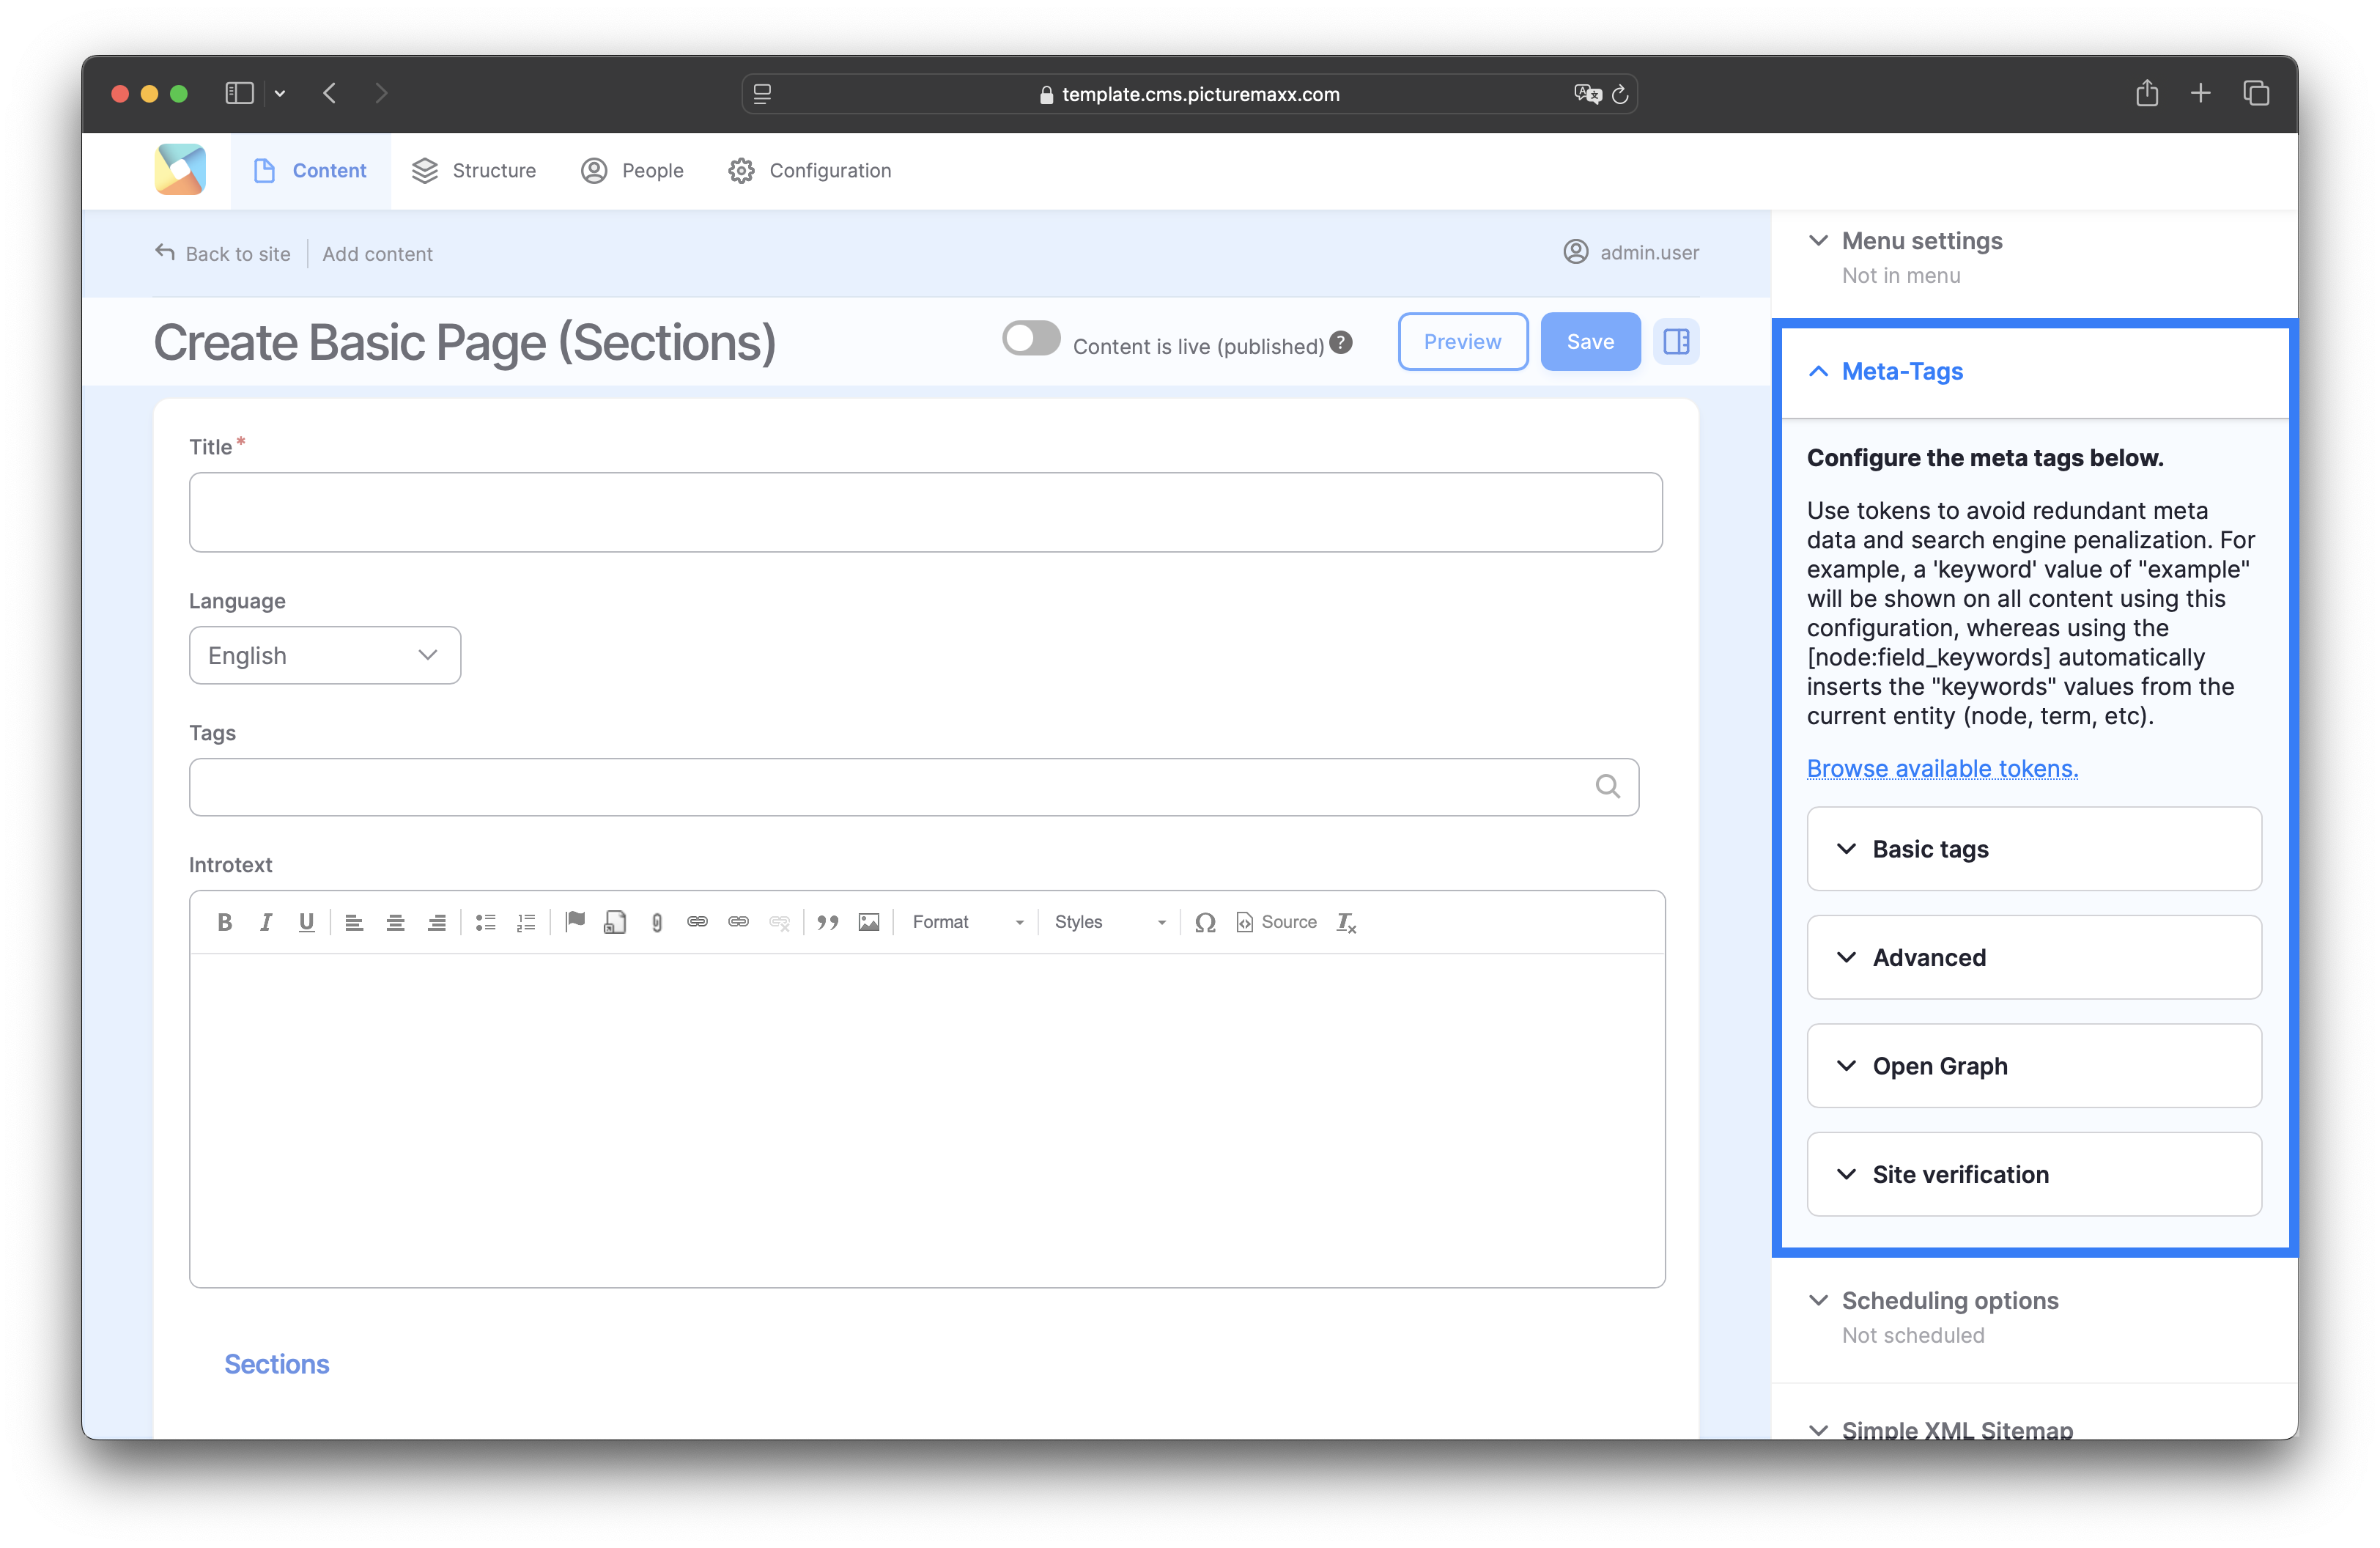
4. Meta-Tags and Site Verification
Meta Tags make it easier for your website to be found. You can consider Basic and Advanced Tags. For Social Media you've got Open Graph settings to work with and Site verification will improve your credibility with search engines. Refer to the Meta-Tags & Site Verification page to learn how to configure the settings.
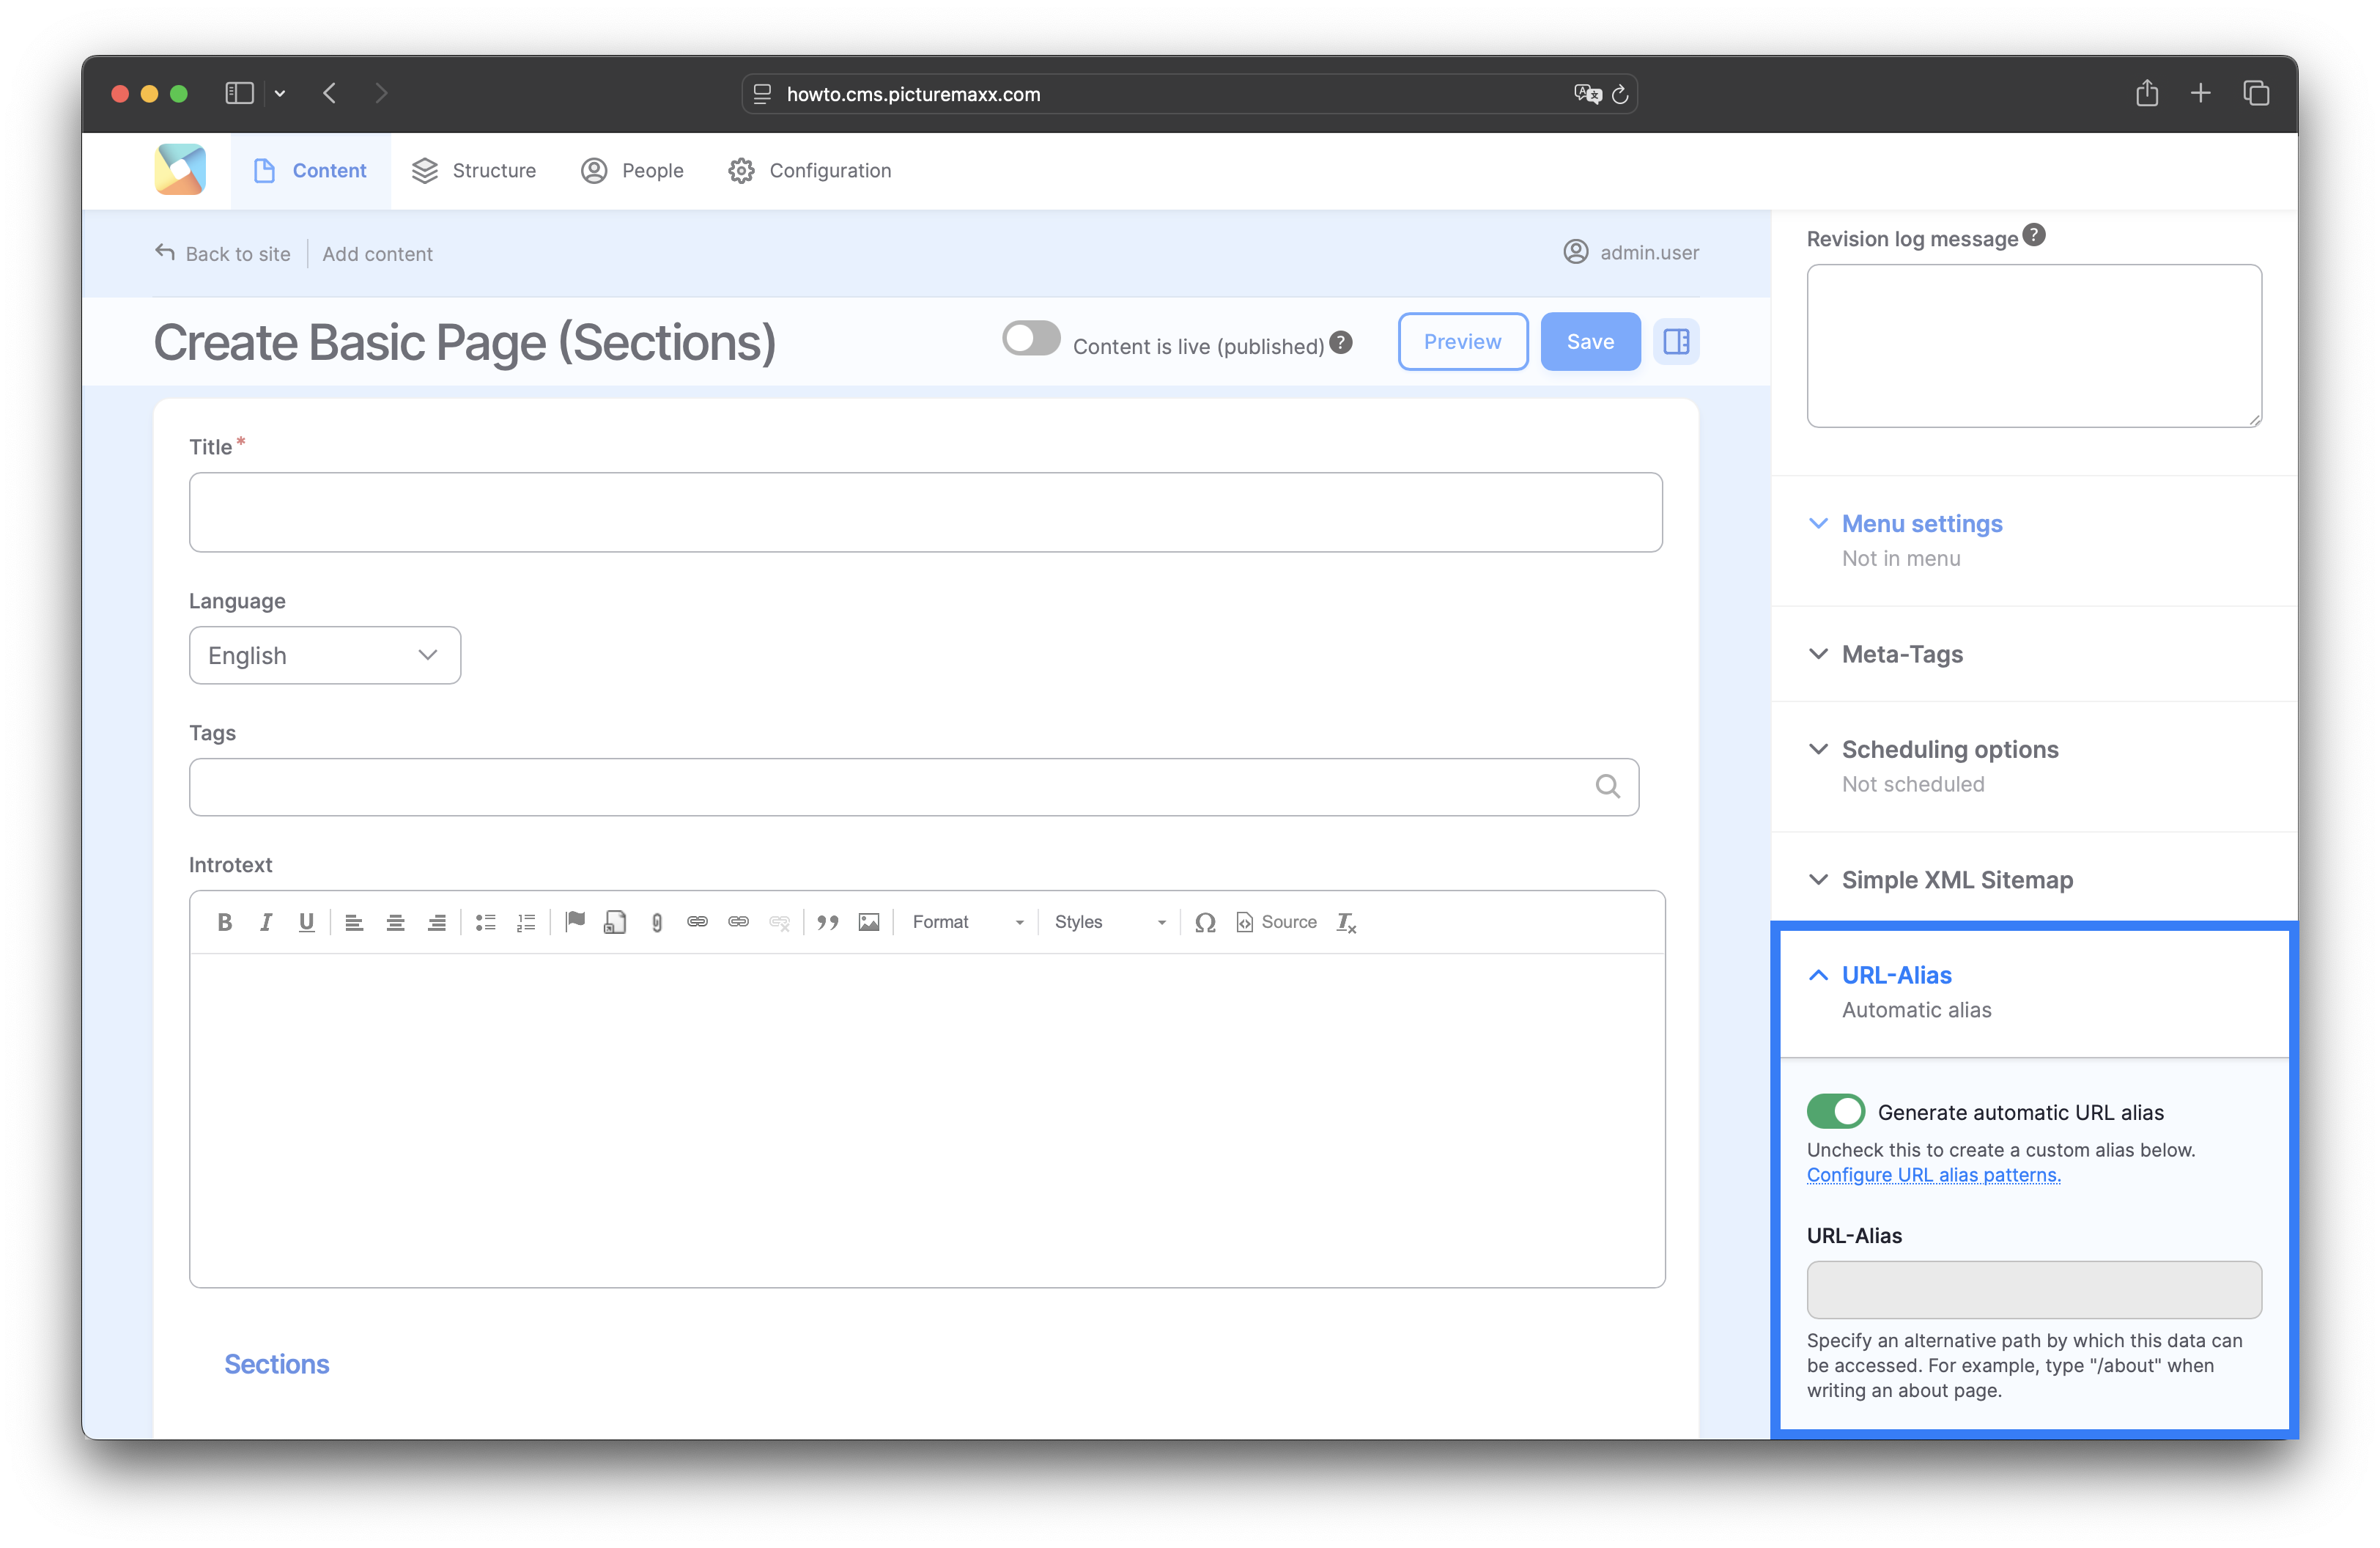
5. URL Alias
URL Alias allows defining simple aliases for complex URLs to help access your website faster from the address bar. To create an URL alias:
- Unfold the URL- Alias item in the sidebar that appears on the right of each setup page.
- Disable the Generate automatic URL alias option.
- Type an alternate URL. For example /new-page instead of .../.../pages/new-page
NOTE: If Generate automatic URL alias is disabled, the later changes to the page title are not applied to the URL.
Recommended: As a rule, you require an URL alias very rarely. In most cases it makes more sense to keep the default Generate automatic URL option enabled.
6. Analytics & Integration
-
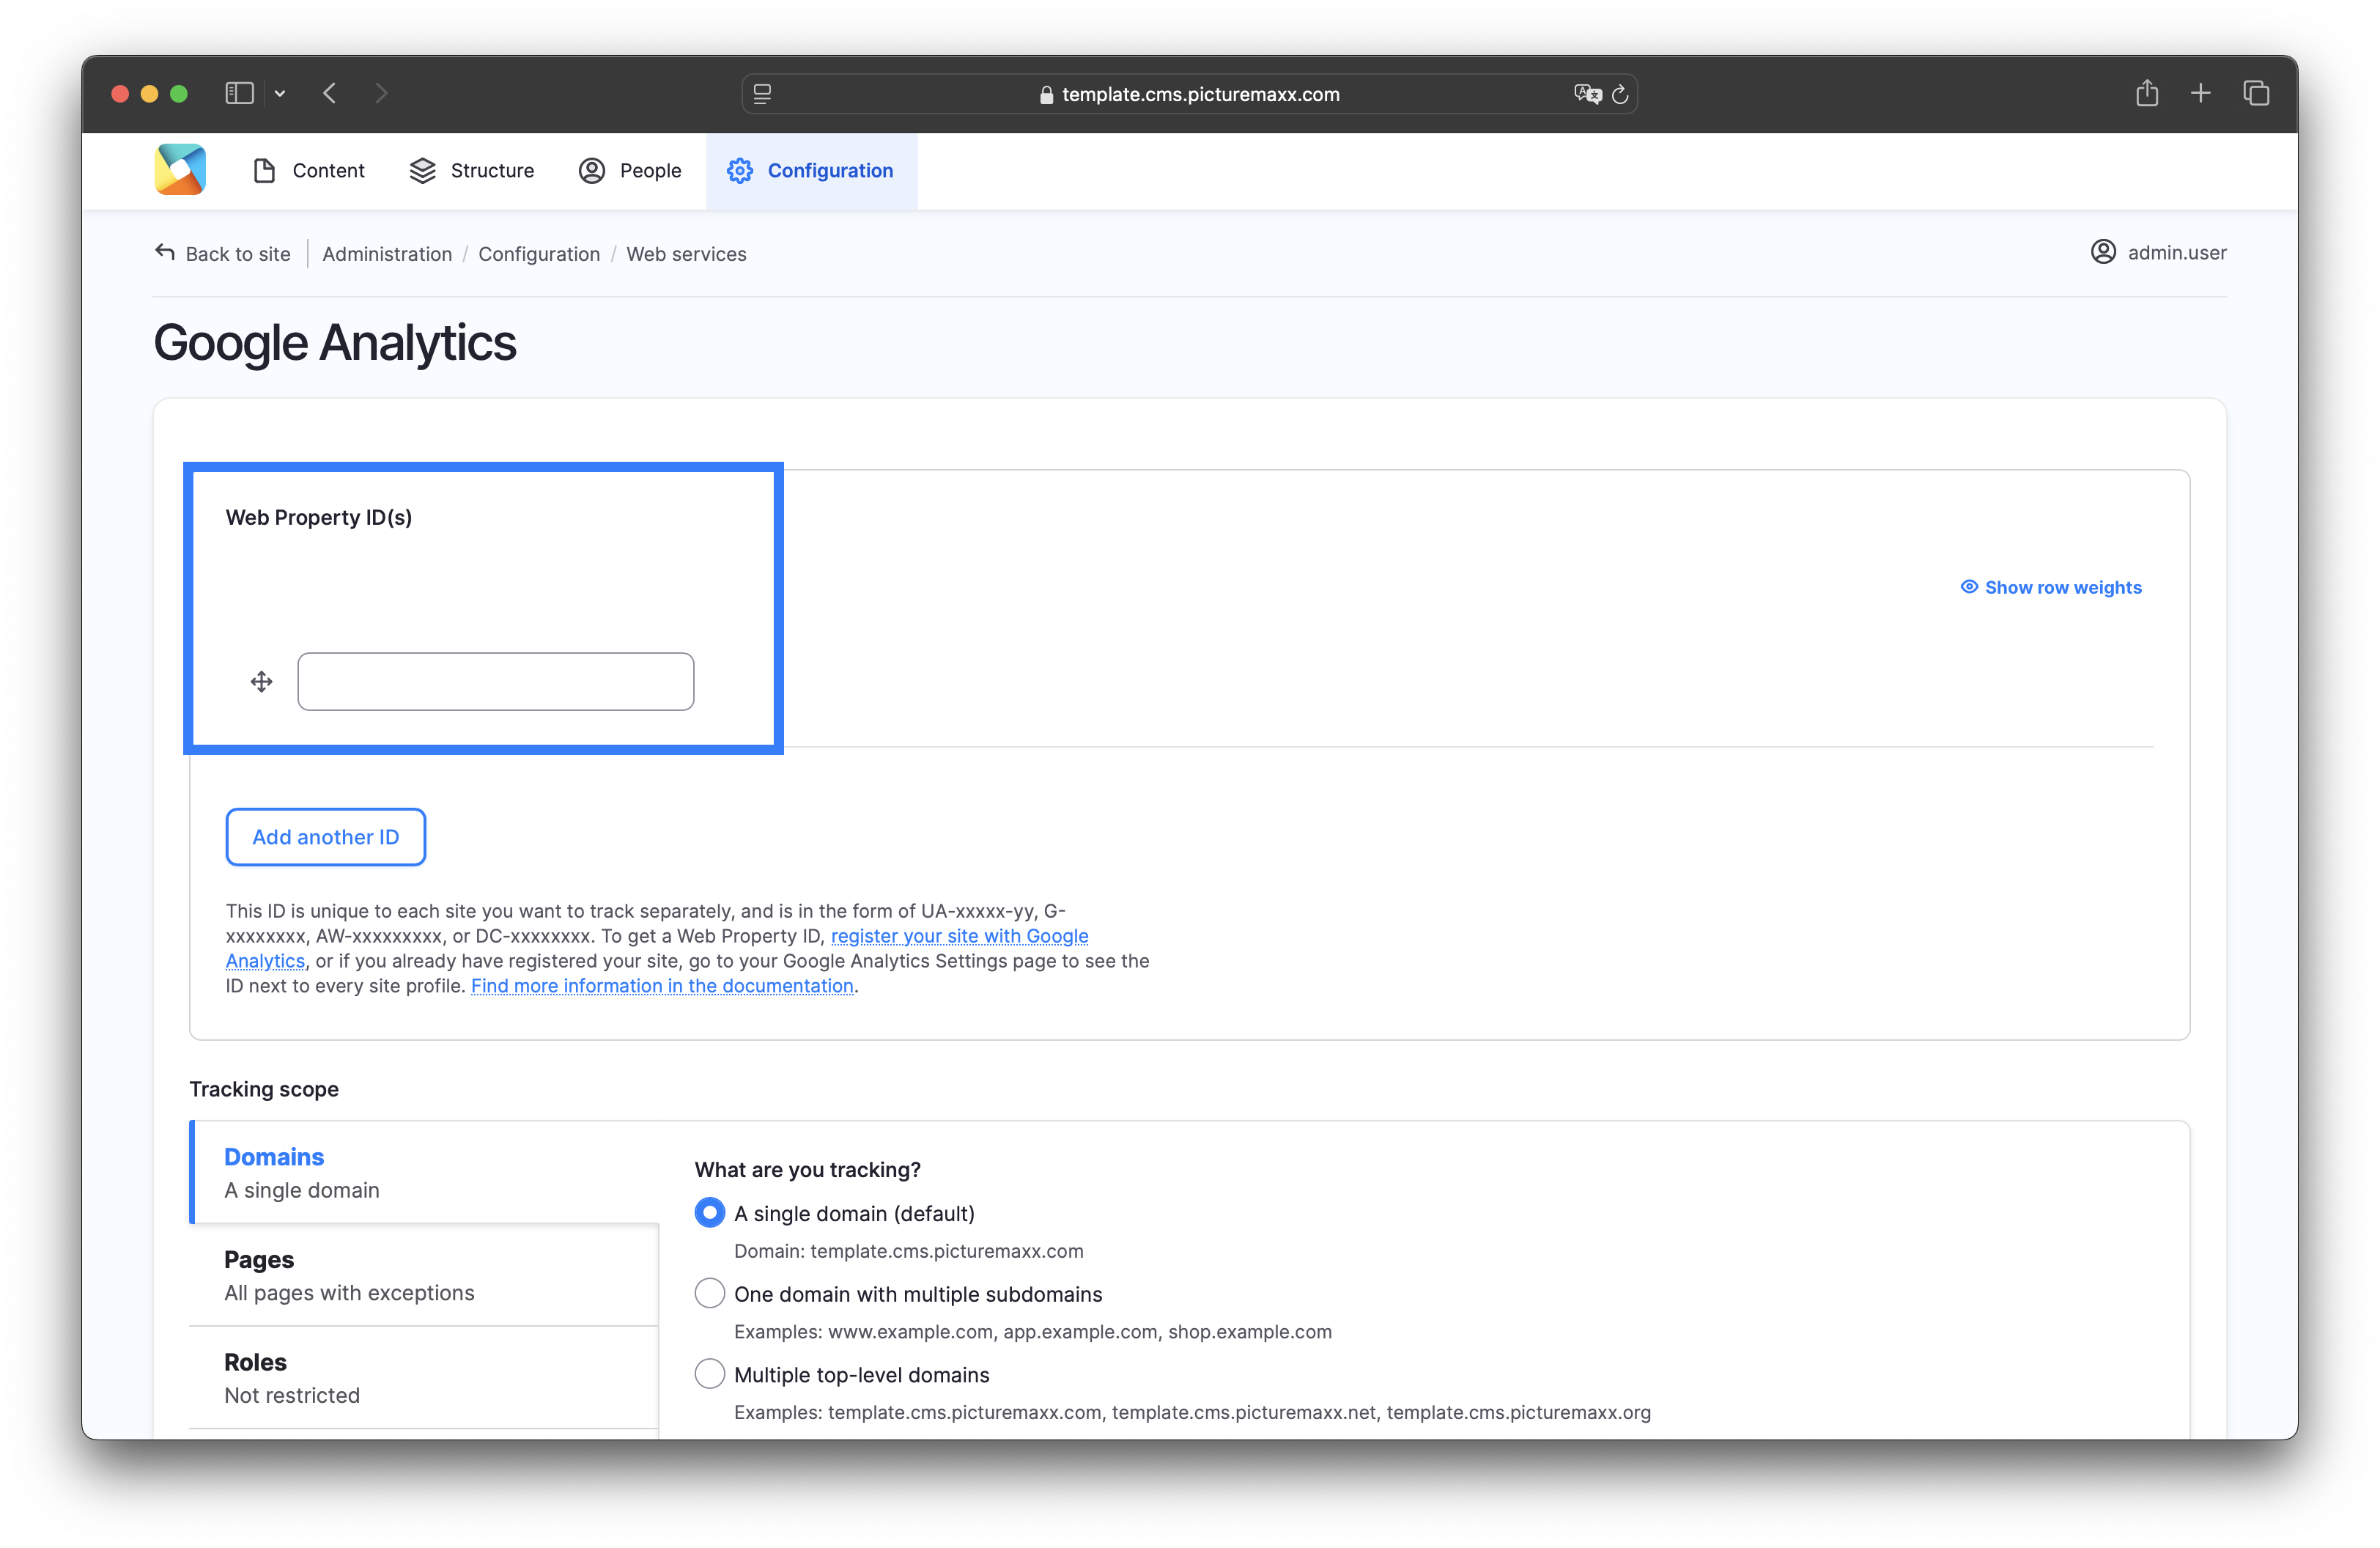
To use Analytics, you need to register your site with Google Analytics and get your Web Property ID there.
For detailed information on setting up and managing Google Analytics, please visit the Google Marketing Platform website: https://marketingplatform.google.com/about/analytics/
In the main navigation go to: Configuration → Web Services → Google Analytics
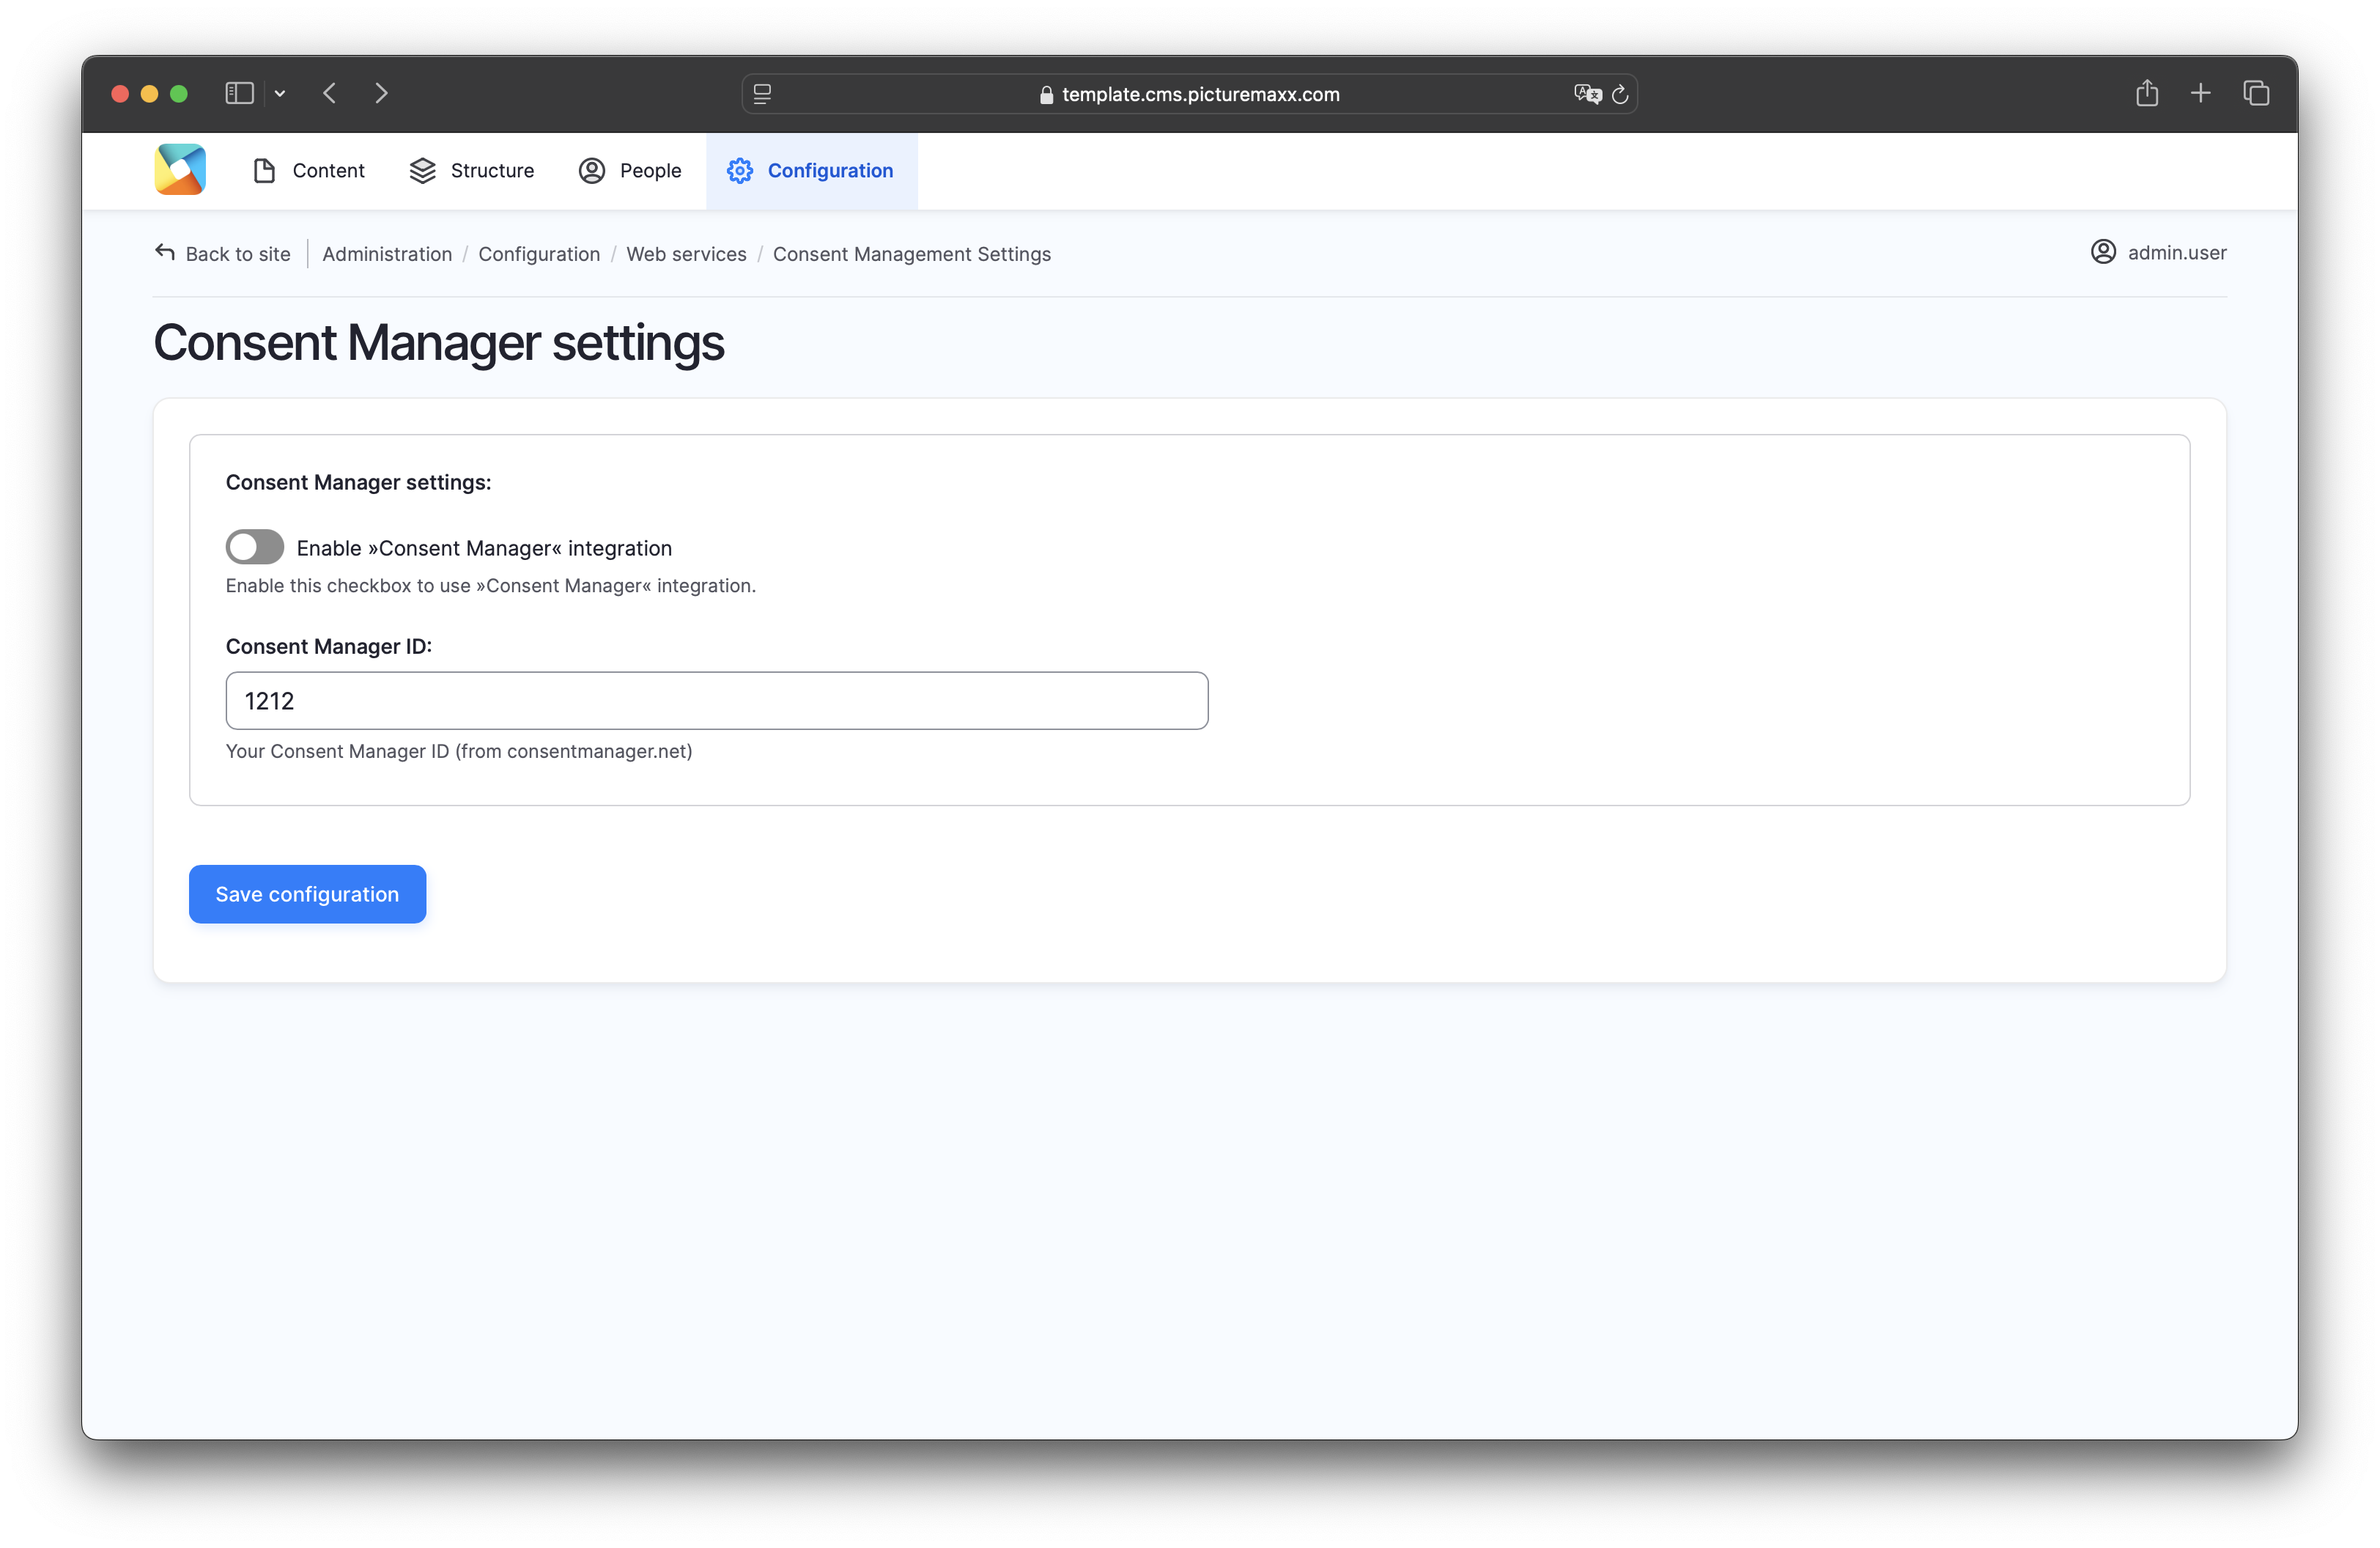
7. Cookie Banner
Almost no website can do without a Cookie Banner anymore. picturemaxx Drupal offers two possibilities to work with: Consent Manager and Usercentrics.
-
To enable this on your website, create an account in Consent Manager and get a Consent Manager ID there.
In Main Administrative Navigation, go to Configuration → Web services → Consent Management → Consent Manager Settings.
- Activate the option Enable »Consent Manager« integration.
- Enter your Consent Manager ID.
- Save configuration.
-
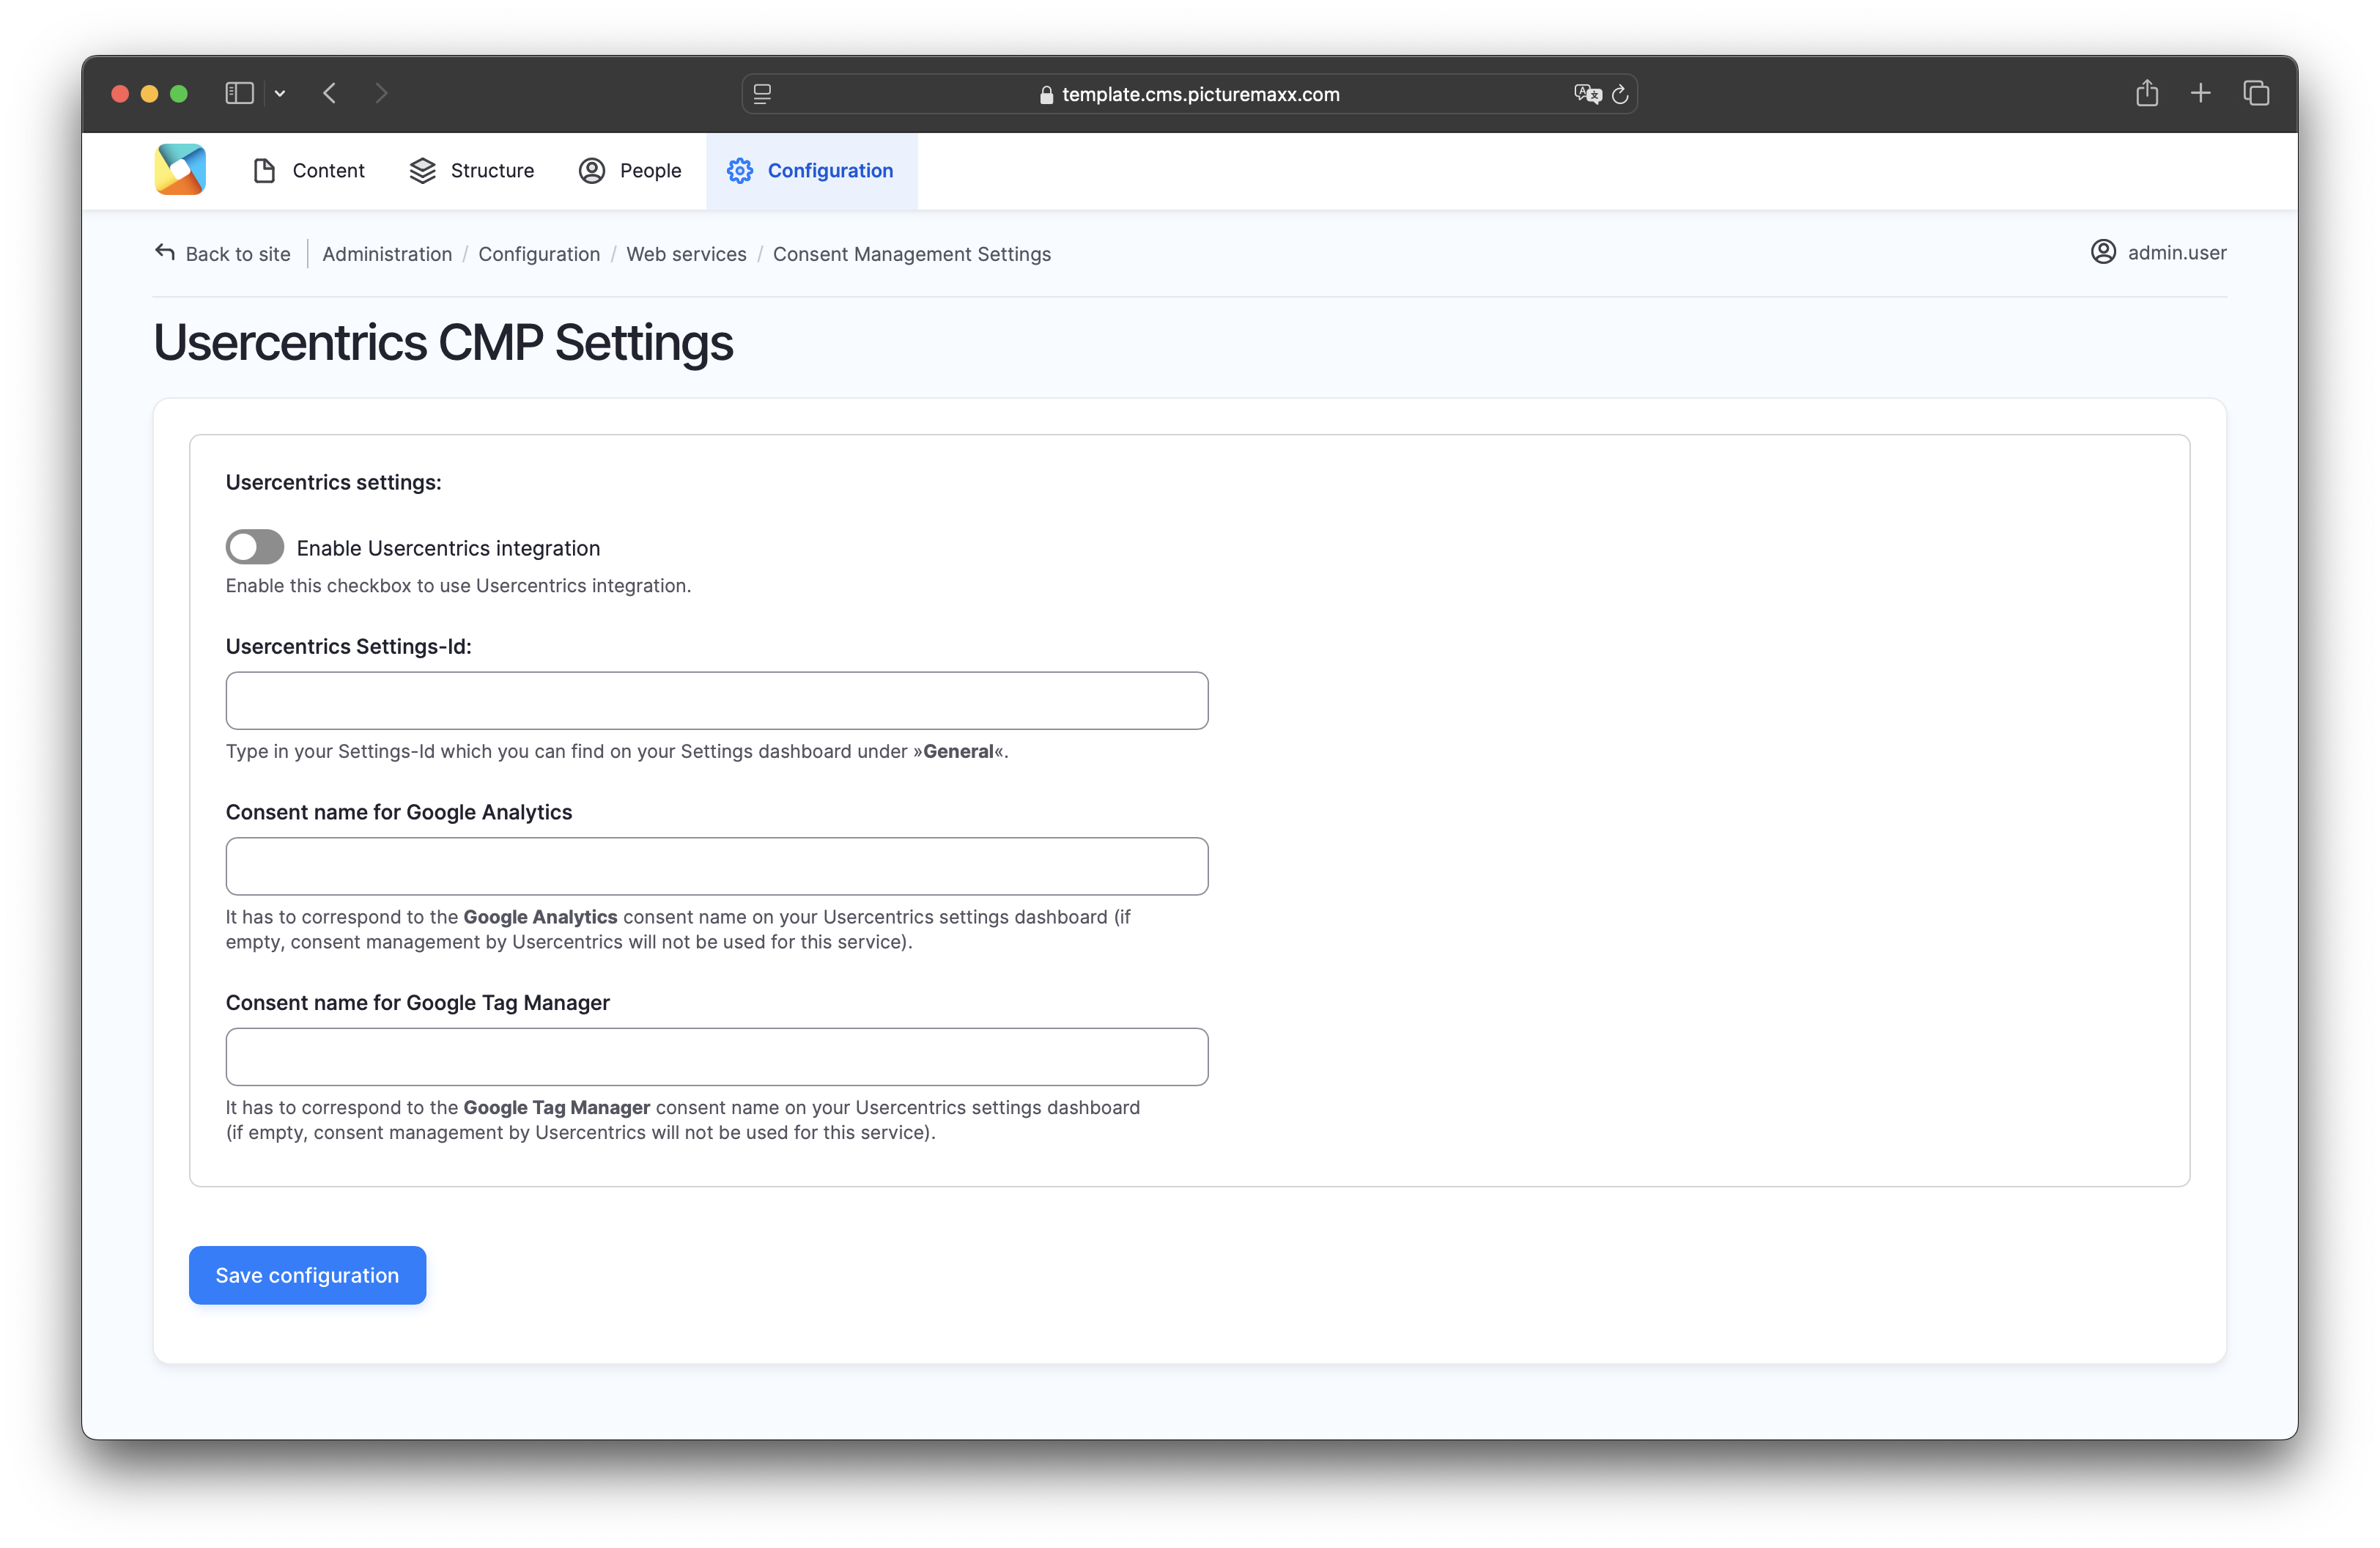
To enable this on your website, create an account at Usercentrics and get an ID there (on the Usercentrics dashboard under General)
In Main Administrative Navigation, go to Configurations → Web Services → Consent Management → Usercentrics CMP Settings
- Activate the option Enable Usercentrics integration.
- Enter your Usercentrics ID and Consent Names for Google Analytics and Google Tag Manager.
- Save configuration.