Home → Website administration → Taxonomy
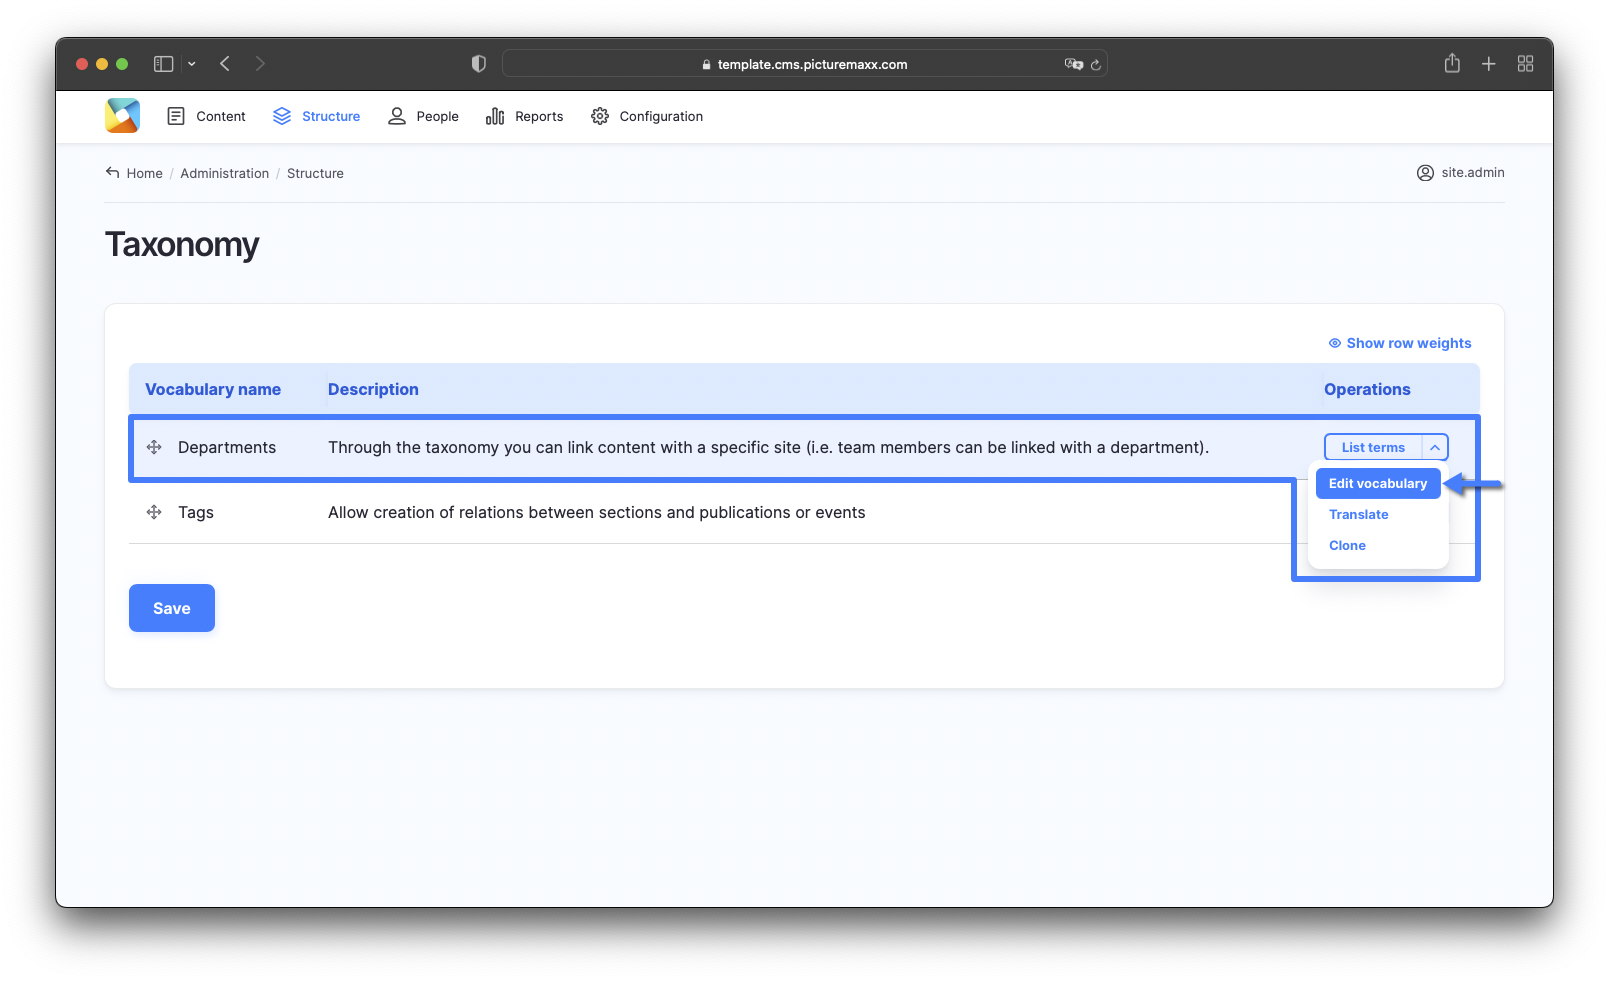
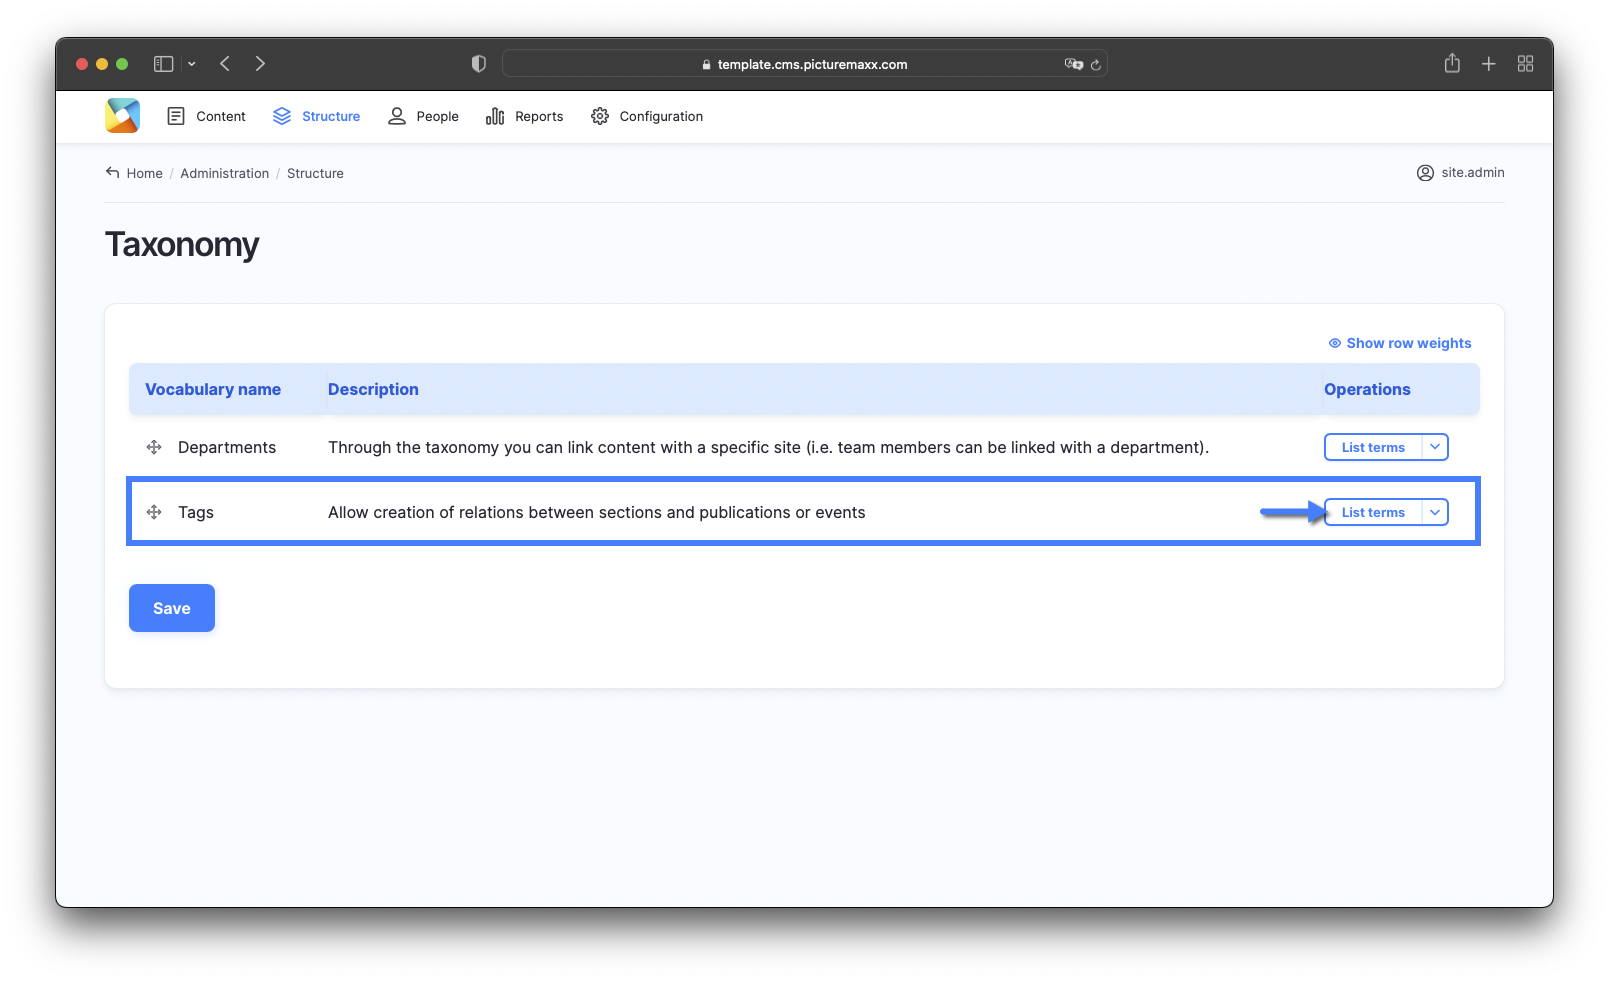
Taxonomy
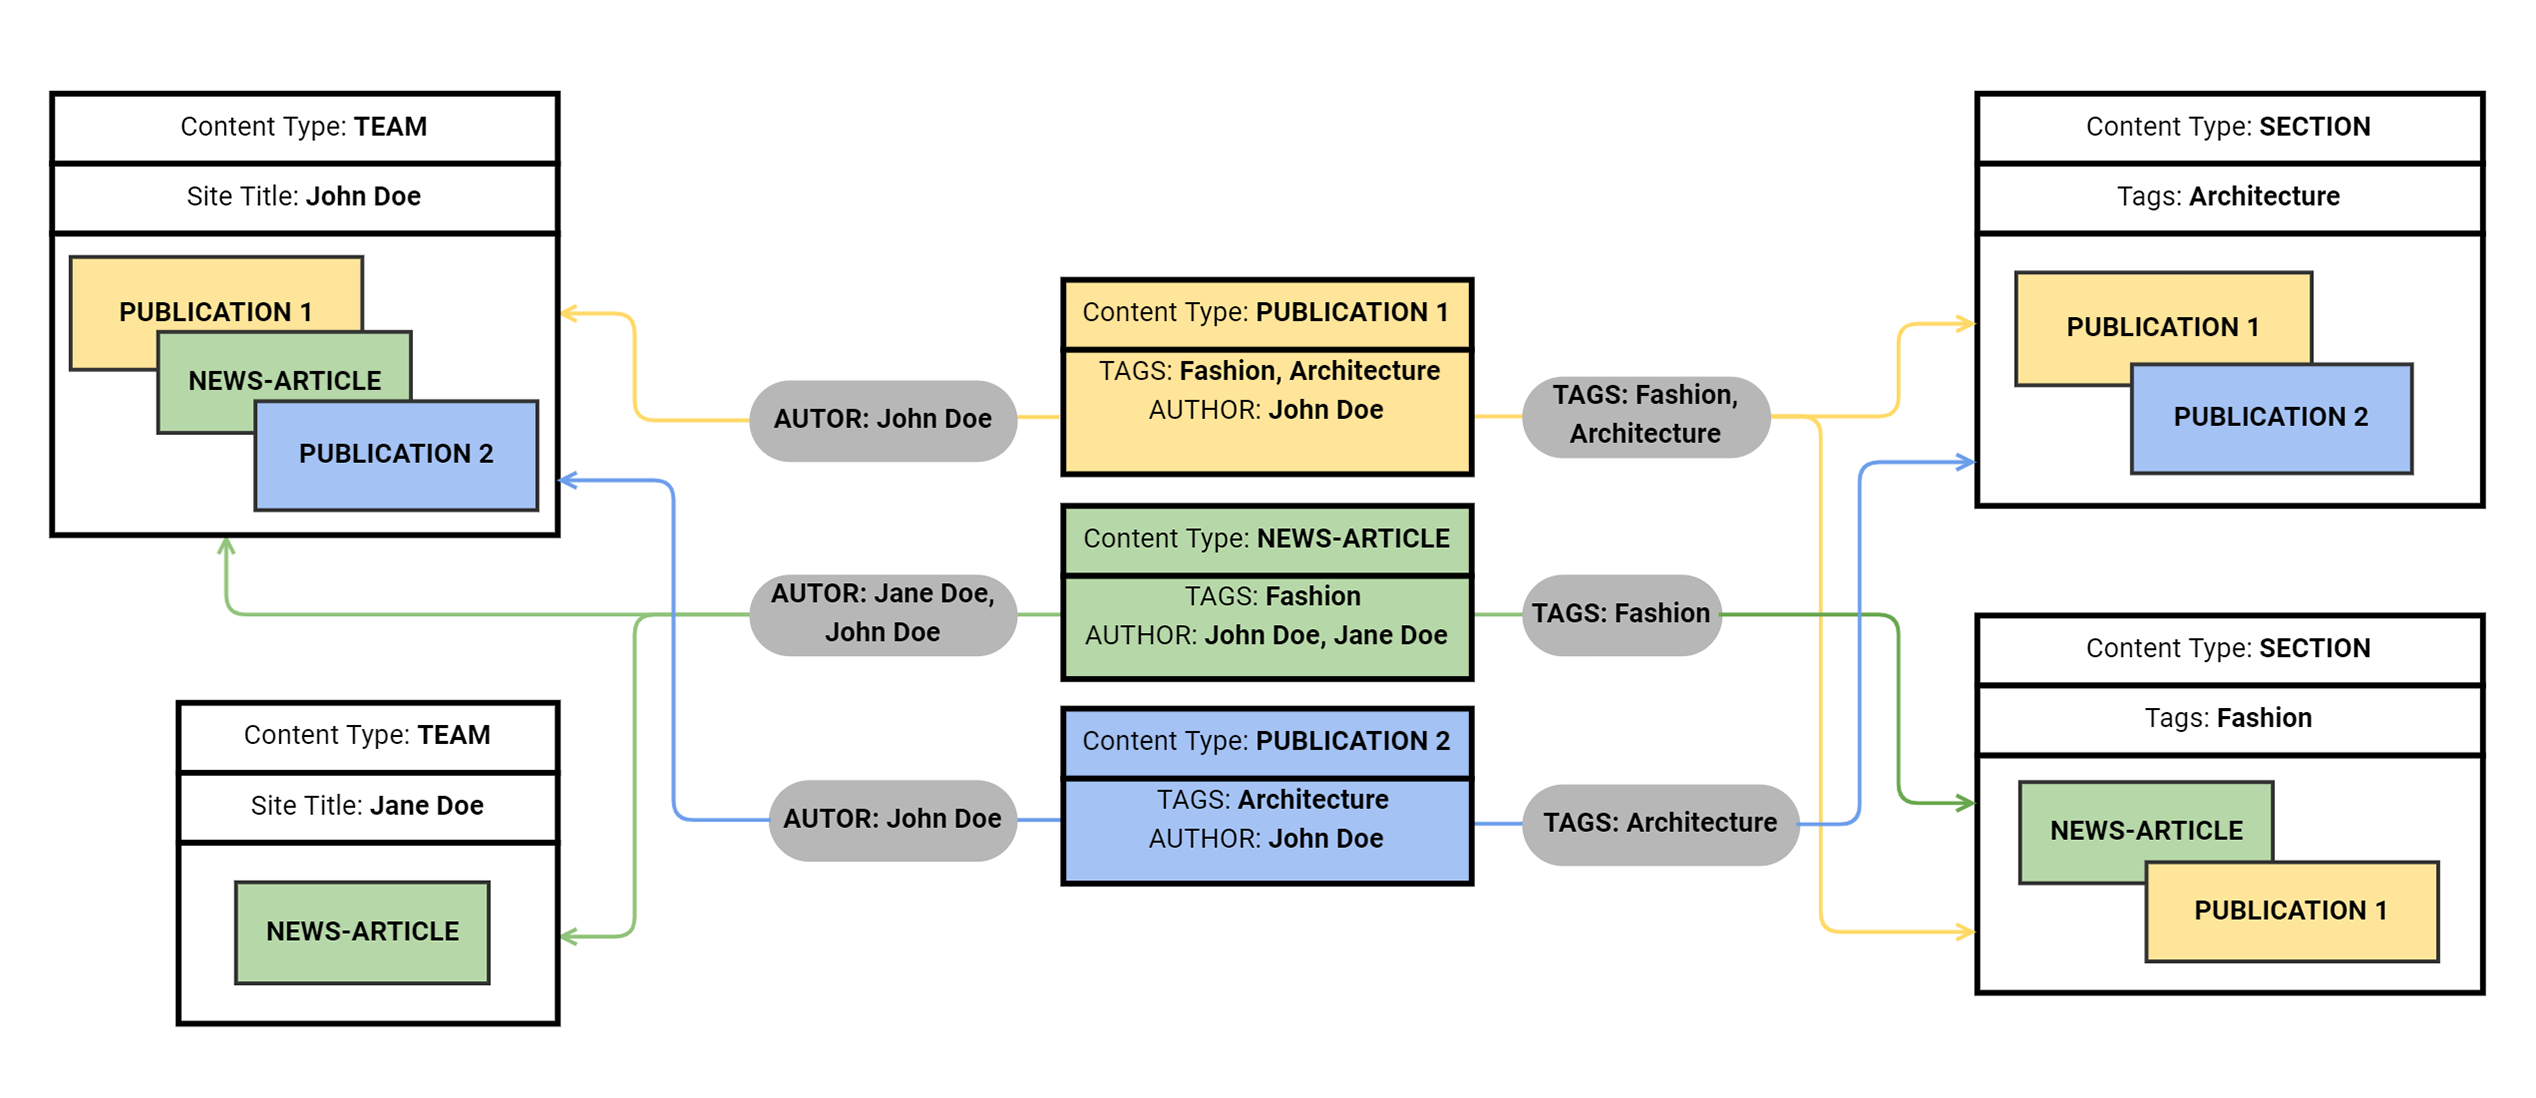
Taxonomy is a powerful tool that allows you to classify, relate and connect your website content. Using Taxonomy for Tags and Authors you can efficiently present topics on several pages, without having to duplicate content over and over again.
Explanation of each field
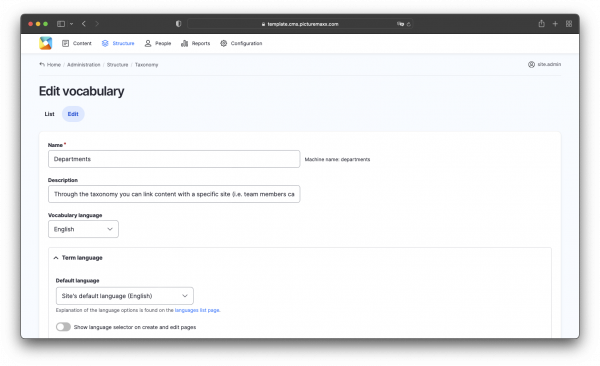
Name
Enter the name of the vocabulary (i.e. Department)Description
Optionally enter a description of the vocabulary.Vocabulary language
Choose a language for the vocabulary.
Explanation of each field
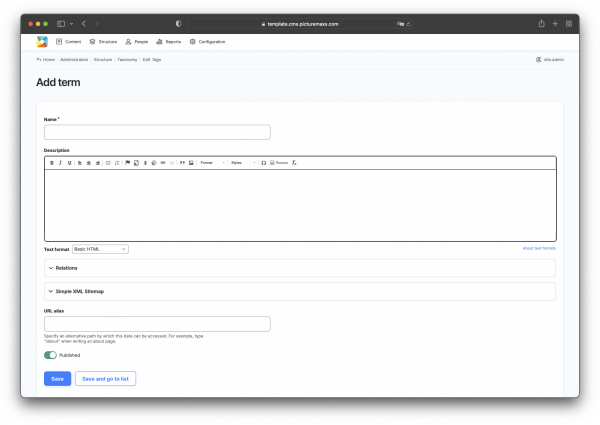
Name
Enter the new term here.Description
Optionally you can add a description of the term.
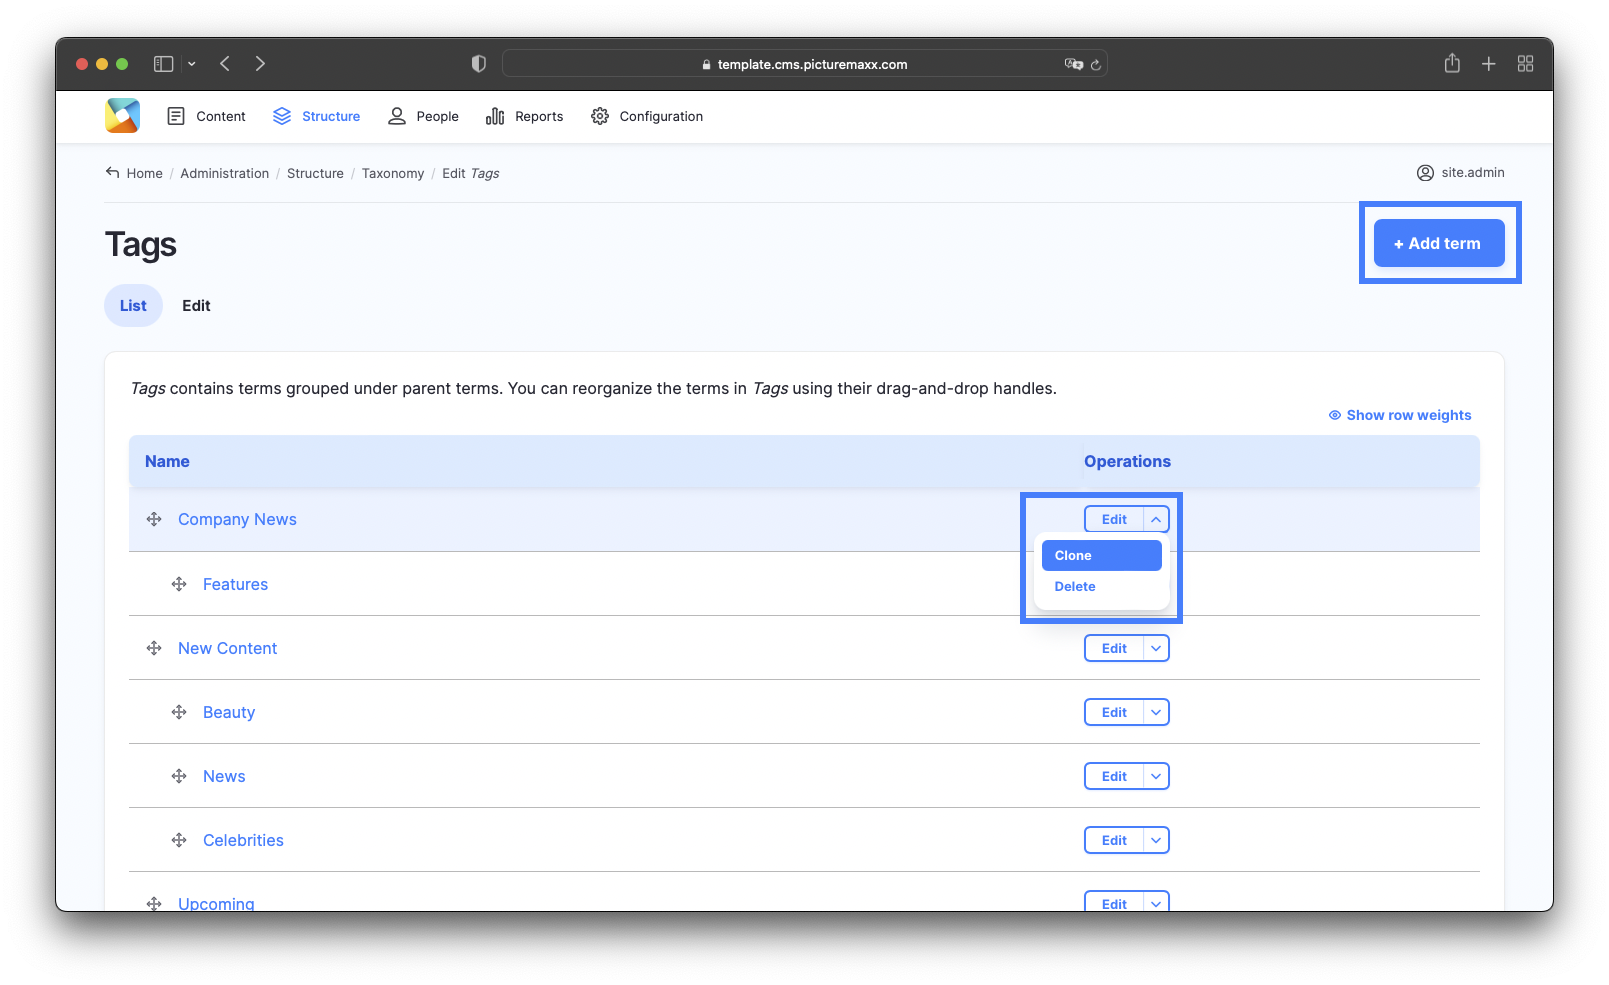
Witihn the Vocabulary List you can edit and delete existing terms or a add a new term. With the drag and drop function you can reorder them and also indent them to create a hierarchy.
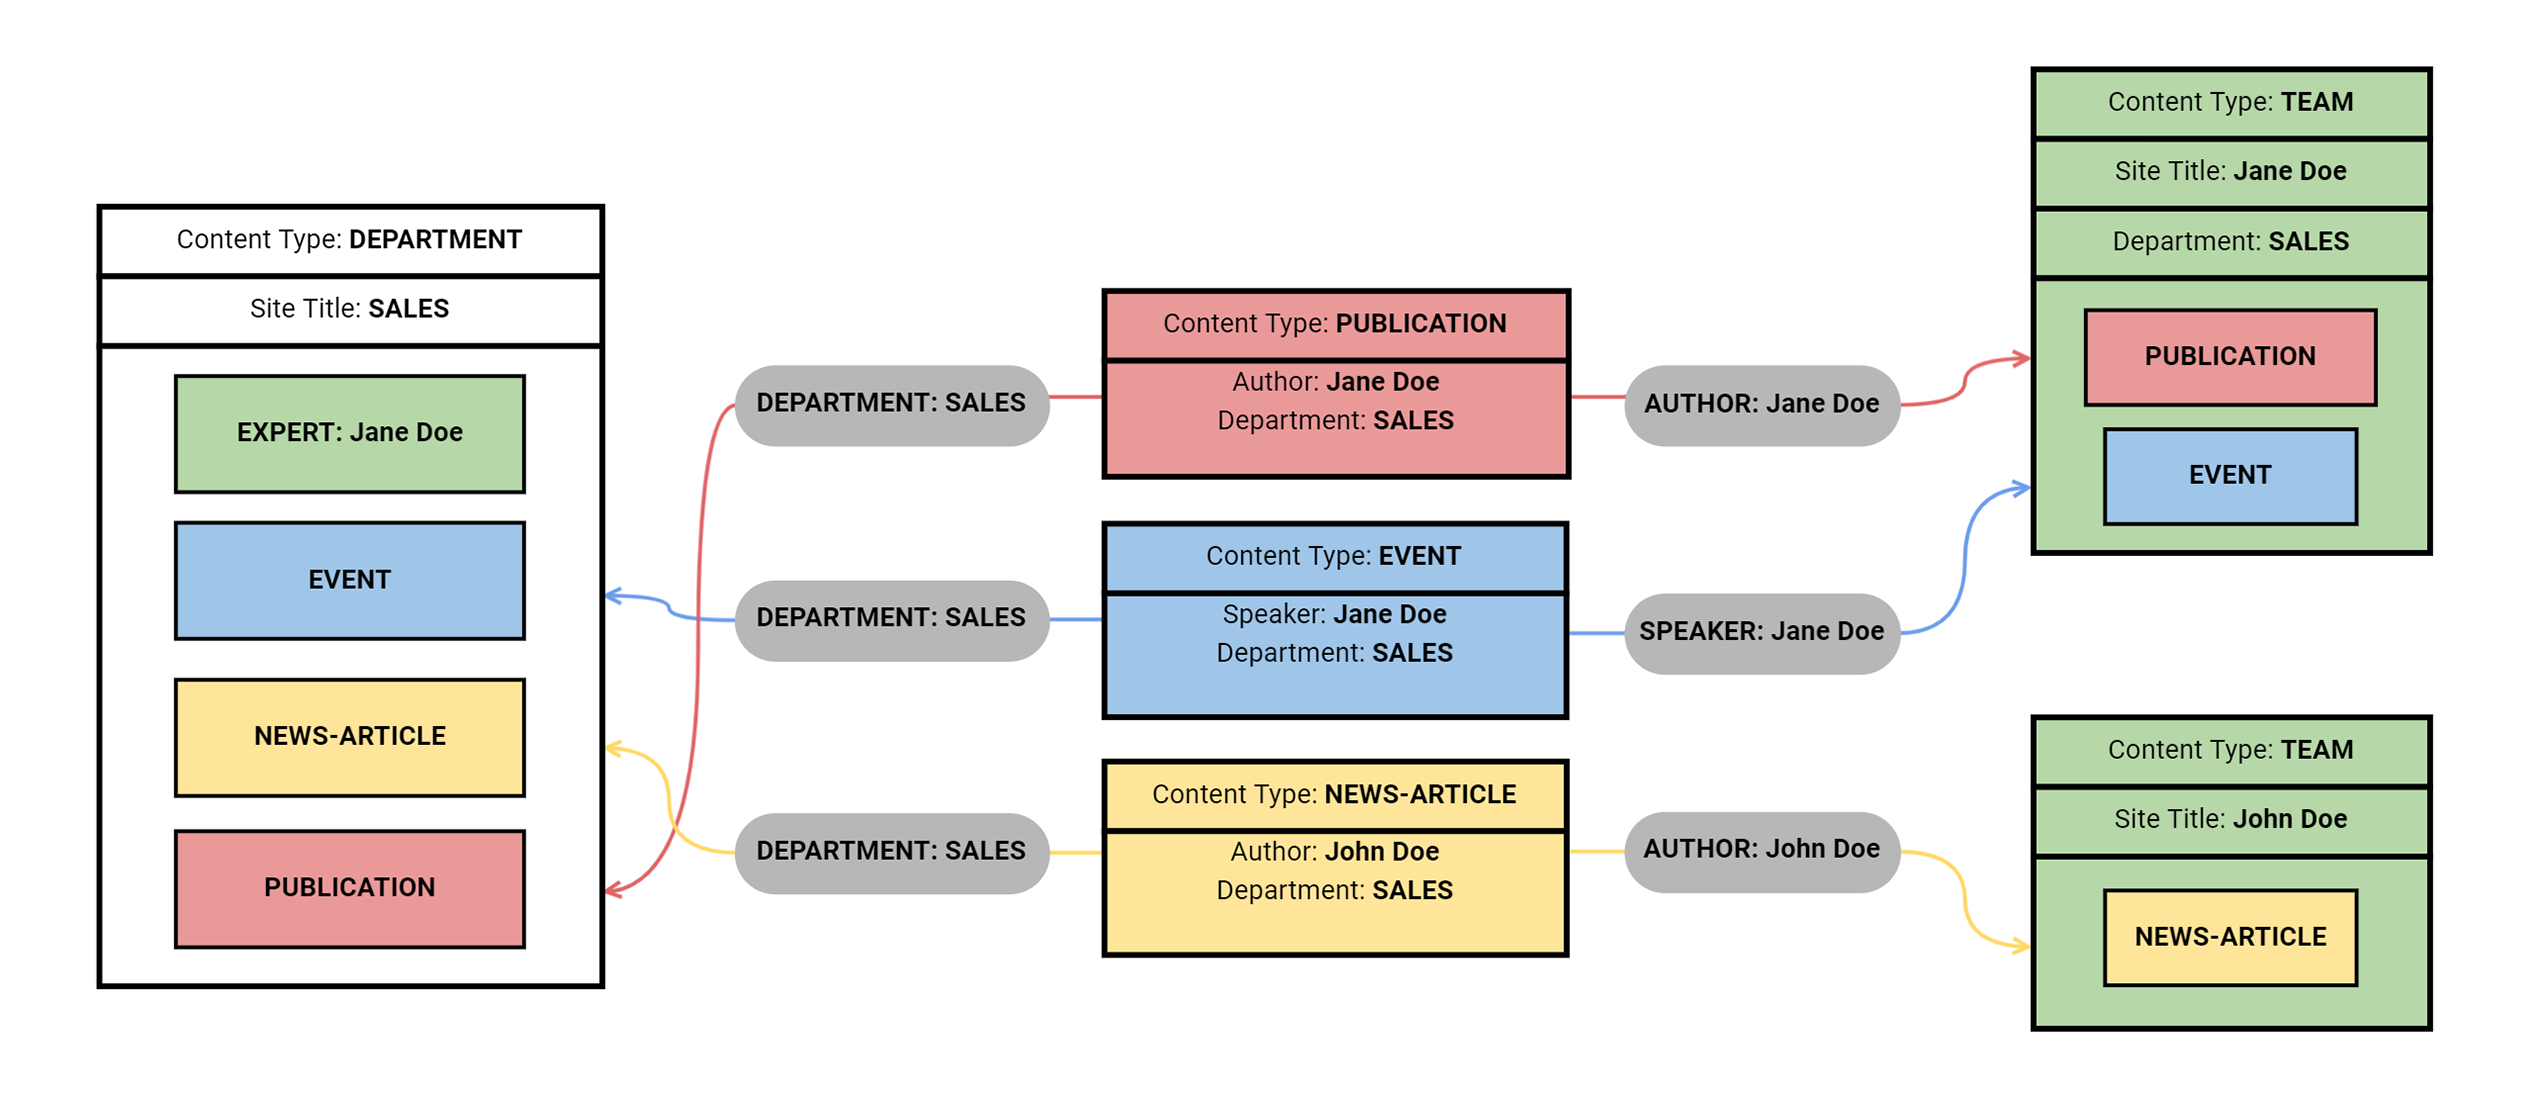
A department can be selected in the content types Event, News-Article, Publication and Team. The content will appear on the department and team pages without any further action.
Explanation of each field
View
Choose the content type you'd like to display on the page.Display
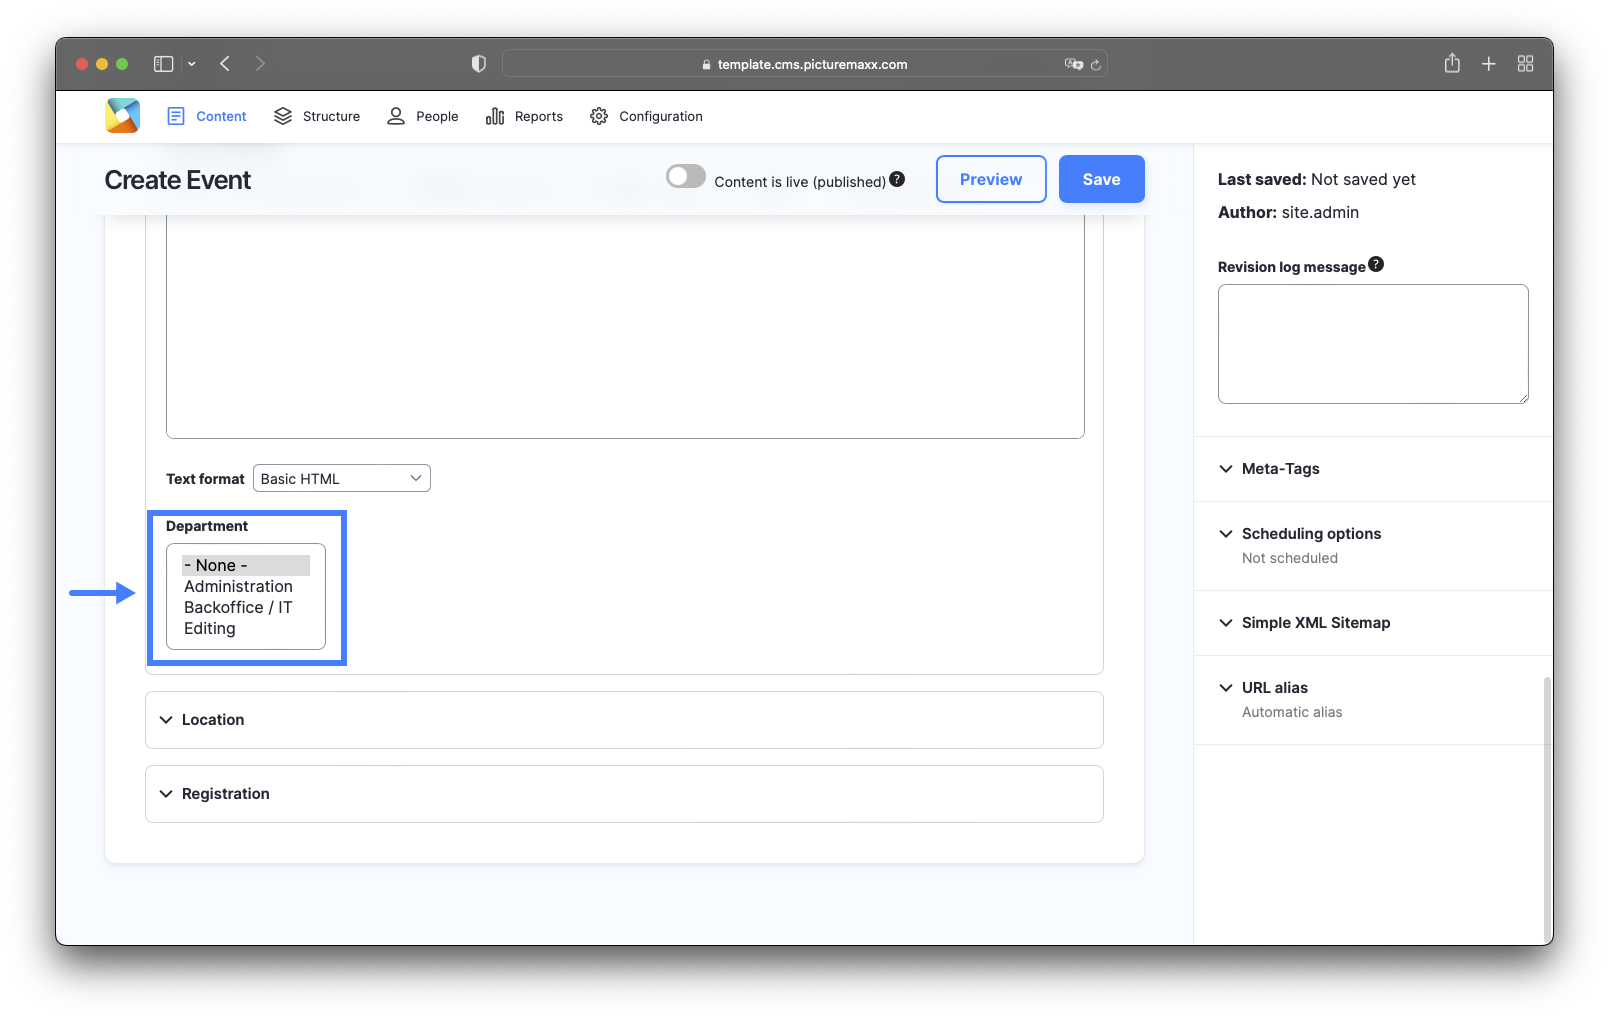
For each content type there are different layout options.Department
Optionally choose a department, from which content should be displayed.Team-Member
Optionally choose one or more Team-Members from which content should be displayed.Tags
In addition to the previous filters you can also use tags to sort even more precisely, what should be displayed. You can also leave the previous filters empty and only use tags.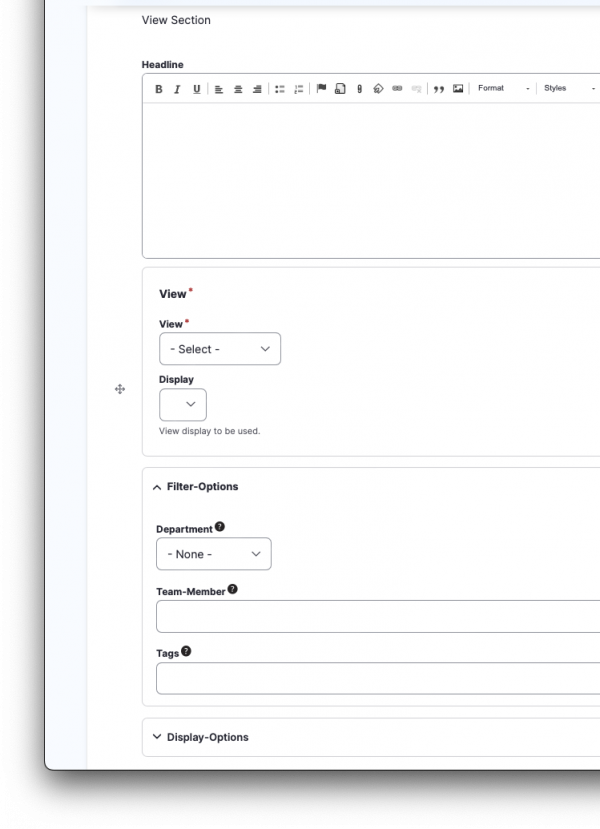
When creating a new publication, news-article or event you can use an individual tag (i.e. tag: "Company News"). With this tag you can show these site types anywhere on your website (i.e. via a view section).

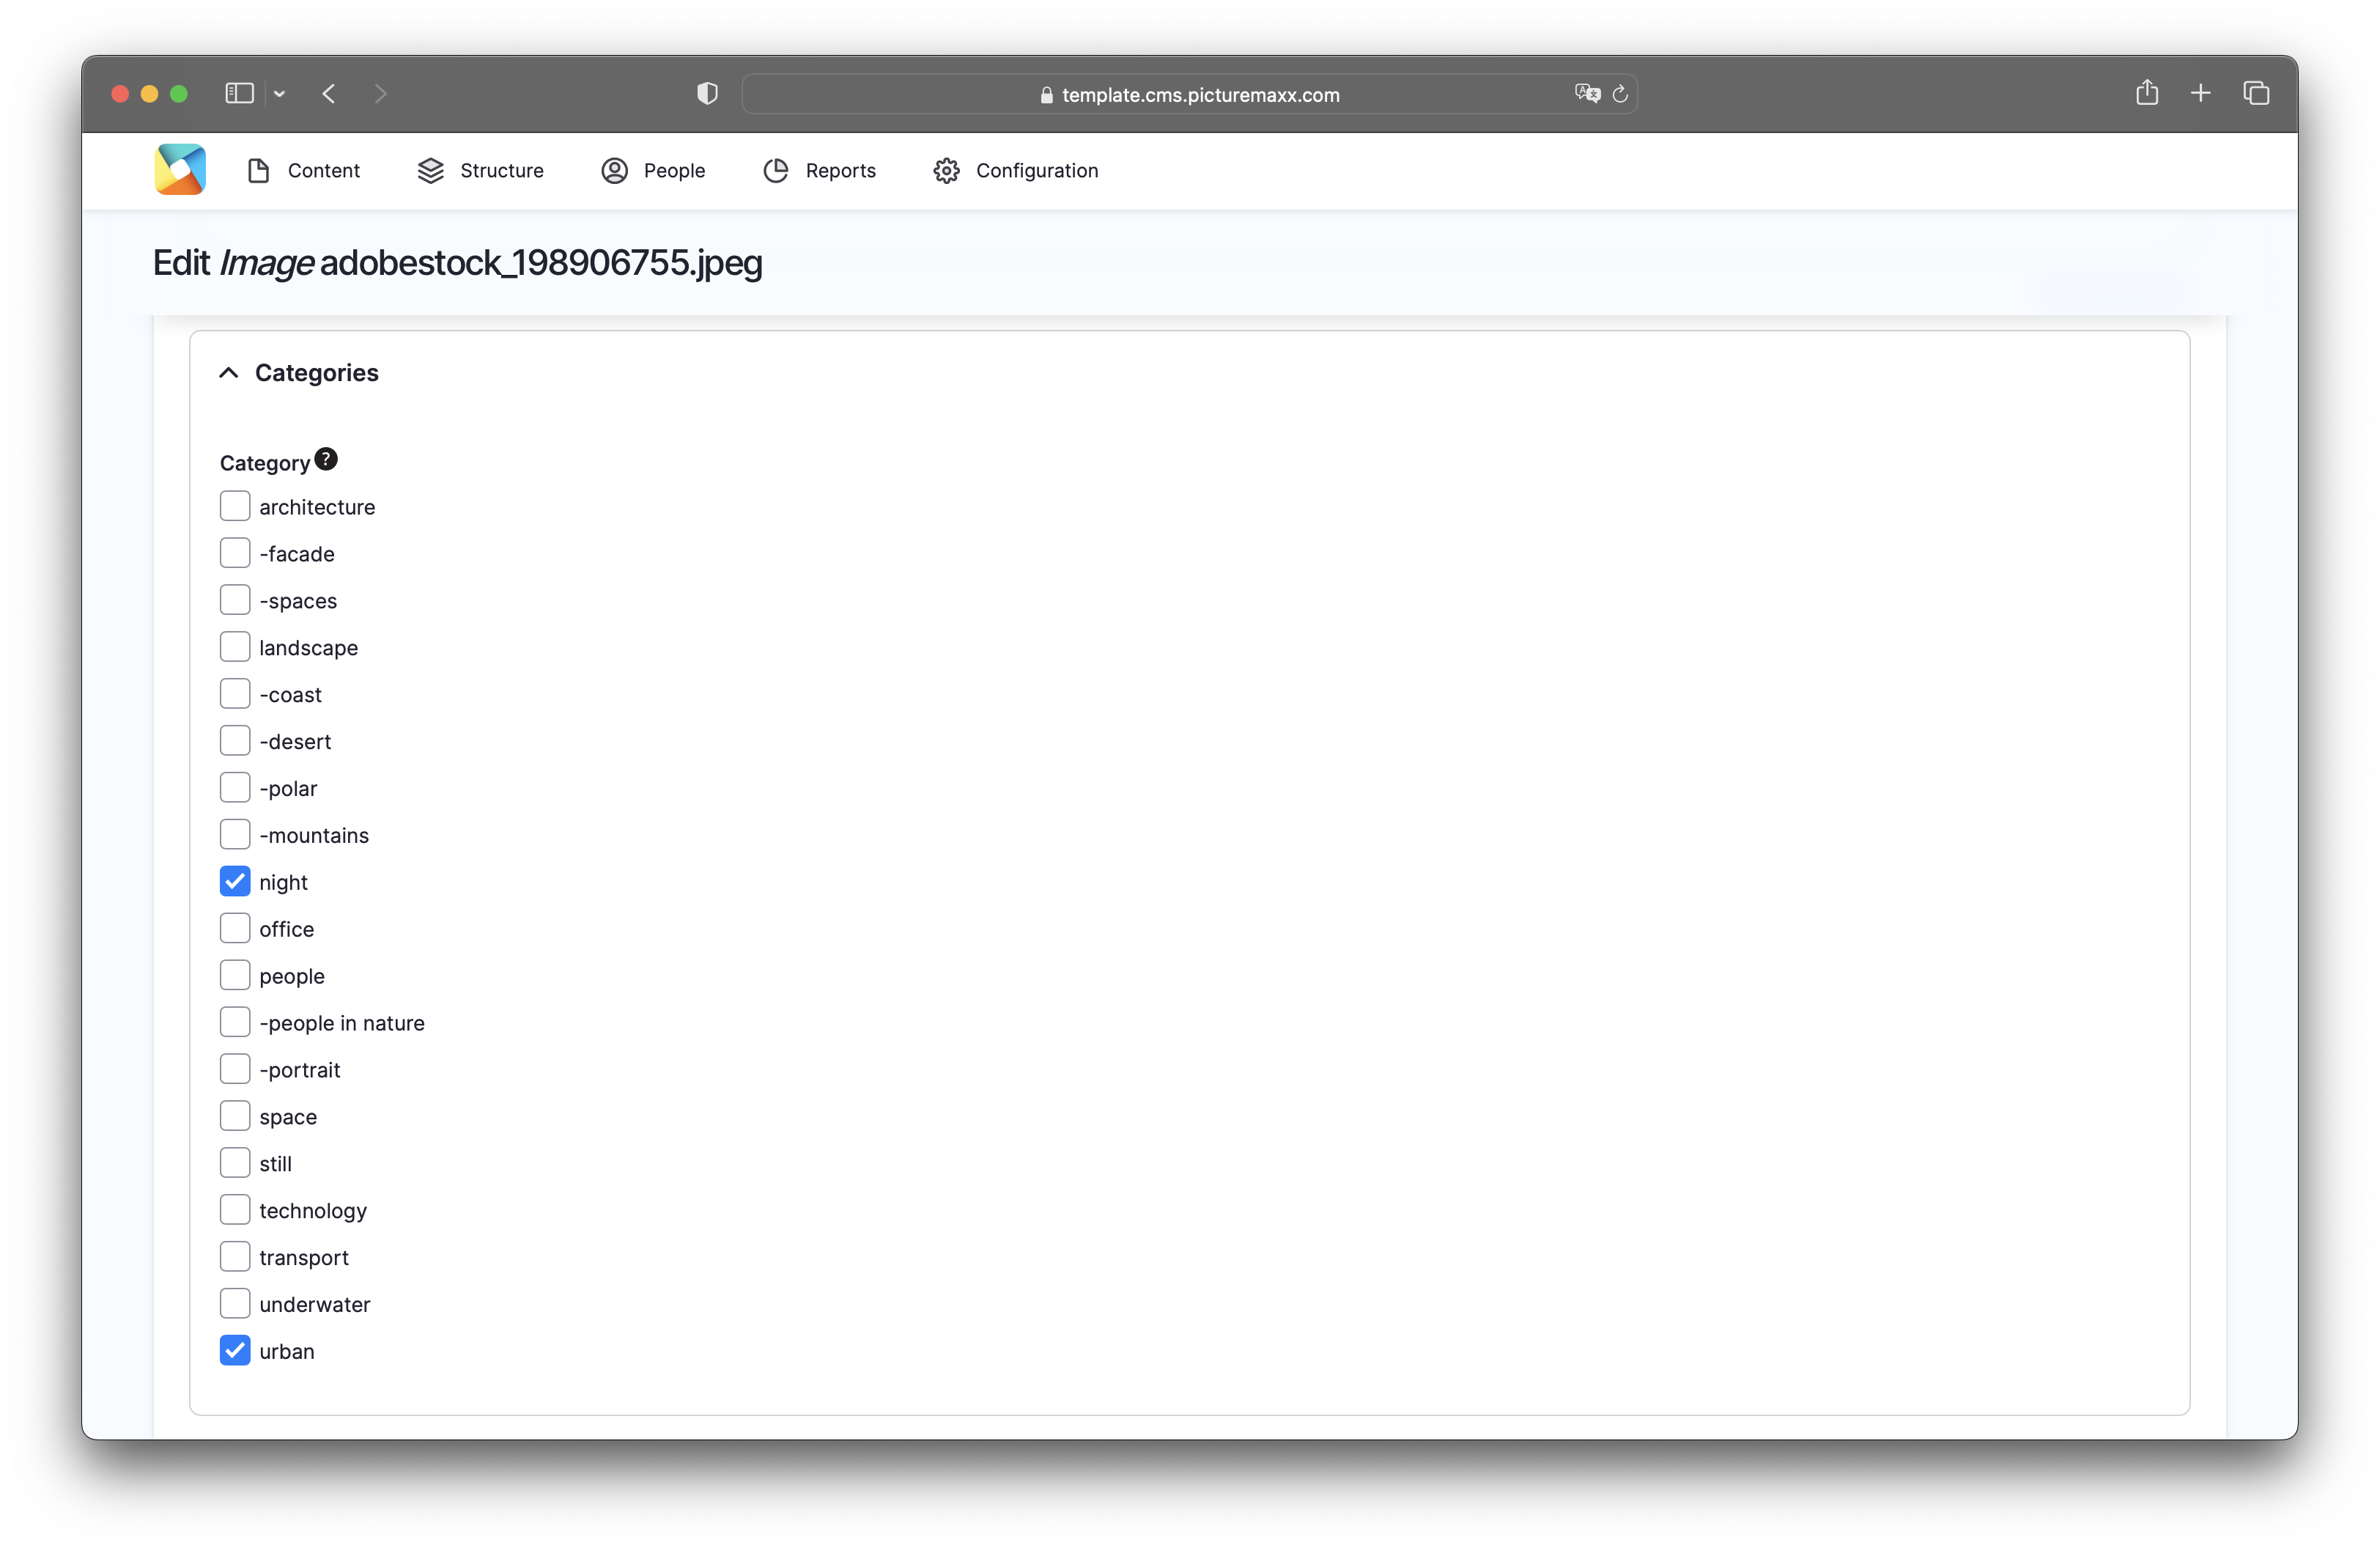
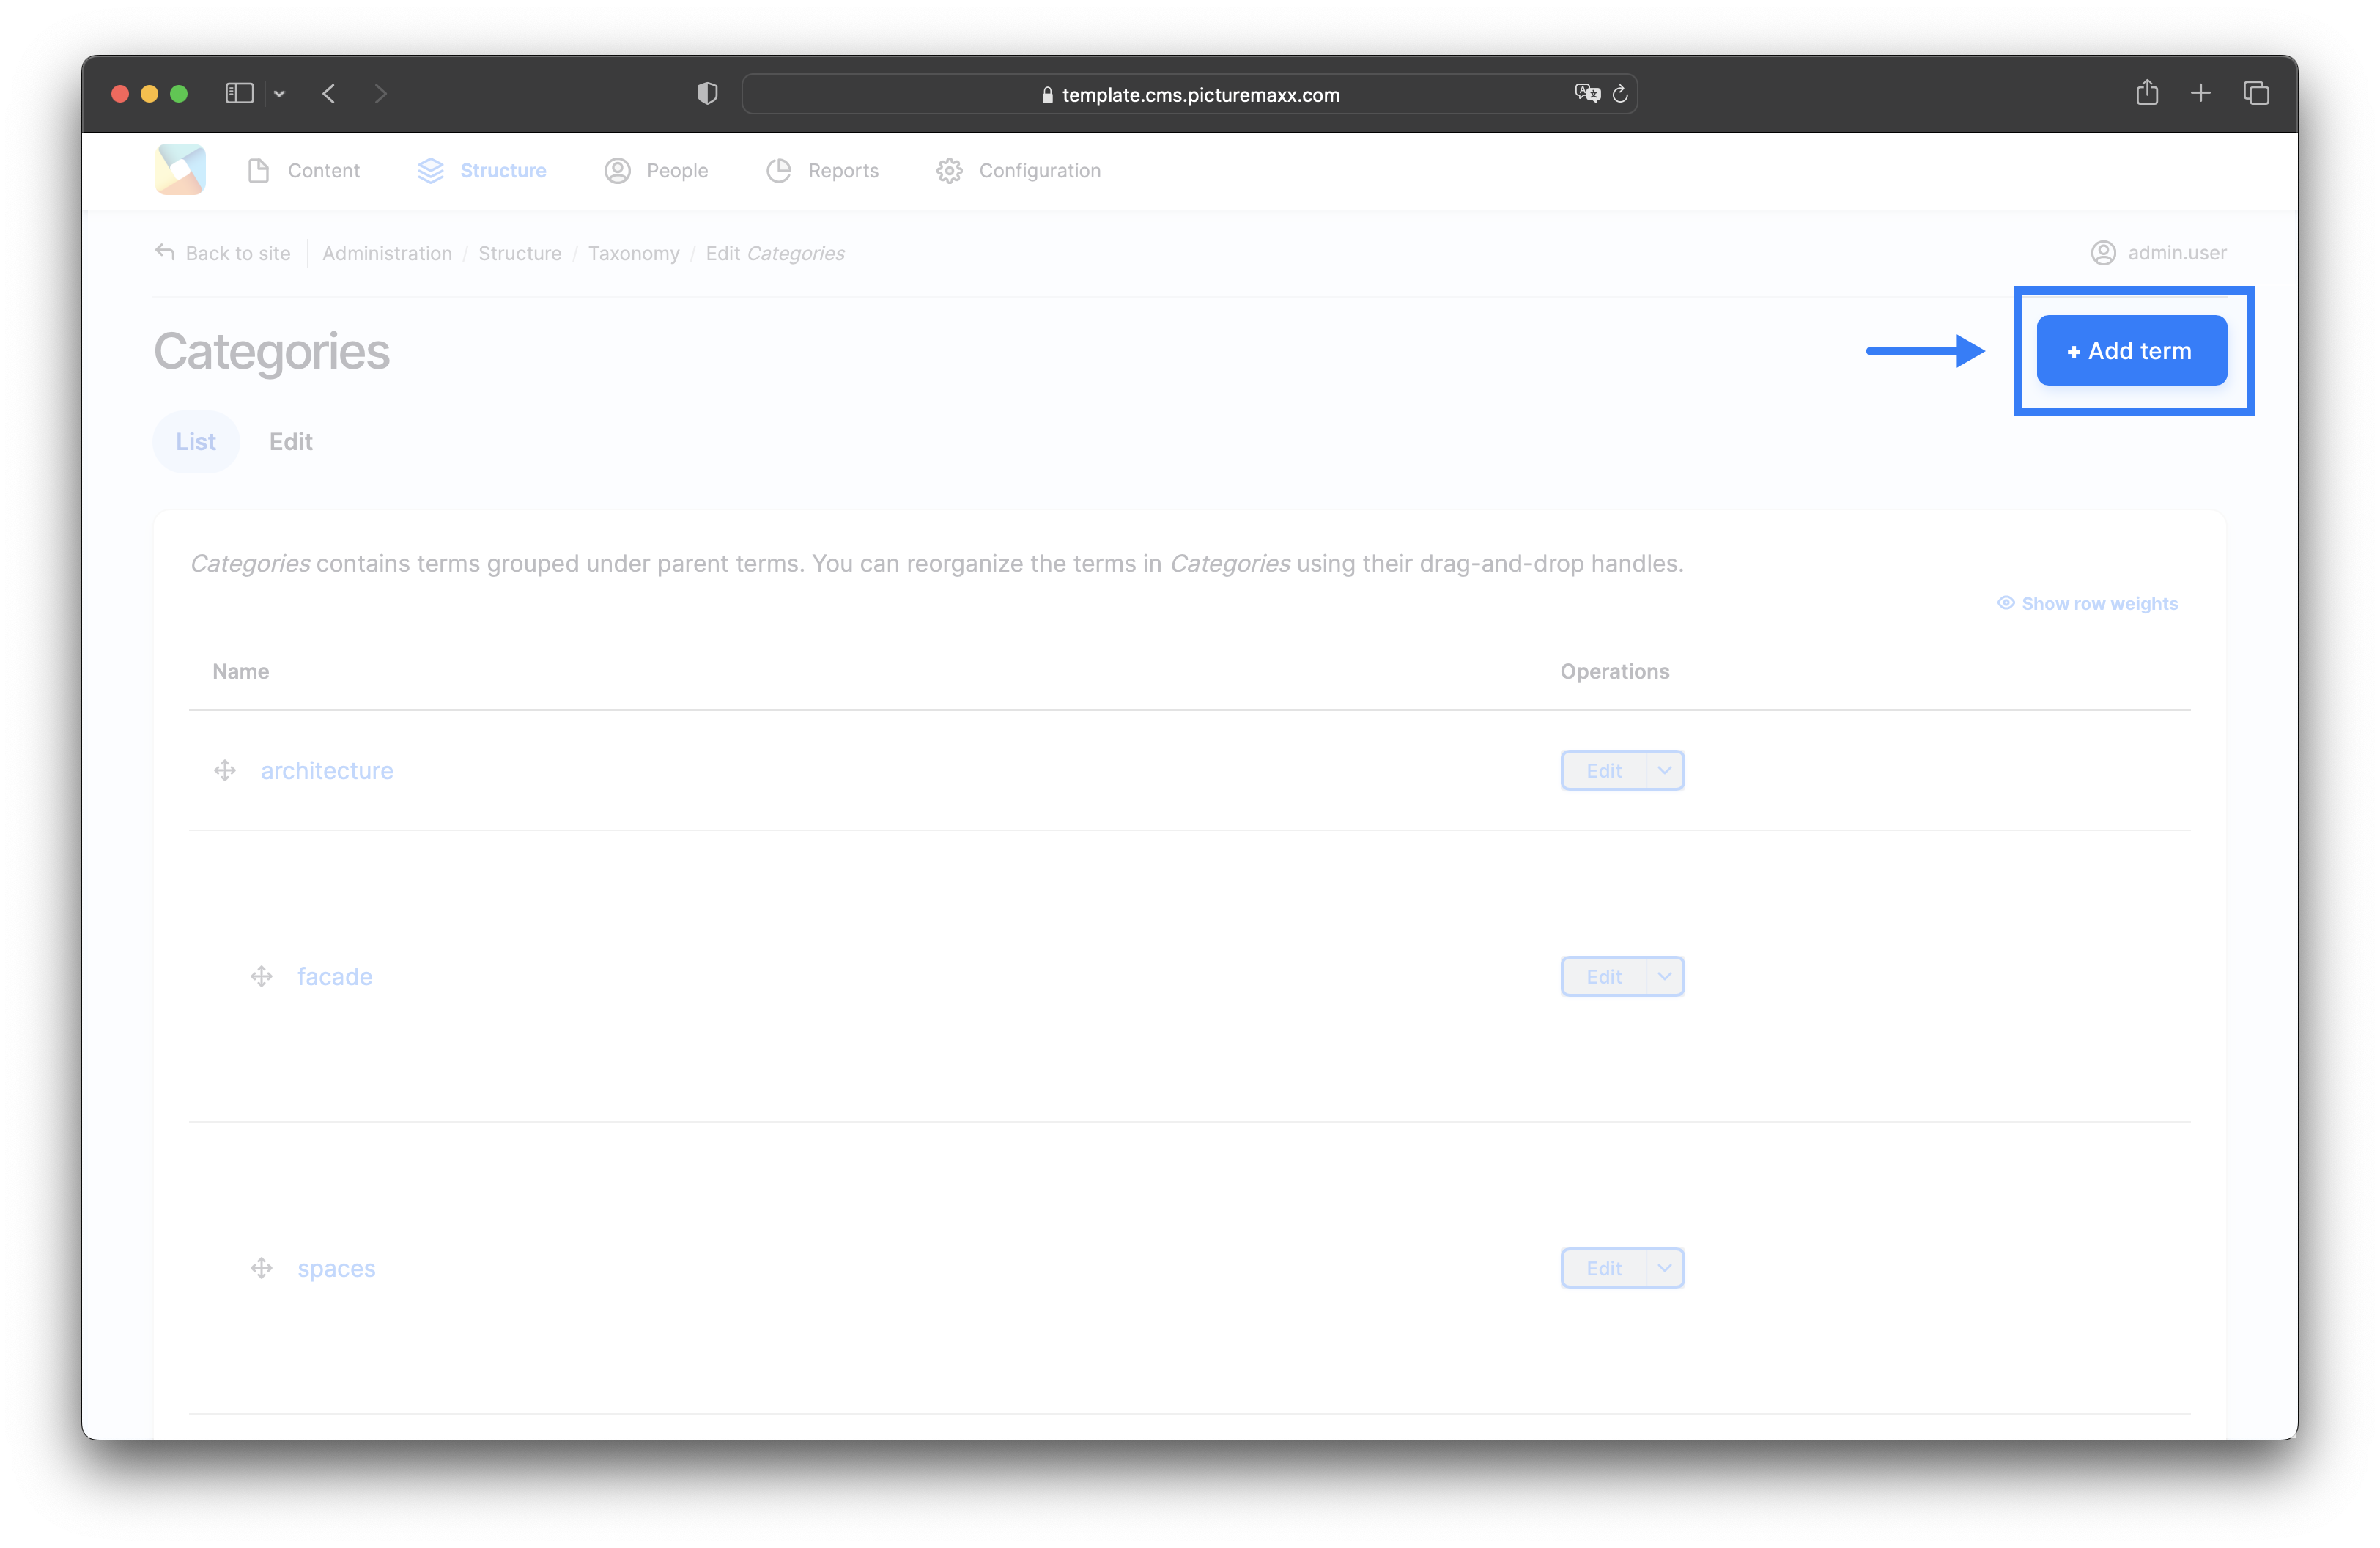
5. Categories
To present your content more clearly, you can, for example, assign images to certain categories. But before that, these categories must be created by you. To do so go to: Structure → Taxonomy → Categories and click on +Add Term.
Related content: Categories become very useful when working with Collections. Here they can be used as filters to display only certain images.
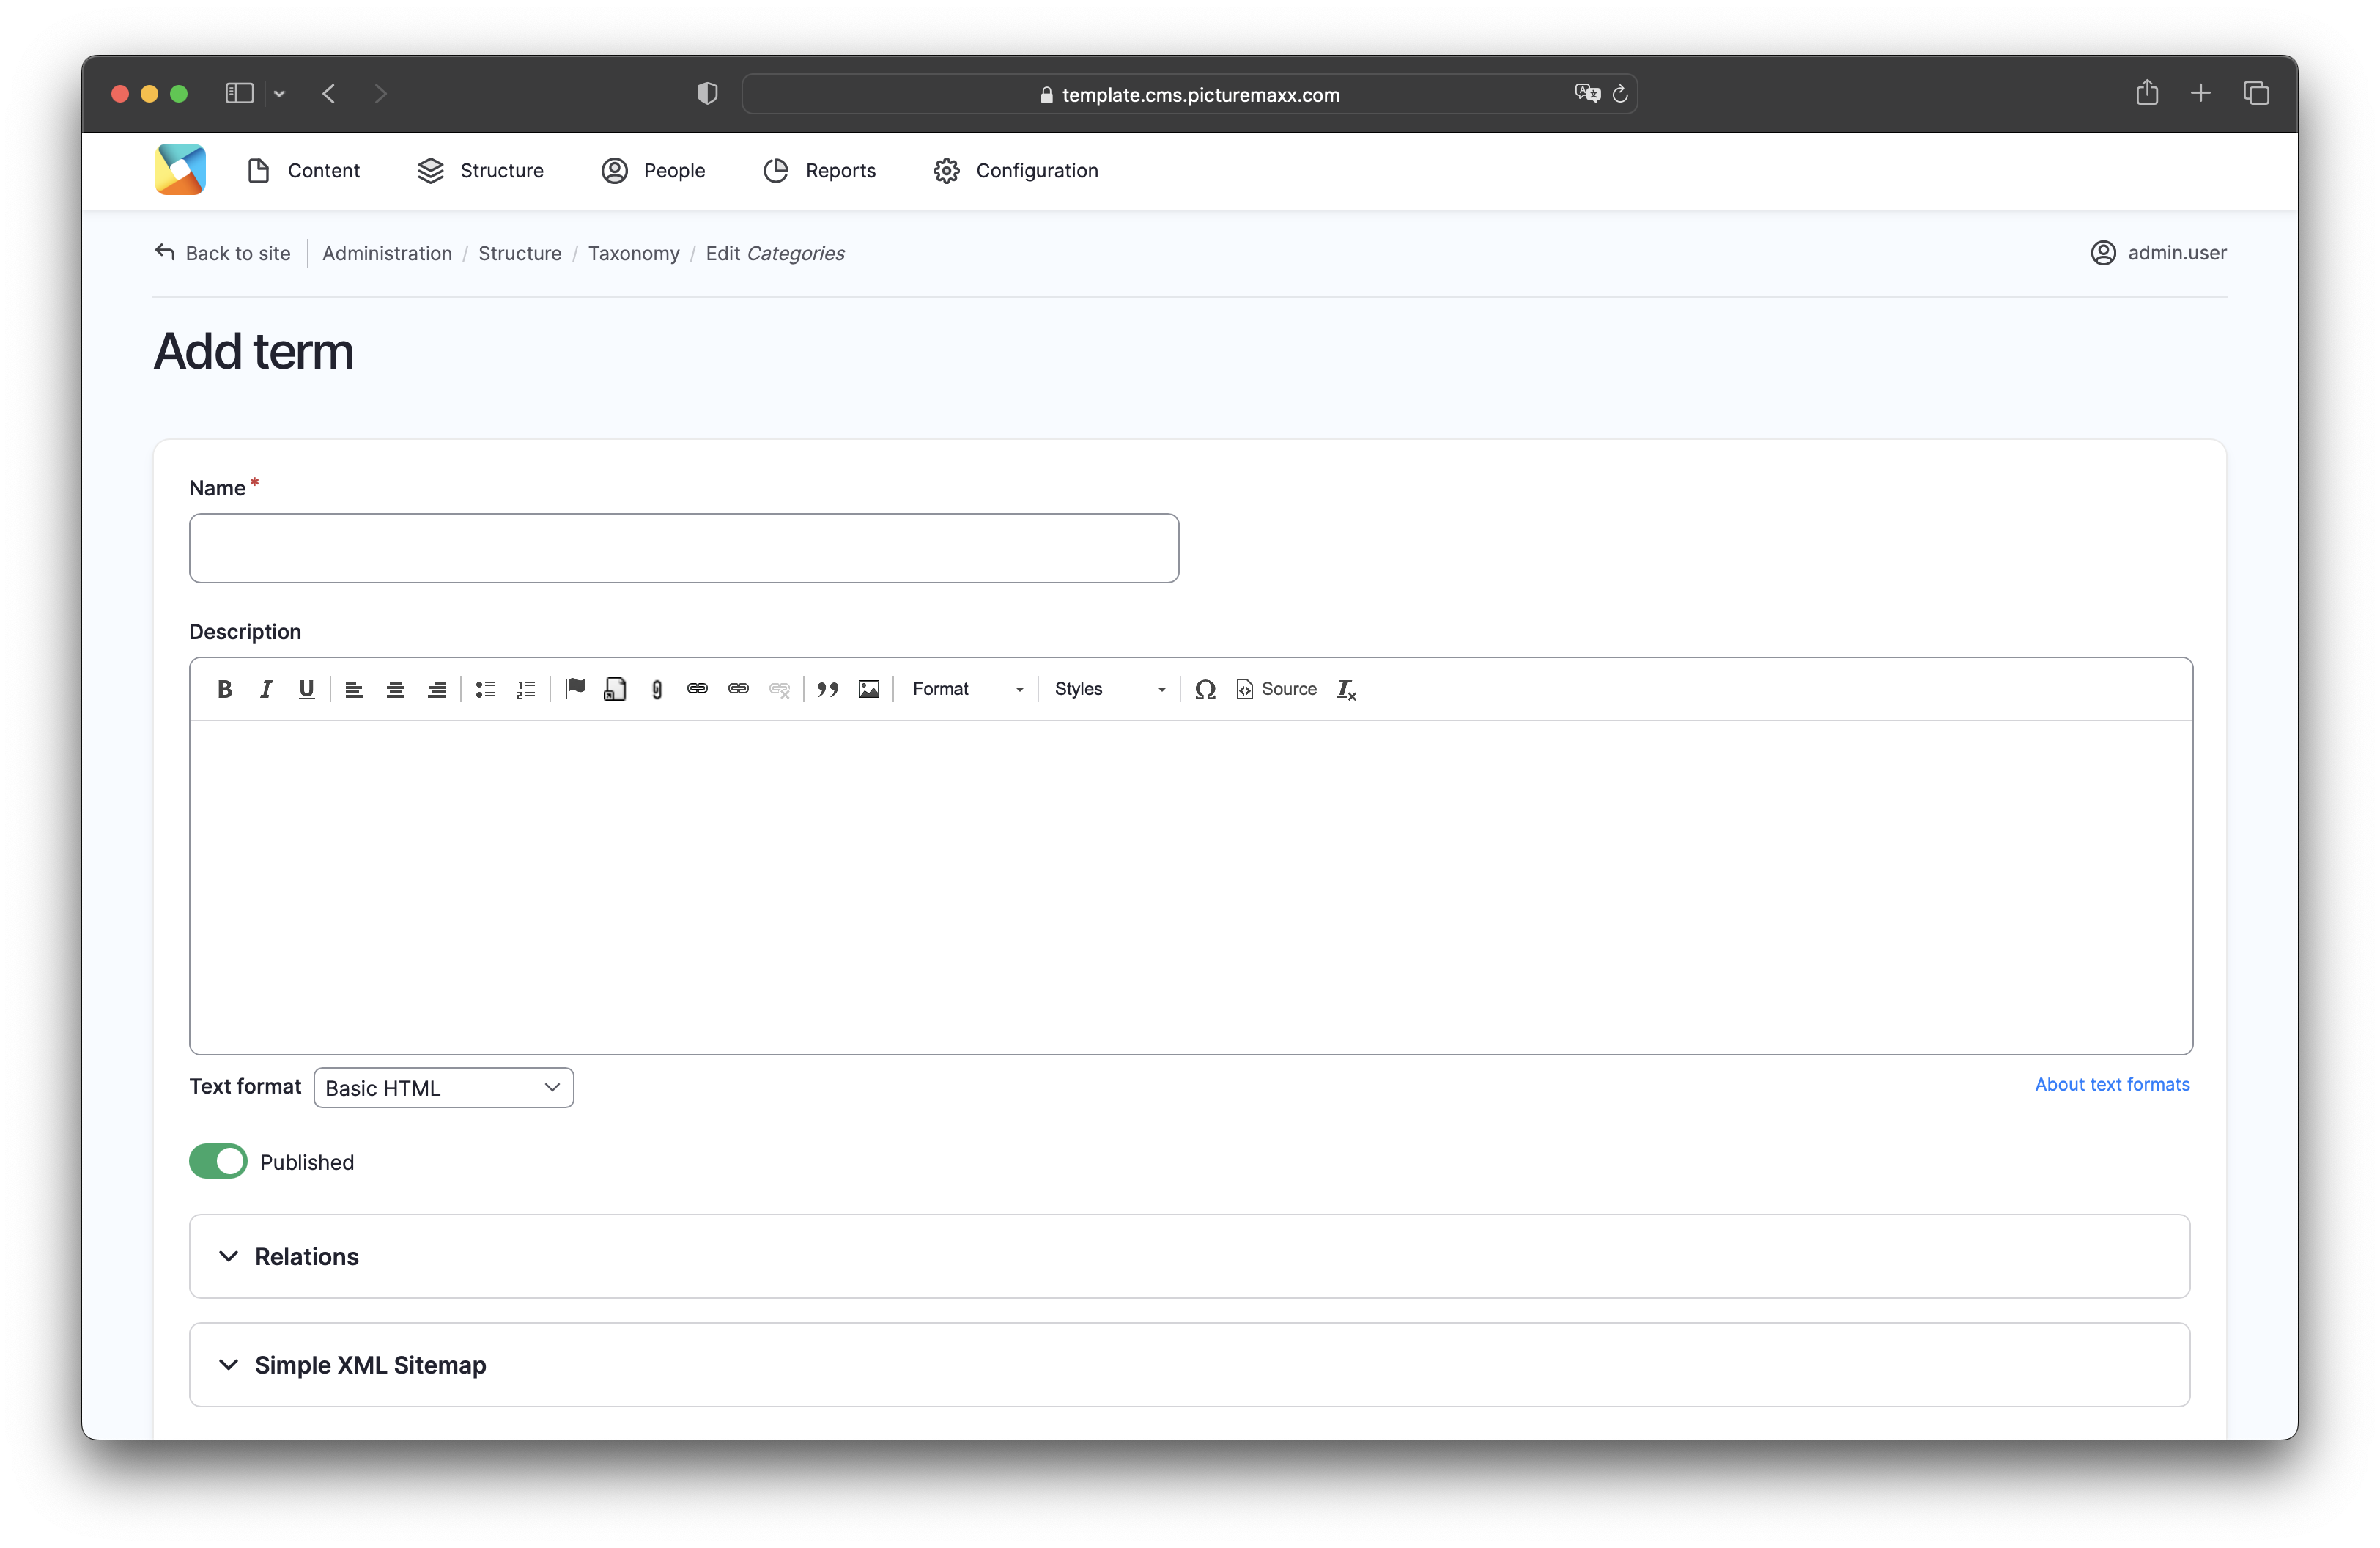
Assign a title for the intended category and click save.
If you'd like to assign an image to a category, go to Content → Media. Click Edit on the image you want to assign. Scroll down to Categories and open it. All the categories and subcategories you have created will appear here. The image can be assigned to one or more categories.